Guitar Amplifiers If you are in the market for a guitar amp for your church's backline, here are some great suggestions as to what you could purchase (click on each amp for a mini-review): 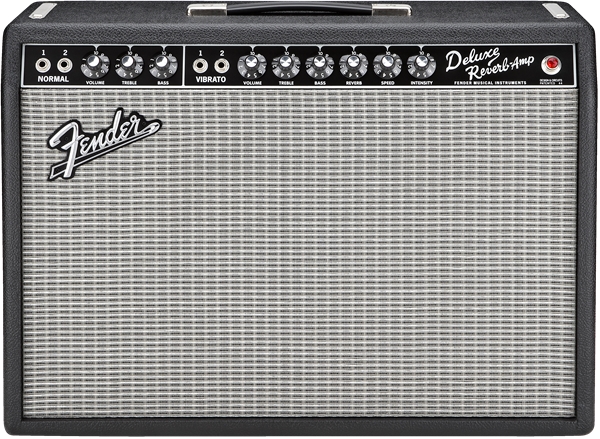 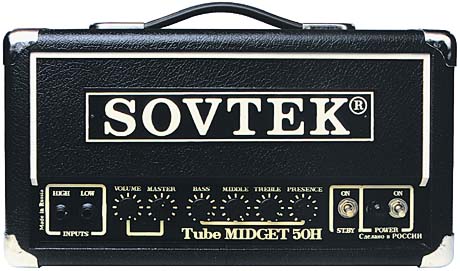 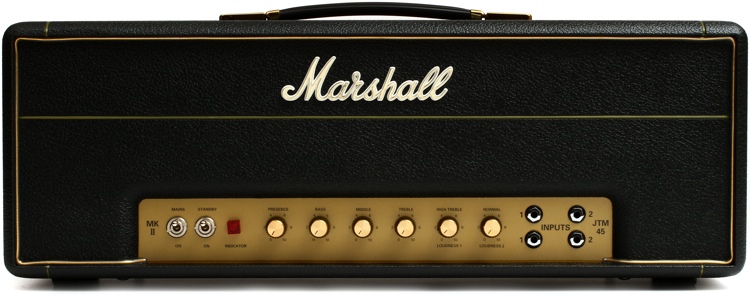 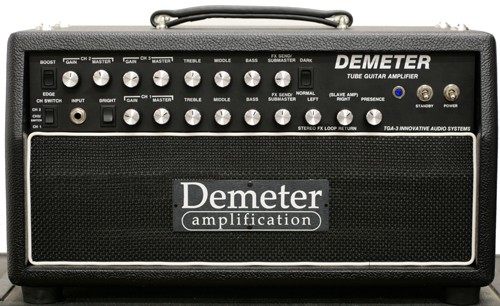 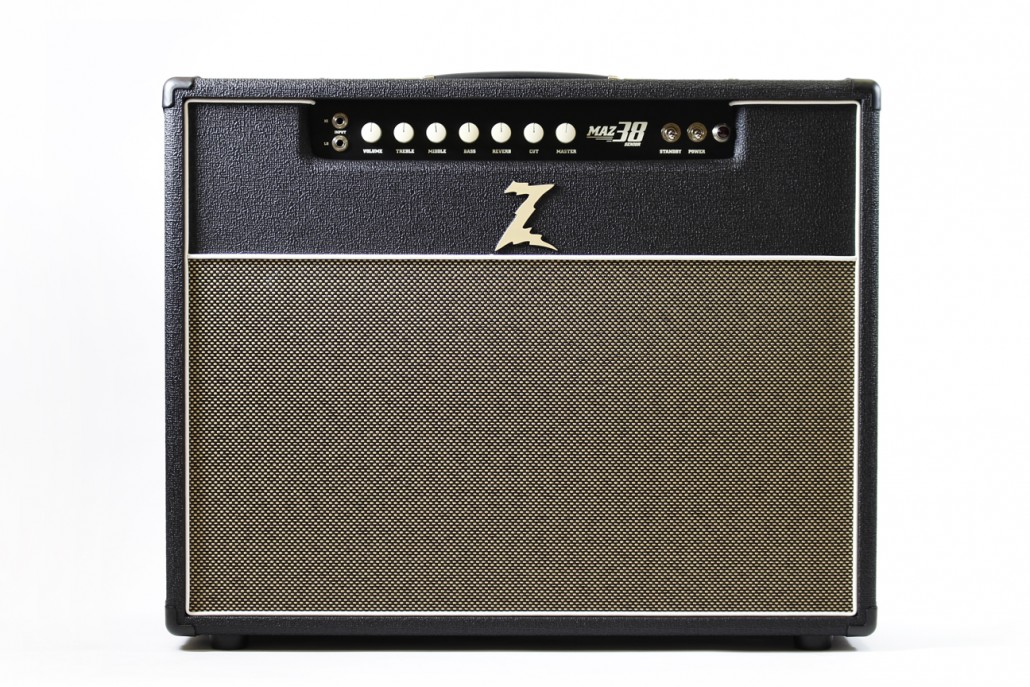     A Note About the Above Selections - The guitar amp market has a ton of options out there. Yes I know about Divided by 13, 3 Monkeys Amps, Victoria, Suhr, Peavey, Morgan, Mesa Boogie, etc etc etc - With the exception of the Demeter, I based my selections on mid-priced to affordable amps that can deliver beautiful tones, affordable (some more than others), reliable, and respected (not to say that there aren't others out there that are not). Below we have a comment section; feel free to add YOUR favorite amp selection. Keep in mind that most congregations are around the 150-250 member range and may not be able to afford a $4000 amp - list it anyway if you'd like though. By The Way - If the Gerlitz Revelator was still available and not so hard to find, it definitely would have made it on this list! How cool is it to have a Fender and Marshall circuit (totally separate from one another) in one head, and a blend footpad control to mix between the two! Much Love Everyone -
0 Comments
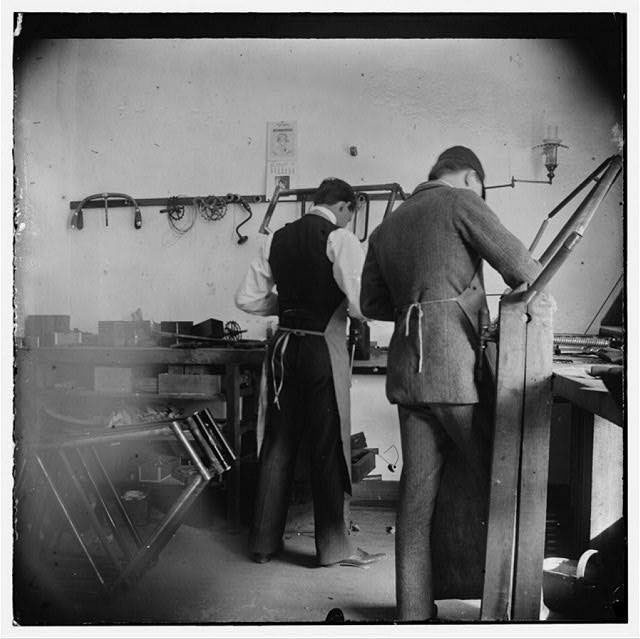 A picture of the Wright brothers in their bicycle shop  They were told that if man was meant to fly, he'd be born with wings. Evidently they wanted to push beyond the criticism and innovate - trading their bike tires for wings! HERE COMES THE NAYSAYERS - "BLAH, BLAH, LATENCY, BLAH" So what about latency? Let's talk about this. In a nutshell, latency is the delay you get when you play an instrument, it hits the A/D converter, then goes into the DAW and is processed, and then goes back out of the interface via the D/A converter. Kind of like if you've ever been on a phone call, and for whatever reason, you hear your voice come back loud and clear a second later. Talk about throw you off! "Let me call you back." This used to be an issue just a few short years ago, but technology has progressed to the point where latency doesn't have to be an issue anymore in recording or live mixing. Earlier today I was speaking with a representative from MOTU. We were both speaking about interfaces and such, and the topic of live mixing with a DAW came up. He said "we believe this will be the future of live mixing, and our MOTU AVB interfaces reflect this philosophy." I of course, couldn't agree more. 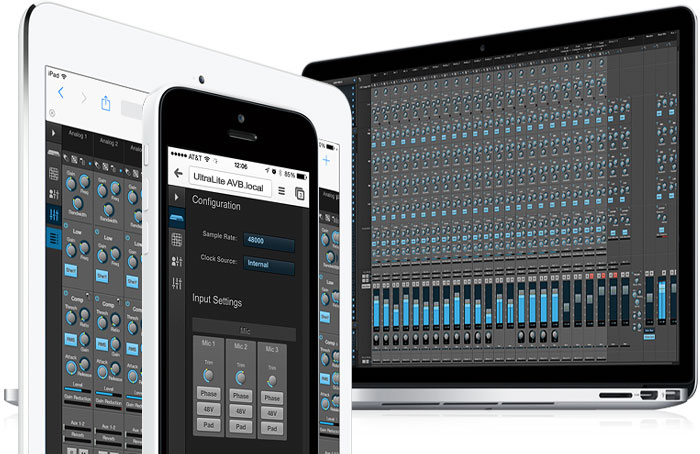 This is a picture of the MOTU AVB on-board interface patching and mixing app controllable via a Mac or Windows browser. This is connected with an RJ-45 terminated CAT5/CAT6 cable.  Well lookie here, here's their AVB series "Stage-B16" unit that directly interfaces with most major DAWS. Hmmm. I wonder why they used the word "Stage" for this interface? 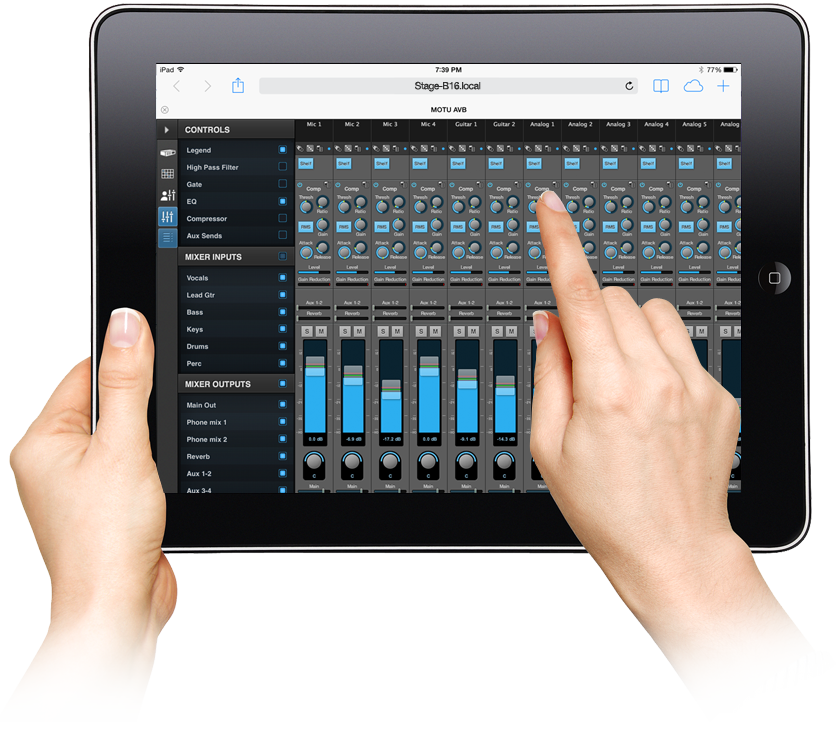 Hmmm. That looks familiar. You mean you can control all of your inputs and outputs via a Mac or Windows OS browser on the interface? Well that's pretty neat. 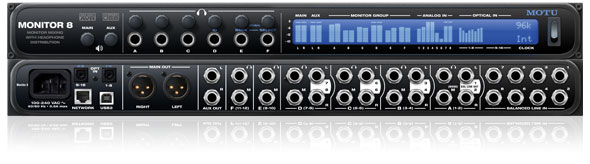 And here's their Monitor 8 unit from the same series. Yes, you can run headphones as well as live PA (designed for this). 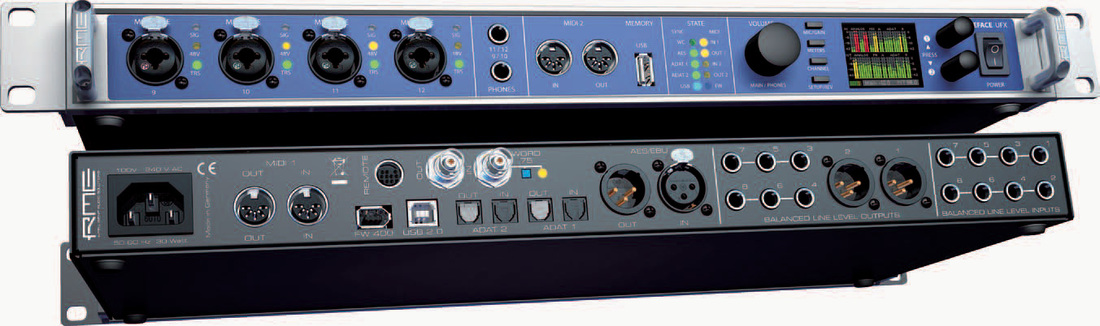 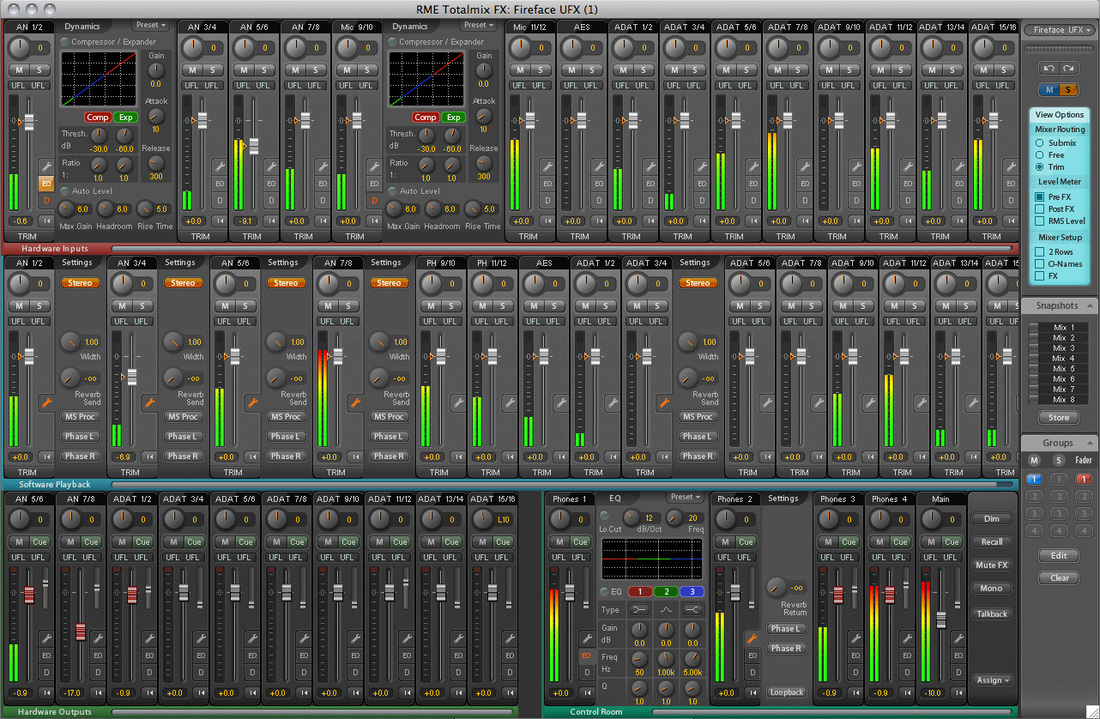 RME has gotten in the game as well with their recording interfaces featuring an on-board mixing suite as well as a full routing feature set. Monitor console anyone? 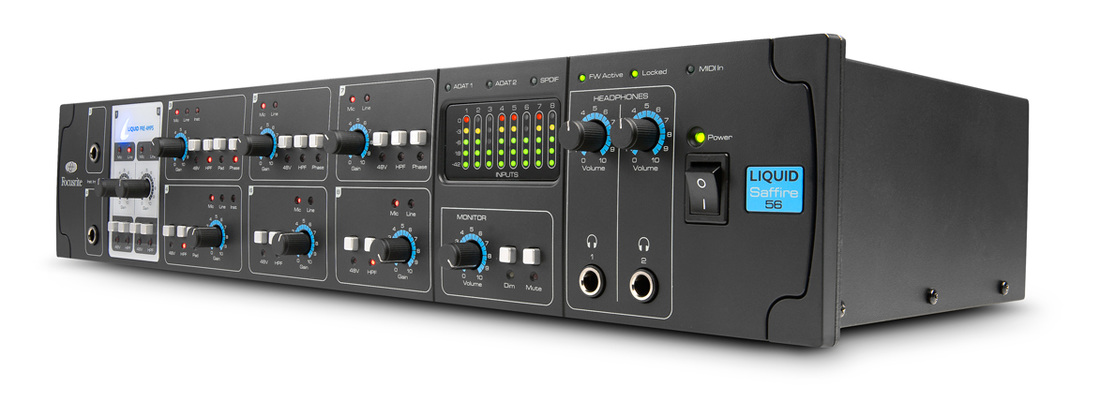  Focusrite has some really rock-solid affordable interfaces called the Saffire series. They too have their own mixing suite built into their recording interfaces. Look at the top tabs. You can create custom monitor/headphone mixes for each person recording/performing. So how does this all relate to latency and building your own modular live digital mixing console? With on-board DSP, any of these interfaces have what is called in the industry, "zero latency monitoring." This is because as soon as the signals from the assorted instruments come into the interface, they are routed right back out of the interface without being processed by the computer. Routing, levels, and even effects can be applied all within the interface using no RAM from the actual host computer. Focusrite interfaces can do this in 1ms or less (which is imperceptible to the human ear). The MOTU AVB series reportedly does it in about .66ms. That's extremely fast. No more will you have latency issues in monitoring anymore. Once this feature came out in affordable interfaces, it has opened up the door for DIY modular live digital mixing consoles. What's even cooler, is that if your church or facility already has in-ear monitoring, you are actually one step closer to having a killer modular live digital mixing console that is equally powerful (if not MORE so), then most live digital mixing consoles out there for a fraction of the price. Stay tuned for Part 3 as we discuss potential latency issues mixing FOH, using your favorite plugins, building the right computer, etc. 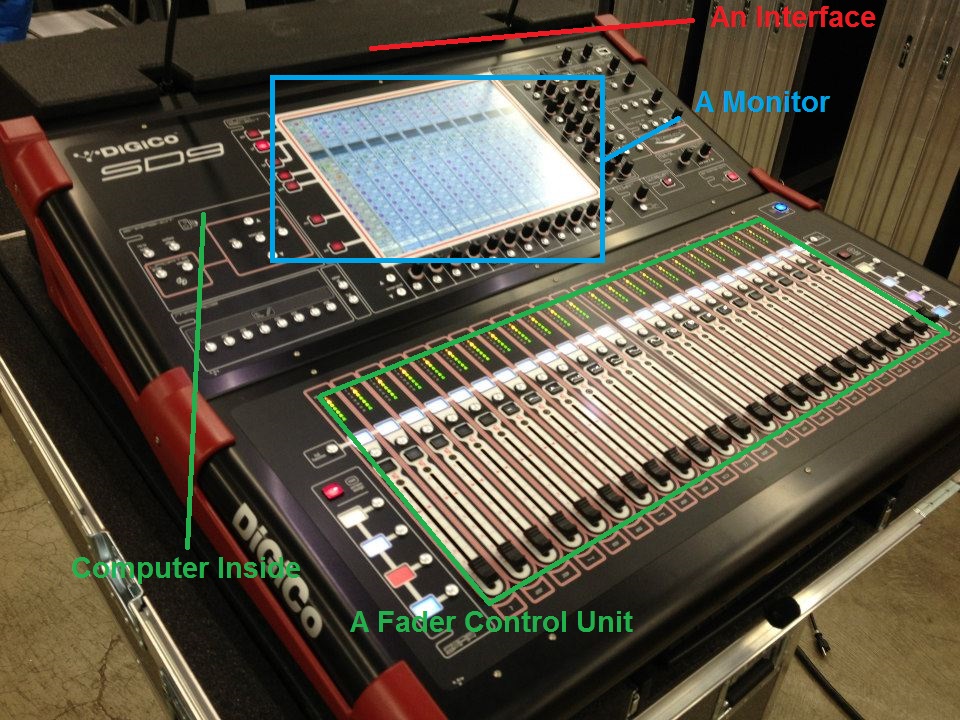 Here we have a lovely SD9. Great console. The general parts of it sound familiar huh? Yes I'm Crazy - But It's Ingenious None the Less 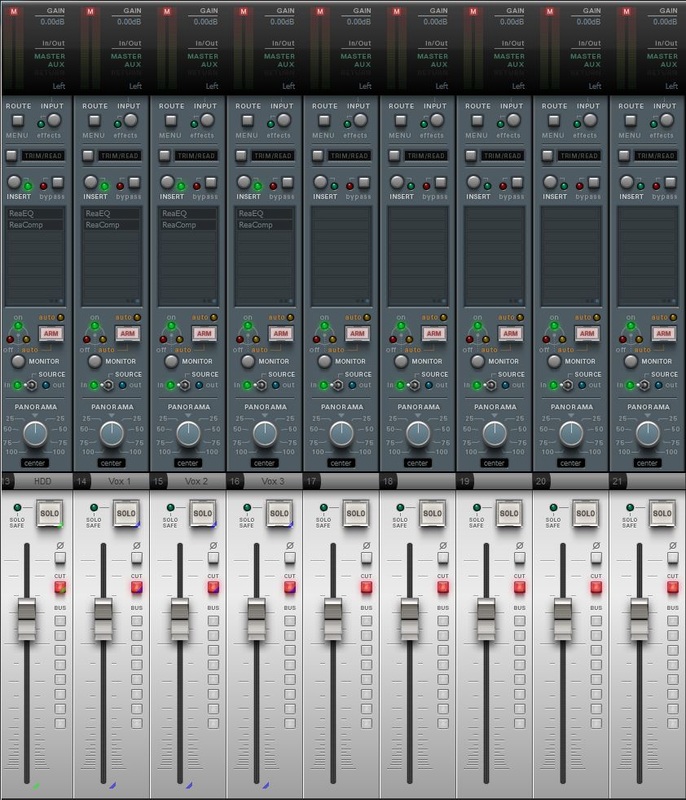 Reaper - White Tie Imperial You may be saying, "Is this even possible?" Nothing New: For a while now, I have been studying this topic extensively. I have found numerous instances of engineers all over the world building their own consoles for the last several years, but it just hasn't caught on yet. The big reason (I believe) is because there isn't a detailed process on how to make this happen on the internet as of yet. A few days ago, I had the youth pastor from my church contact me about some possible digital mixing consoles for his youth room. He had another brand (cheaper - won't name names) that is proving to be too unreliable and "buggy" for what he needs. He's in a pickle because his needs are above what the budget would allow. There are so many churches in the same predicament, and so I have decided to chronicle our process in building a digital console with the rest of the world: In the next couple of months, we are going to be embarking on a journey of building our very own digital console at a fraction of the price of something that is as equally powerful. Follow along with us as we discuss everything you will need in materials, and how to tweak your new console for solid performance. After we successfully build this console, we will be turning to our main sanctuary for an even more quality system. Once you see what and how we pull this off, you may find that this option would be the most eloquent and powerful digital mixing console you can buy for the amount of money spent. Fully Expandable, Fully Customizable, Powerful, Easily & Cheaply Repairable, Reliable. I believe this will be the future of live digital mixing consoles - it just has to catch on; which it eventually will! Materials Needed NOTE: Don't spend money on gear that you either don't need, or won't prove to be effective. There are some particulars you will need to know along the way that will be critical in understanding how all of this works, and if you go out and purchase the wrong gear, it will be money wasted. There are literally hundreds of details and particulars all interconnected in this project. It's not a hard process, but it's a detailed process. In the next couple of weeks - we will be purchasing the gear we need to make this happen - I will not be giving any hard details as of yet (that's going to be in parts 2 and 3): A Computer - Every digital mixing console has a computer in it, and this one will be no different. Generous amount of RAM in a machine with a fast CPU. The program drive will be Solid State, and the data drives will be separate and redundant. Once everything is tweaked and working perfectly with our DAW and OS, we will image the original drive and have a second tested drive ready to go in a safe and dry box just in case we should have something go south. Redundancy is the key here. Then having your drives in hot-swappable bays is ideal. If you have a drive fail, or there's some type of corruption, you can have your machine back up and going within seconds. Dual Monitors - You need to be able to see everything you are doing, and yet again, every major digital mixing console has screens on them as well. Regular 24" monitors for the youth room will work fine, while I will be pushing for us to get touch sensitive monitors in the main sanctuary; yes they are more expensive, but this will provide built-in redundancy in case a fader control unit goes south in the middle of a service/set. D.A.W. - Yes that's right, a Digital Audio Workstation typically used for recording. Right now we are in talks about which D.A.W. is the most stable and user friendly for our use. I have used all of them before with the exception of a couple of the newer and/or esoteric ones out there (which for our uses would be a no-go anyway). The D.A.W. we choose will have a proven track record of reliability, solid performance, tons of support and support material from end users, inexpensive, connect to most fader control units, low latency, the ability to set up monitor routing solidly, and a very user friendly GUI and workflow. I am leaning towards Reaper on this one for all of the above reasons, but we may settle on something else after a ton of testing. I also love the ease of tweaking it for live use. The ability to disable the Solo button in the GUI (not a good option during a live set) with ease, and its routing simplicity is a huge plus as well. By the way: Yes I have heard of SAC. I have a suspicion that he just tweaked his code regarding routing with his previous product called SAW - which is another digital audio workstation. I hear it's a solid performer reliability wise, but we have no interest in it for various reasons. It may be a fit for your congregation, but it's not what we are looking for currently. Props to him though for being one of the first DAW coders to push for live use. IF OTHERS WOULD DO THE SAME, IT WOULD BE TRANSFORMATIVE IN OUR INDUSTRY. Interfaces - You are going to need something for A/D to D/A conversions for use in the real world. I am currently looking at the following options: Focusrite, MOTU, Apogee, or RME. For the youth room, I am leaning towards the Focusrite Saffire series with some added Focusrite OctoPres because of the reliability, ease of use, internal routing capabilities, and sound quality for an affordable price. We are not 100% settled on this yet, but we will get there after some very thorough investigation (i.e. - I own some Focusrite interfaces we are going to be putting to the test). Also - I am most concerned with Latency (as I should be) regarding the youth room project because they are running mostly stage wedges - so it is important that the interface we choose has "zero latency" (technically speaking this isn't possible, but you know what I mean). Our goal is to keep latency below or around 10ms if possible. In this area, it is not perceptible to most listeners. Now interfaces come in 2 flavors (actually more than this, but for our uses will only be discussing two): with microphone preamps built in as an all-in-one unit, and those that are just the raw converters where you have the choice which mic pres you will use. The second option is more expensive, but the quality you can obtain is better. I am at this point thinking of the old K.I.S.S. factor, but this will be discussed in the future as a possible option. Now in regards to the 2nd project: the main auditorium has an Aviom In-Ear monitoring system with a splitter in the input module, and so while latency is still a concern regarding using plugins, and etc, it's not as big of an issue regarding monitoring. We will only have plugins loaded on our consoles that will support very low latency, and will be rigorous in our testing. Plugins - We are going to be choosy here. Obviously this is where this project will shine. The ability to use very high quality plugins without being locked into what an affordable digital console can offer, is a big plus here. Think of the possibilities. Again, latency is obviously a concern, and so we will be testing any plugin we use before it is approved for live use. This is another factor to consider when choosing a DAW because there are some really great & free VST products available that will give our system greater flexibility for little to no money. Voxengo Span comes to mind here; as well as a few others. Again, everything will be fully tested to make sure we have no bugs during a live set. Control Surface(s) - Mixing a live set with a mouse and keyboard is obviously a total no go. Because of this, we will be using a control surface with a proven track record of reliability. We also want to make sure it will work with the OS and DAW we choose. More than likely, we will go with one control surface for our youth room that has the ability to switch banks. In our main sanctuary, I will be pushing to have at least 32 channels of physical faders for ease of use in our services. UPS - This means Uninterruptable Power Supply. This is critical because when your digital mixing console is computer based (as they all are), you don't need a power "blip" to shut everything down while you are waiting for the machine to reboot. Many times, when a machine loses its power in the middle of something, it can corrupt the OS (operating system), and you could also lose all of your settings and mix. This is not an option, and a $40 UPS is more than worth the money to keep the event going with minimal damage in case of a power event. At that point, you are just waiting on the amplifiers and backline to power back on (which can happen in seconds). Remote Mixing - In our youth room, I would like for the performers to have the ability to mix their monitors remotely, and the youth pastor to be able to remotely mix the house as well. This will probably be handled by Teamviewer or some other VNC type product. Support for android and apple products is a plus. That way, every user will have their own monitor controller with them at all times. It's called a cell phone (or iPad). That's it for now! Stay tuned for Part 2!  There's so much violence and turmoil going on in the world today, the church can no longer turn a naive/blind eye to potential scenarios that could happen in their places of worship. I don't believe that people should live in fear and paranoia, but at the same time, a reasonable and rational plan of action should be developed by the leadership team of each congregation. THINGS TO CONSIDER You have to be sober-minded about areas in which to spend money on. Is it preferable to spend part of your budget on plastic trees and an outside water fountain, or perhaps measures and technology in insuring the security and safety of your church family?  Security & Technology Security Cameras - Being able to see a threat before it happens, while it is happening, and/or having video of a suspect can aid in law enforcement doing what they need to do to bring a criminal to justice (like the Charleston S.C. tragedy). Electronic Door Locks - The ability to lock down certain key areas in conjunction with security cameras is a super important tool in saving people's lives. For example - in case of a violent scenario, the ability to see where the suspect is heading, and then locking the area before they can get there at a press of a button, is a very effective means in keeping people alive. I have even heard of facilities using hallways as a sort of containment area to lock an assailant down in an area where they can't get out until the authorities arrive. Panic Buttons - Having a panic button that will automatically dial law enforcement in every main part of your church building can be a very important tool in getting help right away. 2-Way Radios - In a crisis situation, the ability to communicate with other key members of your staff or team, can be the difference between life and death. Example: "Hey dude, I saw the gunman heading towards the fellowship hall! Lock it down!" Guns - I realize that not everyone will agree or feel comfortable with this section, but let's talk about it. There are of course allot of things to think about in this regard:
 Some Pakistani brothers doing what they gotta do so that their church family can worship in peace. Tazers and The Like - If some dude comes in acting a fool, light'em up like a Christmas tree. Safe Rooms - You may have an unused room or large closet (preferably with walls of concrete cinder block or similar) that you can turn into a safe room. This is very preferable in areas where there are children during a service. Volunteer Training / Congregational Crisis Training - By simply saying something like: "If you hear any loud pops or bangs that sounds like a firecracker while you are teaching Sunday school, close your door, lock it, and call 911." Taking a Sunday night to have law enforcement come and teach your congregation what to do in a crisis situation, should be a given for every congregation. The Sound Booth - The sound booth is usually in a great position because you are in the very back of the sanctuary (usually). Allot of times, your position may even be elevated. This is an excellent place for a panic button, security personnel, etc. In closing, I pray that none of the above will ever have to be utilized, but if the unthinkable happens, I also pray that you will be prepared and protected. Much Love Everyone!
Piano Verb! Weeee!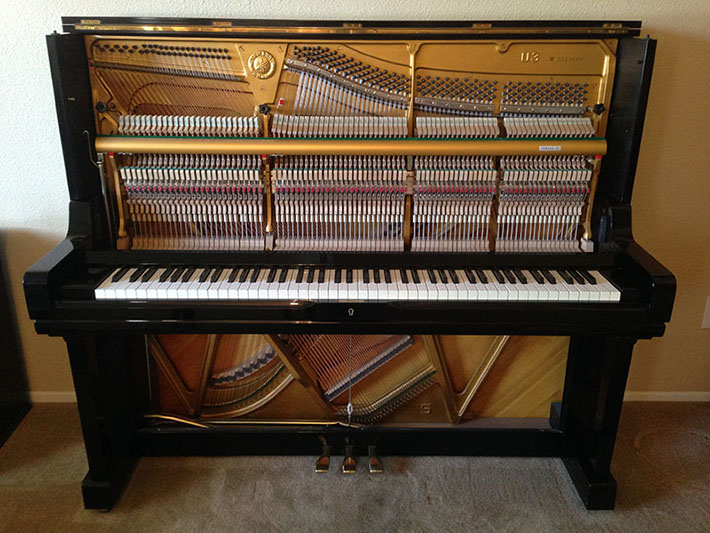 Oh Yes Indeedly! Hiding in most churches, is one of the coolest analog reverb processors you can find. It's called a piano. That's right. With just a little bit of hardware, you can add a very unique sounding reverb to your arsenal of effects when mixing. How Does It Work? By sending audio to the piano with the sustain pedal pressed, the strings will sympathetically ring according to each note played via vibrational coupling from the track you send to it. This is accomplished by using a device called an exciter. Say what? What Is An Exciter? 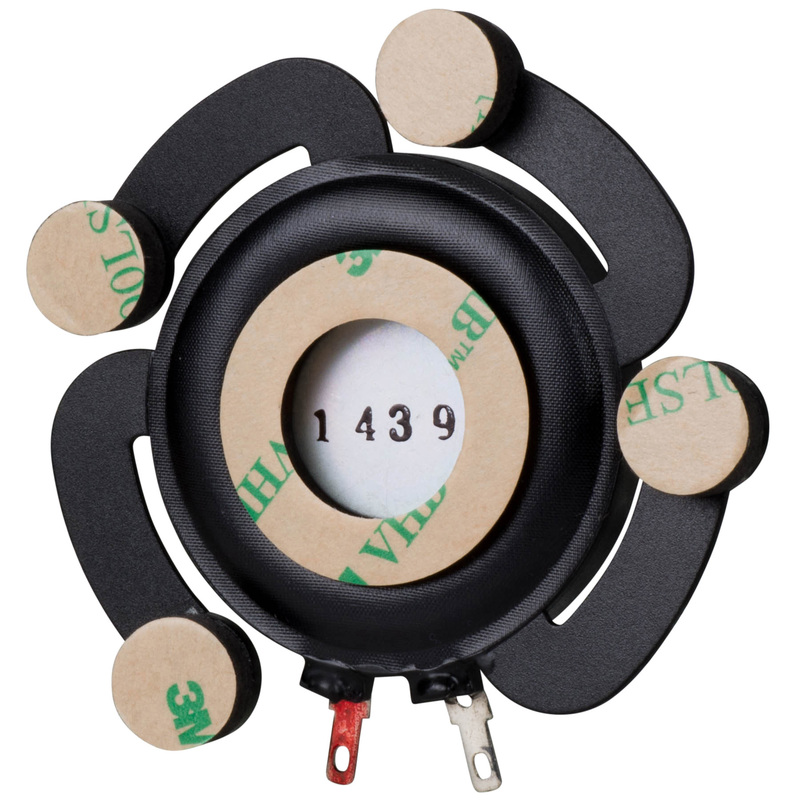  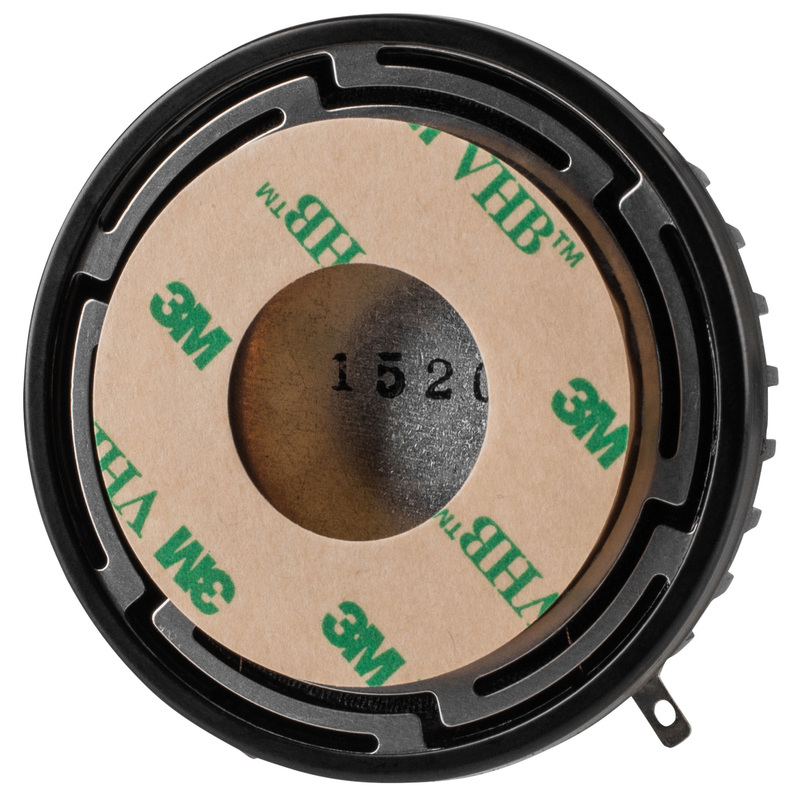 In layman's terms, an exciter is basically the motor of a speaker that is attachable to most surfaces. When music is played through it, it turns that surface into a speaker. It's hard to imagine that something like this could even work, but I assure you, they actually work really well! Let's Get Started! What You'll Need:
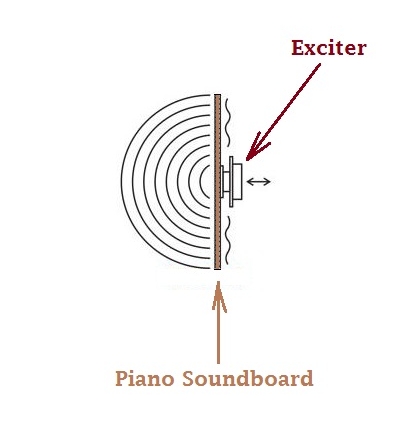 How it works in a nutshell How To Do It
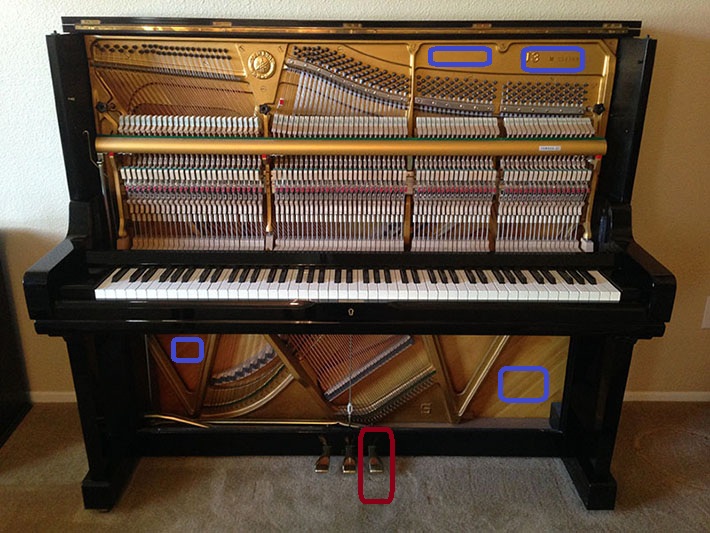 The rectangles in blue show you possible places where you can stick an exciter. You can also try placing the exciters on the back of an upright upright piano was well. Experimentation is the name of the game here. You'll want to place the exciters where the strings ring the most when music is played through them. Place a brick, or a heavy microphone base gently on the sustain pedal (marked in red) so that the strings will vibrate freely. Important Concepts
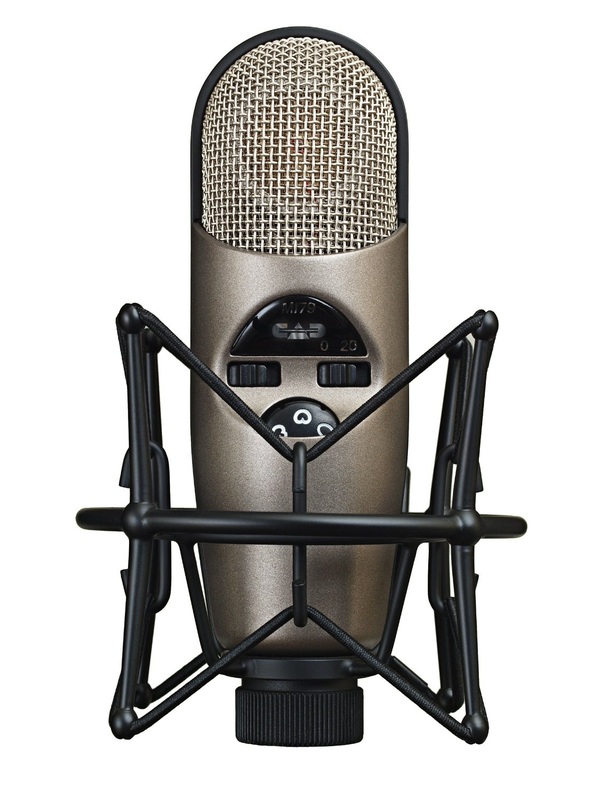 CAD M179 If you are in the market for an affordable condenser microphone that can handle a variety of jobs with ease, you may wanna take a looksie at the CAD M179. Although I am not necessarily a fanboy of all CAD products, the M179 is a true little jewel of a mic. Uses: Allot of engineers like this as a drum overhead microphone, but it can be used on just about anything. The CAD M179 can take up to 143 decibels (with the pad enabled), so you can even throw it in front of loud sources - like a guitar amplifier. Features: The M179 has a continuously variable polar pattern selector - basically this means that you can select a Hypercardioid, Cardioid, Figure of 8, or Omni - and everything in between those patterns as well! This ability makes this microphone very versatile. It also features a Pad and a High-Pass filter to boot. Price: At $199 street, this microphone is a steal - especially if you need something inexpensive for events like live festivals, or other duties where you'd rather not bring out your more expensive microphones. **Disclaimer: This article is written for PC users, although you can find a free VST host for Mac here, or here - and accomplish the same thing. You may also be able to use a wrapper for non-VST plugins, but I have not tested this out as of yet for this purpose.  Random cool pic to get your attention. Hey, did it work? So, for our last installment of "Cool Live Sound Tricks," we discussed how to set up an echo/reverb chamber at a live venue for another reverb option when mixing. This week, we are going the opposite direction. Some of you love recording and invariably have collected some great sounding plugins you use on a constant basis to get the mix you want. Some of you may not know that it is very easy to incorporate them in a live setting. For this particular tutorial, we are going to be using VST plugins for 2 reasons: 1. You can find them super cheap (or free) in numerous places on the web. 2. Finding a host that will work live is super easy and quick because there's allot of development around the VST format in that area. Step 1: You'll Need the Following Supplies - a. A mixing console (this is a given). b. An audio interface c. A computer d. VST Plugins e. A program called VST Host. Here is a list I came up with a while back that lists some of my favorite free VST plugins. If you look around on KVR, you can find even more cool stuff! Step 2: Watch This Video To Learn How to Set It Up - 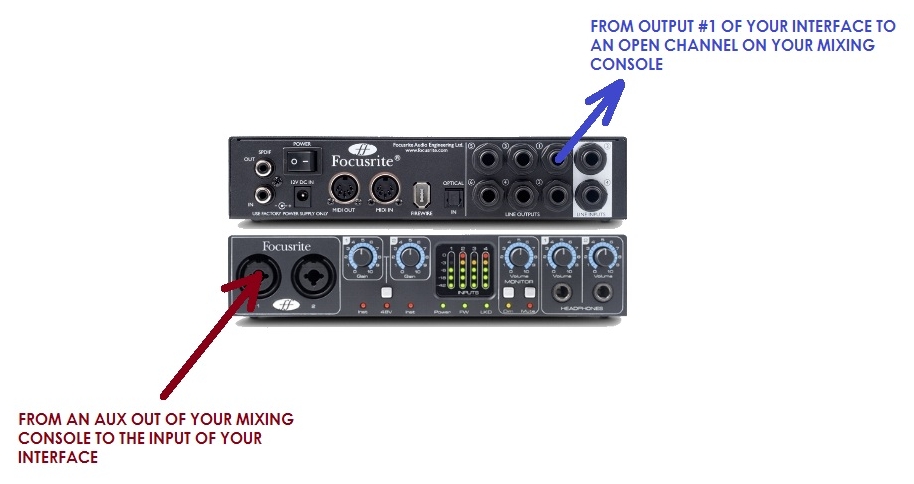 Here's a little diagram of the basic connections going to and from your interface. Obviously different interfaces are built differently, but I think you get the idea. Note: If you use this for a dynamics processor or drum replacement, you will want to run the interface as an insert and not off of an Aux. Also Note: VST Host can used with multiple plugins - on the video I just show one for brevity sake, but you can use more than one if you'd like. You can also use this program as a host for instrument VSTs. It can receive and send MIDI as well. Experiment, Play With It, Have Fun! Rock On...
CATCH THE VISIONIf you are a recording engineer, you should really see yourself as an audio historian. You are essentially capturing moments that will never happen again. Are you approaching your craft with the utmost care and thoughtfulness? If you don't bring your A game at all times to your craft, then what are you doing? You have to change your perspective. No more old hat. None of us has all of this stuff figured out. Successful engineering many times is a back catalog of happy accidents (or divine moments) built on a foundation of hungry learning. When I first started getting into audio, I started on this quest in reading everything I could get my hands on. Most of it was the old school engineer's methods of recording and such. I devoured it day after day. I interviewed, I called, I watched, and I improved (I am still improving). "If you don't bring your A- game at all times to your craft, then what are you doing? You have to change your perspective. No more old hat. None of us has all of this stuff figured out. Successful engineering many times is a back catalog of happy accidents (or divine moments) built on a foundation of hungry learning." All of the above has everything to do with how you amplify or record a drumset. Yes, that level of care and expertise should be taken. Don't just throw a bunch of microphones up there and hope for the best. a DRUMSET IS JUST ONE INSTRUMENT, NOT A BUNCH OF INSTRUMENTS PUT TOGETHERThe sound of your drumset will always lack that special "something" if you view it as a bunch of separate drums and cymbals put together. A set has to have a cohesiveness to it when you are presenting it (like one instrument), or you have failed in that area as an engineer. Ouch.  You may be asking, "How do I get it to have that sound?" Well keep reading, and this question will be answered shortly. STEP ONE - THE MUSICIAN Totally ridiculous right? But that's how the game is played currently. If your drummer is not up to snuff, can't play to a metronome, can't decide on a solid kick pattern so that the bassist doesn't put him in a judo hold and choke him out, never hits the snare in the same place twice, loves to punish his/her hats, lacks dynamics, plays one big drum solo the whole time, and....well, you may be getting the point. The first step in drumset cohesiveness is the musician (most of the world refers to them as drummers). A great musician will strike each part of his/her kit dynamically with what's going on in the song. They will bring glue to their own kit. They know what cymbals need to be struck where, the best place to strike their toms, what the beater material needs to be for the song, etc. This is something that comes with experience. STEP TWO - THE INSTRUMENT Break out ye ol' turd polish yet once again. Some of us call it "drum replacement software." Does the set sound good? Fresh heads? Cymbals that sound better than old tin trashcan lids? A pedal that doesn't squeak? The same kind of dude that'll spend $200 on a pair of shoes, or $1000 on a watch, will buy the cheapest cymbals so thick that they could be used for battle armor. "I'll sacrifice for bling, but not for my art." STEP 3 - FOR THE LOVE OF GOD, LEARN HOW TO TUNE YOUR DRUMS!If you are a drummer reading this, and you don't know how to tune a drumset, then please read the above title of this section over and over. There are plenty of good tuning lessons and videos online you can watch for free. DW drums has a great one. Dave Weckl does too. STEP 4 - THE DRUMMER IS THE LEADER OF THE BANDYou may be thinking..."Oh no, I knew it...the dude writing this is a drummer." Nope, I'm a guitar player - but the sooner the band realizes this concept, the tighter and more jelled they will be! How cool would it be if a whole band would lock into what the drummer is doing. As a guitarist, I will purposely lock in what I am playing according to what the drummer is playing. As an engineer, I always make sure the rhythm section is the very foundation of my mix. If the drummer and the bassist cannot be heard in a mix, you are doing it wrong! STEP 5 - MIC PLACEMENT, MIC PLACEMENT, MIC PLACEMENT (OH, DID I MENTION MIC PLACEMENT?)Learn microphone placement. This is an art in itself. Stop being lazy. Learn your craft. There are particular guidelines you can follow to get you close, and then from there you adjust each microphone to get the voicing(s) you need from the instrument. YOU ARE MIC'ING THE DRUMSET FOR THE PURPOSE OF PRESENTING IT AS ONE INSTRUMENT, NOT AS A BUNCH OF INSTRUMENTS PUT TOGETHER. You may be saying:  THE OVERHEAD MICROPHONE(S) SHOULD BE FOR THE WHOLE SET, NOT JUST FOR THE CYMBALS! THE SOUND OF YOUR SET RESIDES MOSTLY IN YOUR OVERHEAD MICS, WHILE THE KICK, SNARE, AND TOM MICROPHONES PROVIDE SUPPORT AND TONE. I know, I know, I know. All of you recording engineers are shaking your heads. I know I've lost my mind. I KNOW WHAT YOU BE SAYIN': "YOU ARE FULL OF IT DUDE!"Nowadays it's "use as many microphones as possible on a set to record it, and then replace them all with samples! HA HA HA HA HA HA.... cRAzY! I know that's the current state of affairs lately. I know that's usually what the client wants. Let's make everything as huge as possible! "Dude, I've got three kick samples going, doesn't it sound absolutely HUGE?" I came from a time that if a drummer caught you "replacing" or augmenting a snare, they would be highly offended. We had to leave that work to after hours after everyone else went home. We called this "arthuring" or "georging." This is the method in which you place a raw frame speaker on top of a good sounding snare, run the original snare track through it with it mic'd, and blend it with the original track. ka-boooom!Whose idea was it to make the kick drum the BIGGEST instrument in every mix. I mean jeez, it's getting ridiculous. You'll have this totally dry massive kick drum smacking me upside the earlobes, but the rest of the drumset is highly spiced with room mics...like as if the kick drum is in a totally separate room than the rest of the set! And that's another thing: enough with the friggin' room microphones. A little is OK, but it's gotten WAY out of hand. Phil Collins did it in the 90's with "I can feeeel it, cawmin' in de air to-night, Oh Lawd." Here comes the drum roll.... Ever since then, room mics galore! Weeee! Huge & dry kick drums with really verby room mics. Makes no sense. RANDOM TIPS FOR CAPTURING AND PRESENTING DRUMSIN NO PARTICULAR ORDER: Make sure your drums are tuned well. My Opinion: If your drums are tuned well, you won't need any type of muting on the toms nor snare. This is highly subjective I realize - both according to what the musician wants and what the song my dictate. Use a pillow for your kick drum. Yes, the kind you lay on. Nice and fluffy. Forget about those goofy little oblong overpriced pads that fly up every time you smack the kick drum. Know the difference in tone between these two scenarios:   Or this (2 positions compared): 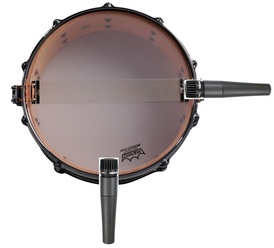 Learn the difference in microphone types, and the voices they can lend to your set. The least amount of microphones on a set is advisable. Learn about phase, polarity, and different stereo mic'ing techniques for drum overheads. One overhead condenser microphone over the right shoulder of the drummer, pointing at the toms, is a great way to mic a set if you don't have many microphones to work with. The old "rule": Anything with a head, use a dynamic microphone. Point your overhead mics at the toms rather than the cymbals. Don't worry, your cymbals will be heard! So will your snare. Learn that EQ is your last resort. Equalization is to fix a problem. It's not supposed to be "the given." Oooooh, alright! With that said: A boost around 7khz can bring out more snare or cymbal "sizzle." 200hz'ish range is warmth. 50hz is the low warm boom. 80hz is the low punch. 100hz is the thud. Around 400hz in a kick drum is mud, while in a bass guitar, it's note definition. Plate verbs can be cool for snare drums. Sending your drums to a sub-bus, and then using compression on that bus can add some glue to a set. Same can be said with using the same verb on a sub-bus as well. Make the drums as realistic sounding as possible, not as big sounding as possible - unless of course you are mixing metal. All click and no tone! Rah, Rah Raaaaaah!!! Yeeeaaaahhhh! Yeaaaaaah! <---- you gotta have a ton of "yeaaahhhhhs" in a metal song. Each drum should sound as plastic as possible with HUGE kick drums and a click sound every time the drummer hits a drum. Ha!!!! Don't use compression for your overheads, or use very little with light ratios (unless of course you are going for that really squishy thing). 2:1, compressing not more than 3-4 db as an example. Never play around with Low-Pass filters for your kick. Let it bleed...just like in real life. If recording, feel free to take off the front resonant head off the kick drum, and then place a heavy quilt over the front of it after you have found a good mic position inside the drum. After that, you may have to adjust the mic to get the perfect tone. For more attack, move the mic closer to the beater head (or change the beater type), for more boom - move it further away from the beater head. Allot of times, a better tone in a kick drum can be found with the mic closer to the inside of the shell rather than in the very middle of the drum. Learn about the vibrational modes of a circular membrane (as mentioned above). Gates are a plague. Never use a gate.....ever. Let your drums ring. How would you like it if someone cut off the last part of every one of your words in an important conversation? Ha! Compression: slower attacks to let the initial transient through will add a degree of "punch" to a drum. Start around 15-20ms. Adjust to taste. Hard Knees for bass instruments, soft knees for treble/mid instruments - like cymbals or a snare... Ok I'm tired...Much love everyone! 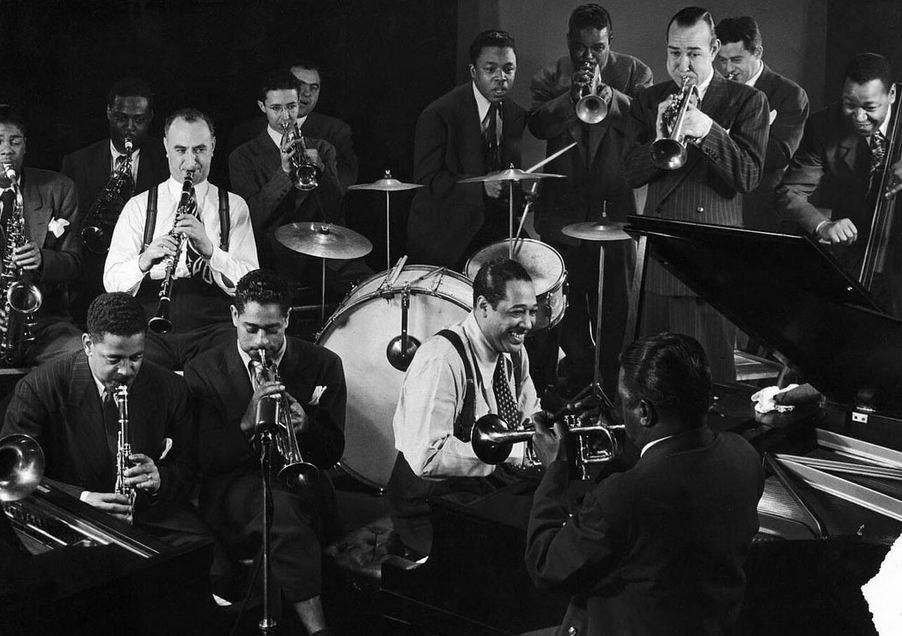 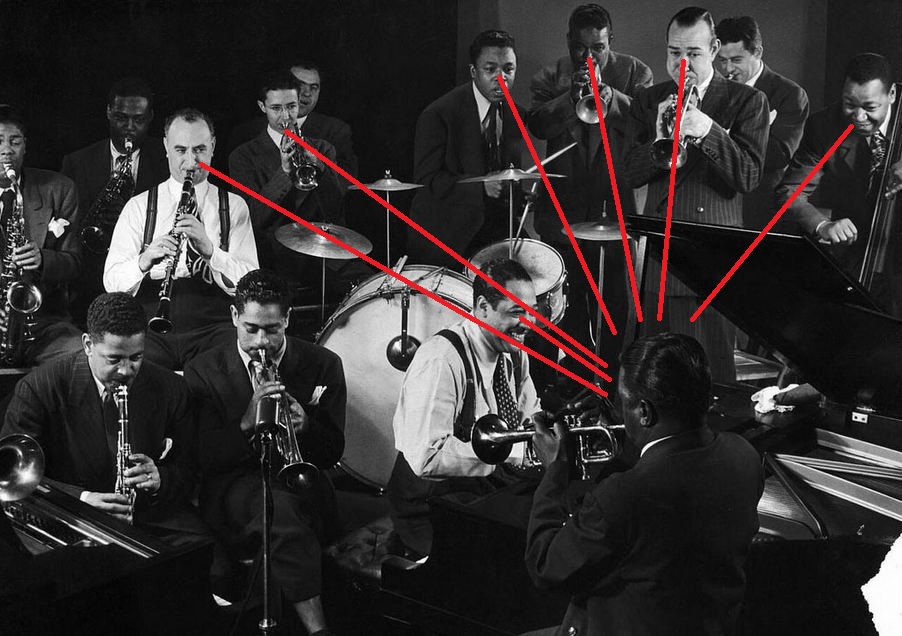 Perspective... 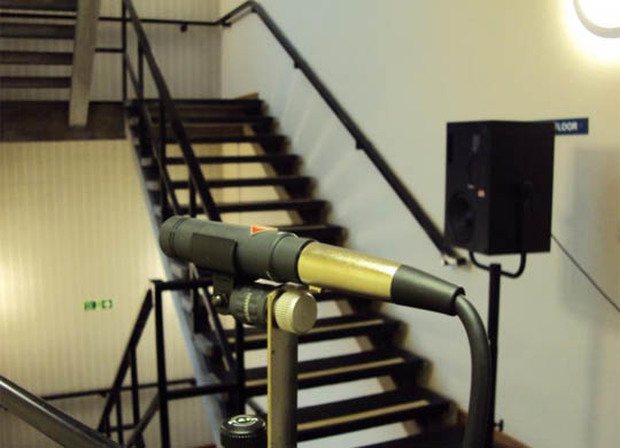 Did you know that your church (or other facility) may have an extra reverb processor you didn't know about? Yup. It very likely has been there the whole time under your nose, and you didn't even realize it. Back in the 1950's & 60's, recording studios didn't have digital reverb effects processors. Instead, to get reverb on a track, they'd use something called an echo chamber. Basically, an echo chamber is comprised of a reverberant room with a speaker and a microphone. A lot of times, the verb in an echo chamber can sound really awesome. That is part of what made some of the older recordings so pleasant to listen to. Let's Do This! Well guess what, you can do the same thing too in a live setting. You may say, "How is this possible?" Well it is very simple actually. Check the facility. Find out if there is an old abandoned hallway, or perhaps a reverberant bathroom that is no longer used anymore. You may also have a stairwell or perhaps a long hallway near the console or stage area. The perfect DIY echo chamber will be a space that will not be used, and where you can pump an audio feed from a console channel to it, and it won't disturb anyone. 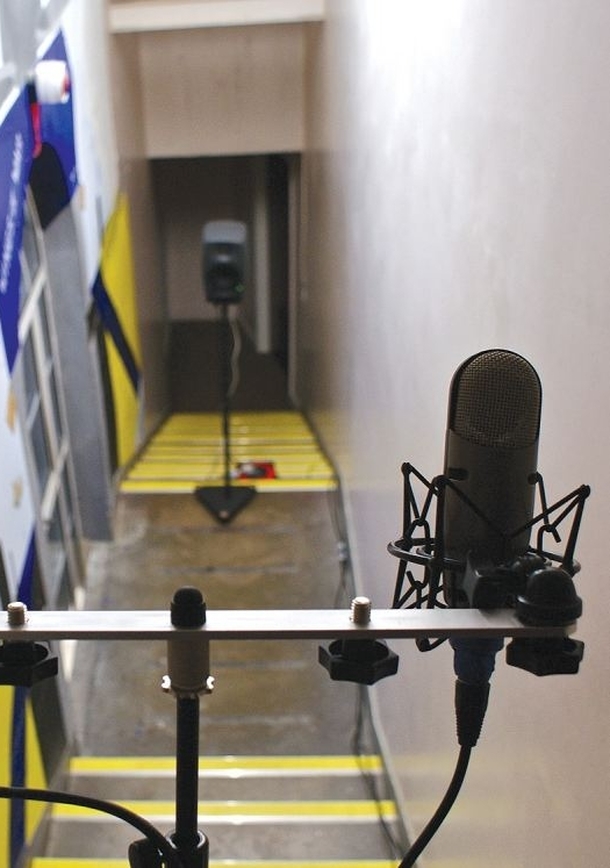 From there, find an unused Aux channel, and feed that to a powered speaker or an amplifier that will be powering a speaker to your verby room. This speaker typically fires on the far side of a DIY echo chamber. Now place a condenser microphone on the other side of the room where the reverb you hear sounds the most pleasant. Listen for a sweet spot in the room where the verb sounds the best. Place the microphone(s) in that spot, and feed that signal back into an empty channel on your console. This will be your natural reverb channel, and behaves just like any other reverb/echo return on your console. Tweak It! If the room is too verby, you can tame that with some type of absorbent material - like couch cushions, a mattress, an old blanket, etc etc etc. You can also "tune" the reverb return on your console by using a channel EQ or a High-Pass filter. The reverb from your DIY echo chamber may sound awesome though just as it is. Let your ears be your guide on this. It may take some experimentation to get what you like, but with enough patience, you'll get it. If you really know what you are doing, you could use a delay unit to get some pre-delay going as well. Using the 60,000/BPM equation, you can also time this pre-delay to the tempo of the song. What Type of Hardware Do You Need (and other questions) ? Speaker: Find a decent sounding speaker. It can be an unused stage monitor. Powered speakers are the easiest to use because you don't need a separate amplifier, but use whatever you have that sounds good. Experiment with speaker placement. You can try firing directly into a wall, or perhaps coming from a corner. Microphone(s): An omni microphone is usually preferred, but any type of condenser mic will work. If it's a cardioid, you can try pointing the microphone towards a wall with the back of the microphone facing the speaker. Some folks prefer ribbon microphones, and they definitely impart a different tone to a reverb. Use a stand to experiment with different heights and angles. Note: Don't forget to enact phantom power if it is a condenser mic you are using. If it is a typical ribbon microphone, make sure the phantom power is turned off so that you don't fry the ribbon. How Loud: It doesn't have to be loud. Anywhere from the 60-80db range will be plenty loud enough to get what you need from your DIY echo chamber.
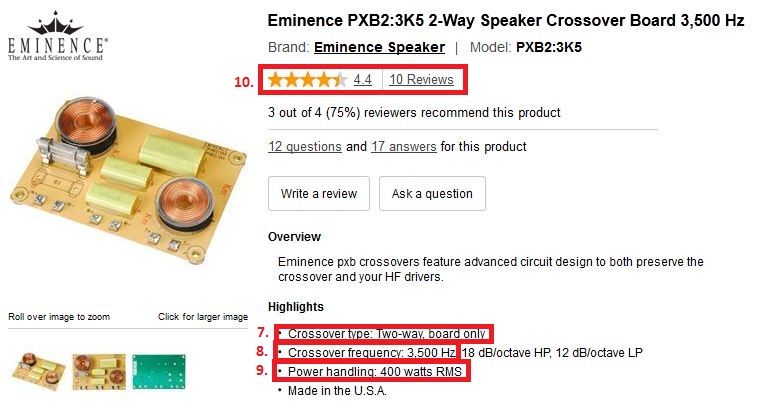
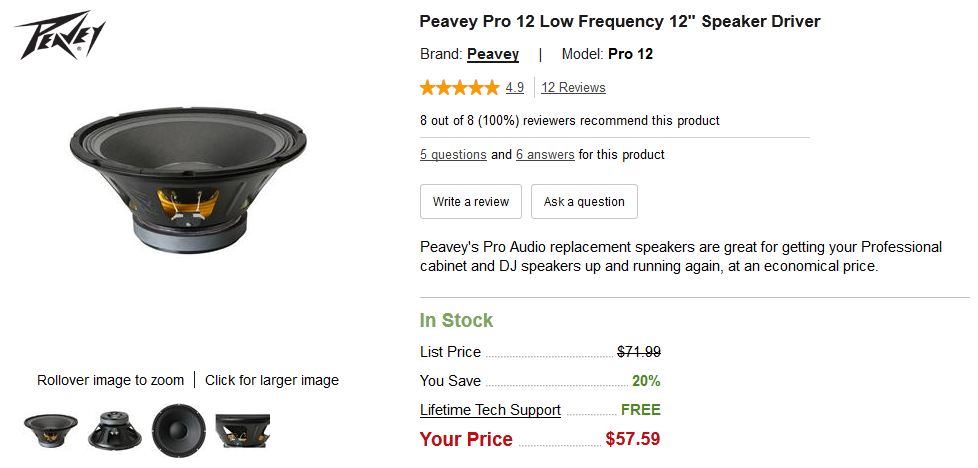
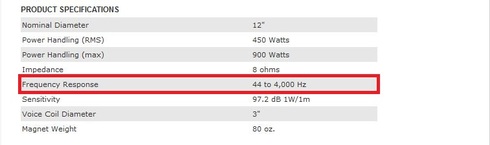
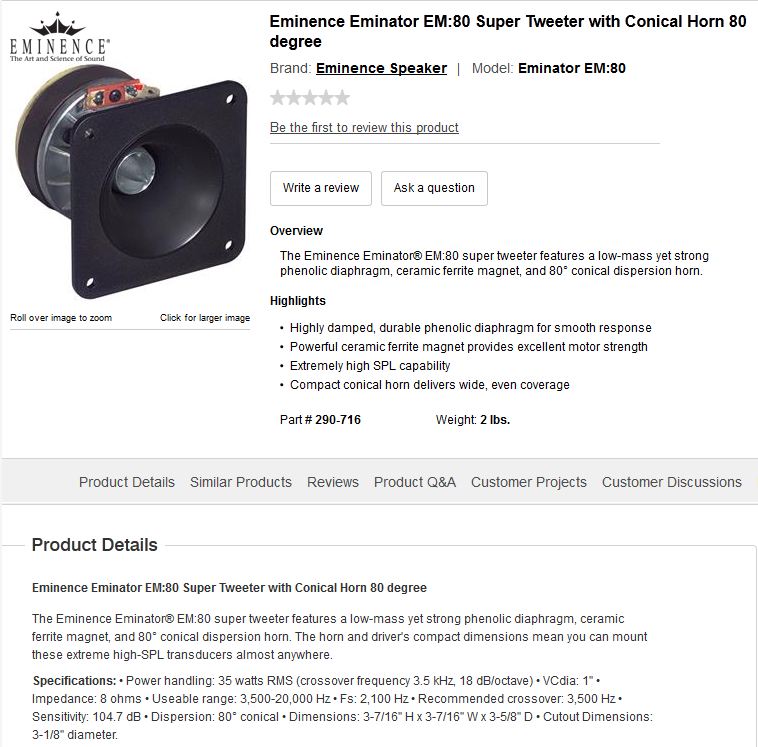
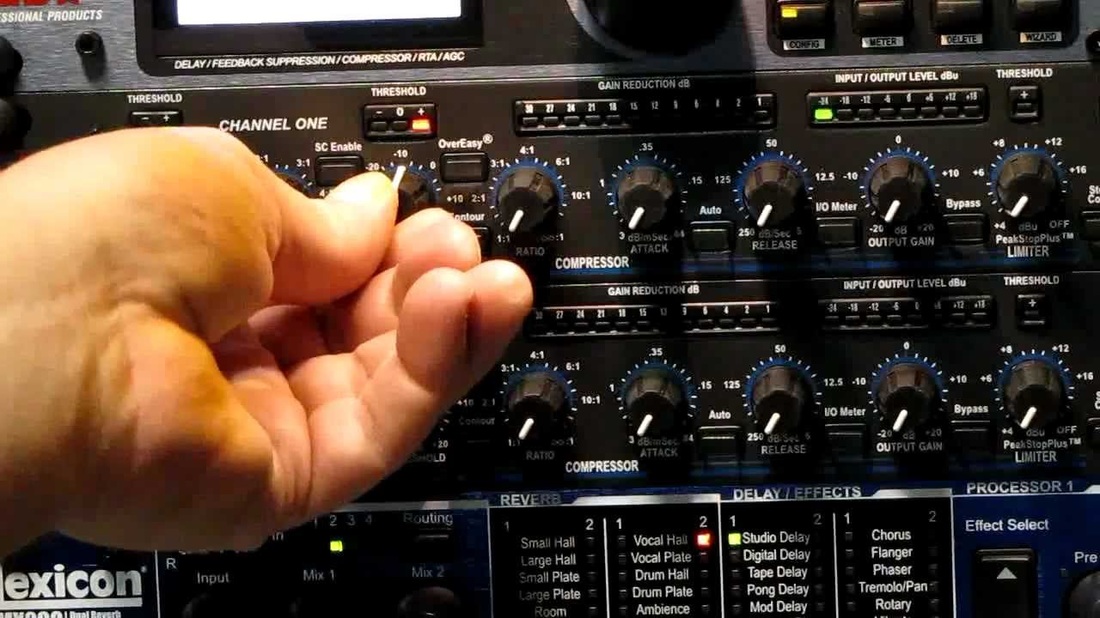 "Let's see what this thingy will do..." 1. I love to compress an instrument on the way in when I record. This makes sure that I'm not clipping when I crank my microphone preamp to the absolute highest level right before it clips. I loooove not having any headroom in the digital realm. It's awesome. 2. Then, once I record the track, I'll insert a compressor on the instrument's channel. Actually, I'll do this for everything I mix! I like to make everything as huge and "punchy" sounding as possible so that it won't fit in the mix with everything else huge and "punchy!" 3. Then, I'll send that track to a sub-bus and use a compressor there too - you know, just to make sure there are no dynamics at all (cause that would be bad). 4. And theeeennnn, I'll send that to the main out where all of those instruments have been compressed as well - because hey, compression is the coooolest, and I might as well put a limiter on the main insert out so that I can get it as loud as possible for the mastering engineer. That mastering engineer is gonna LOVE ME for this! 5. Then, I'll bring that to a mastering engineer where he'll put a limiter on my music - or if I'm lucky enough, he'll put TWO for maximum loudness! That's when I'll say phrases like, "PUNCHY" & "WARM." "HEY BRO, CAN YOU MAKE IT MORE PUNCHY?" "HEY BRO, CAN YOU MAKE IT MORE WARM?" "HEY BRO, WHY DON'T YOU HAVE ONE OF THEM THERE BBE SONIC 'MAXIMILLIANS' CAUSE THOSE THANGS ARE AWWWWESOMMME!" "HEY DUDE, CAN YOU MAKE IT AS LOUD AS THIS HERE METAL ALBUM. YOU KNOW THE ONE WHERE THE LEAD SINGER GROWLS WORDS LIKE 'RAH,' AND 'YEAAAAHHHHH' BEFORE EVERY GUITAR SOLO?" 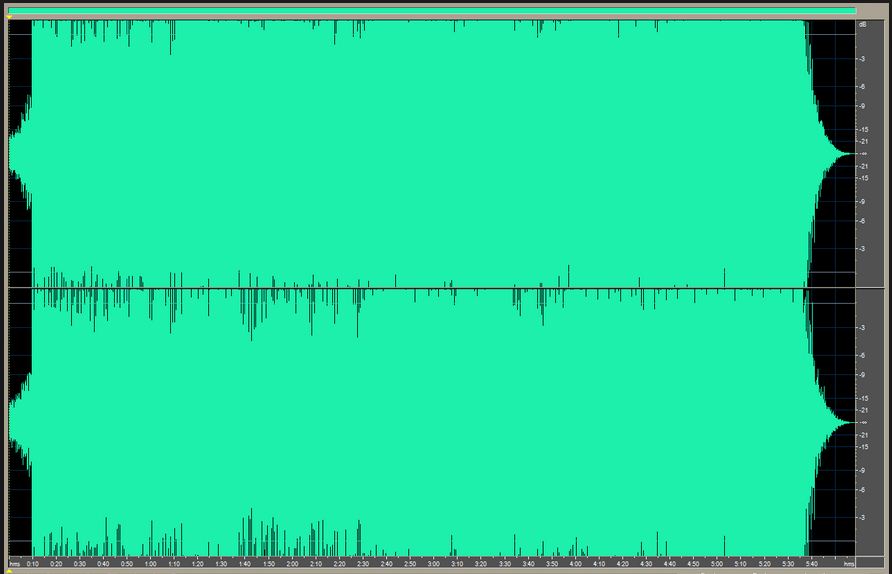 Aaaahhhhh.... That's better! 6. Then if I'm really lucky, my song will be played on the radio where they'll put a broadcast compressor/limiter on it. Ah, niiiiice and squishy. Wow, that part of the song where it just breaks down to my voice and an acoustic guitar is just as loud as when the full band comes back in! AWESOOOME!!! So, How Did We Get To This Point? Once upon a long time ago ( 1980's & 90's - Ha! ), there was this little fella named Mr. Volume Knob. Everybody loved him. He knew this because they'd use terms like: "Crank It Up, Duuuuude!" "Turn It Up to 11 Maaaan!" This was his time to shine. He was the coolest dude at the party. People loved him in their cars. People adored him in their living rooms on their Fisher stereos. Cool kids with kangaroo shoes, tight-rolled pants, and jackets with 40 zippers, would give him attention all the time on their Jamboxes and Walkmans.  Everything was going great until... Mr. Compressor Became Popular!!!! 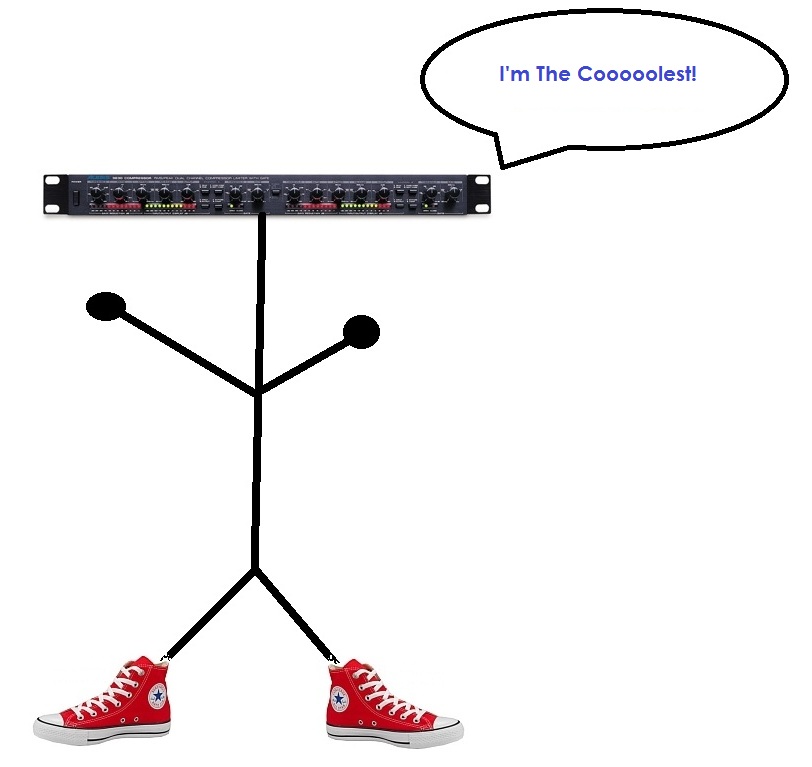 OH NOOOO! - EXCEPT HE'D BE WEARING SOME GIRBAUDS AND A COCA-COLA SHIRT! Now Mr. Volume Knob from the consumer electronics industry, hangs out at the local cafe; sipping coffee with Mr. Story Line from the movie industry (Mr. Story Line got replaced by some cool flashy dude named Mr. Special Effects, but that's a whole other story). Mr. Volume Knob would reminisce about the good ol' days where people would actually turn him above 1/4 of the way.  Rock On Dude, Rock On... Warning - A Satirical Rant In Progress... 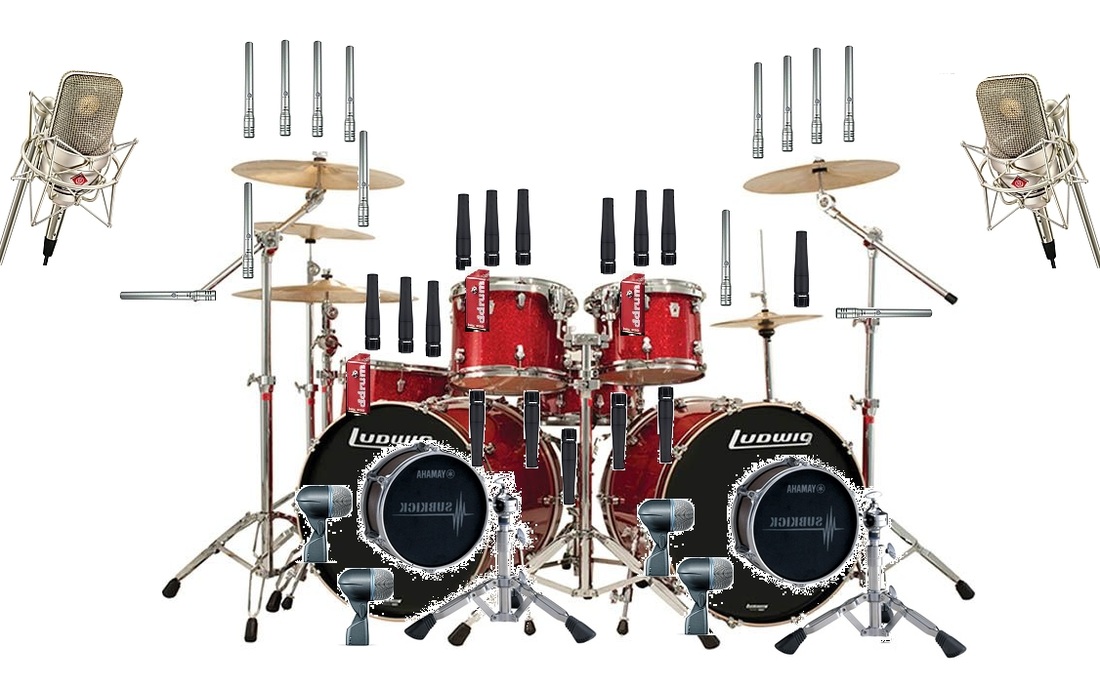 Feel The Power!!!! I JUST LOVE USING AS MANY MICROPHONES AS POSSIBLE ON A DRUMSET! THIS MAKES ME FEEL AWESOME. I'M A TOTAL ACE. THIS IS ESPECIALLY EFFECTIVE WHEN RECORDING. THEN AFTER THAT, I'M GONNA USE DRUM REPLACEMENT SOFTWARE TO REPLACE ALL THE DRUM TONES! YOU KNOW WHAT'S EVEN MORE AWESOMER THAN THAT? MAKING SURE THAT KICK DRUM IS THE BIGGEST SOUNDING INSTRUMENT IN THE SONG! THAT WAY IT DOESN'T EVEN SOUND AS IF IT'S IN THE SAME ROOM AS THE REST OF THE INSTRUMENTS! IT'S REALLY GREAT THAT WAY! KA-BOOOOM, KA-BOOO0M, KA-BOOOOOOOOOOOM! 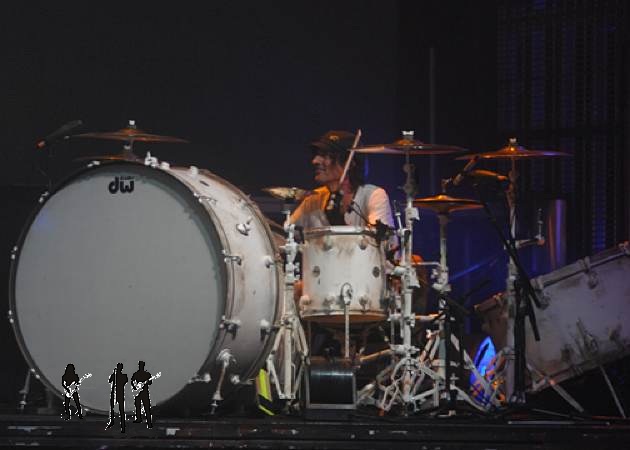 THEN WHEN FOLKS LISTEN TO MY MIXES ON THEIR BASS ENHANCED HEADPHONES WITH THE BASS ENHANCER KICKED IN, IT'LL SOUND THE COOLEST BECAUSE IT'S THE BASSIEST! AWESOME!!!! 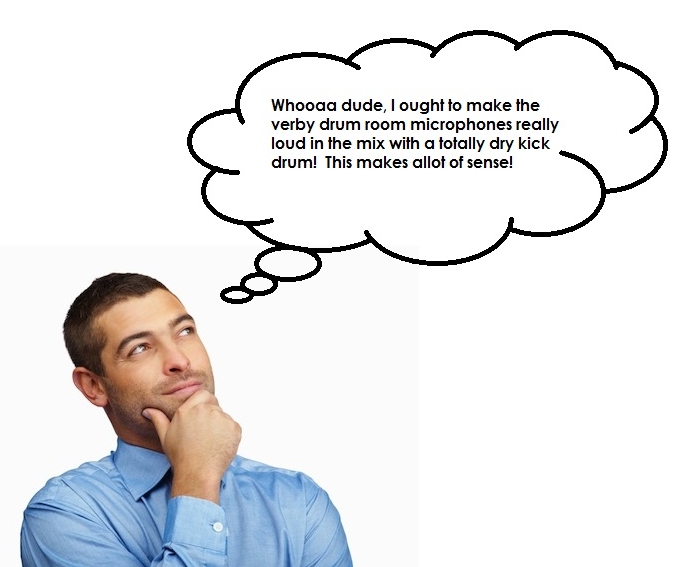 Hmmmmm. 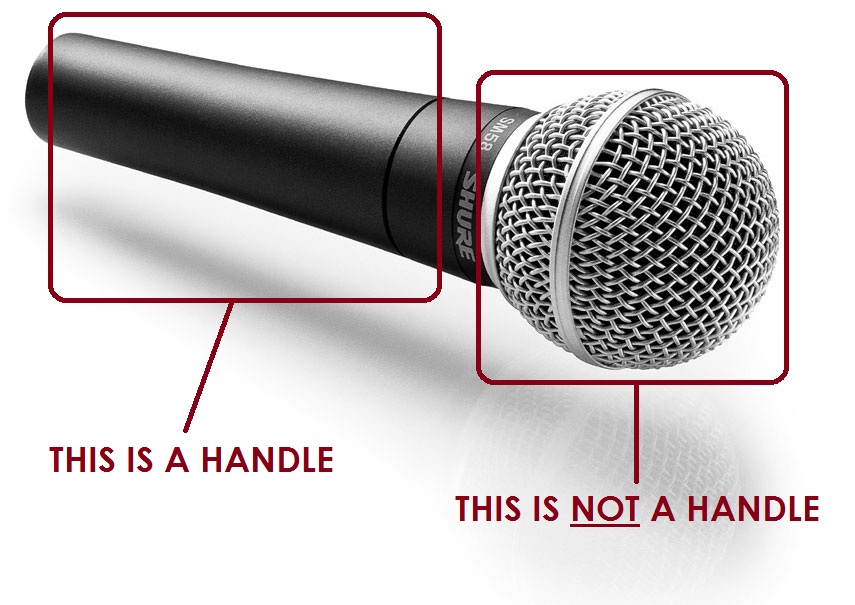 I LOVE IT WHEN MY VOICE SOUNDS TERRIBLE, AND THAT'S WHY I HOLD THE MICROPHONE ON THE WINDSCREEN! WEEEEE! MOST PERFORMERS AGREE: Making your voice sound as if it's going through a 3" speaker shooting down a 20 foot pipe is the coolest sound ever! we should all take a lesson from sandi patty & this mullet man:  Ah, That's Better!  So you are in the position that you really need to upgrade your speakers, but have very little money. Buying something brand new is out of the question, but you have to do something because your speakers are blown, or perhaps they sound really awful. There is an inexpensive way to handle this situation and will greatly improve the sound of your system! About 6 months ago I was working with a smaller church in Louisiana. Their youth department had a pair of Peavey speakers that were over 30 years old. Not all 30 year old speakers sound terrible, but these REALLY did. They were beyond terrible. My task was to upgrade their mains in their youth room for an insanely low budget. I know their situation. Their budget isn't going to increase anytime soon. So, I took what they had, and let them borrow some old JBL's in the mean time. 1. The speaker cabinet had a model number on it. I called Peavey just for curiosity sake, and they told me that it was so old, that they didn't even have any information on that model anymore! 2. The cabinet featured a 12" speaker with a tiny magnet, and a super cheap piezo tweeter. No crossover of course. Just an old capacitor. 3. I did some measurements on the cabinet to see the internal dimensions to get a close number on the volume of the cabinet, and the internal clearance to see what I could do in way of a new woofer & tweeter. 4. From there, I contacted a company called Parts Express. These guys offer great replacement speakers for very fair prices. They can be found at www.parts-express.com - And no, I am not affiliated with them. They just have really good customer service, and I have been a satisfied customer of theirs for years. 5. Their youth department at that church runs an all-in-one mixer-amplifier, and I knew that their particular model didn't support under 4 ohms on each output channel. So from there, I knew the total ohm load I would have to work with in re-building their speakers. Remember, if you combine two 8 ohm speakers on one output, the combined ohm load is 4 ohms! That's right, not 16, but 4! If you combine two 16 ohm speakers on one output, the amplifier will then see 8 ohms! Keep this in mind when building or rebuilding new speakers. 6. I then chose a decently priced crossover (also available at parts express). A crossover separates treble from bass so that bass doesn't go to the tweeter, and treble doesn't go to the woofer. With that said, tweeters and woofers have what they call a frequency response. So, you have to match the woofer and tweeter to where they will work together with the crossover. You want to try and choose a woofer that extends up to (frequency wise), where the tweeter picks up at. Also, make sure you get a crossover that can handle the amount of wattage your amplifier provides. Needs are diverse, so don't go out and buy this exact one, but this is just an example of the type of components to look for:
 Cool gear pic so that you'll read this article. Ha! For Part 2 of this series, we are going to be exploring cool gear hacks and workarounds to get you rolling on a low budget. In this series as a whole, we will be discussing everything from DIY electronic builds, to great inexpensive products you may not have heard of before. With that said, let's get rolling with our first project: DIY ELECTRIC GUITAR BUFFER/LINE DRIVER/BOOST If you run an electric guitar amplifier in a remote & isolated location several feet from your guitar amplifier, this buffer/linedriver is a killer solution for curing any capacitance issues you may have with your rig - thus preserving your tone. As many of you already know, the longer the 1/4" run, the more capacitance in your guitar's signal chain, and the duller the tone. This circuit cures this issue, and has no negative effects. This ultra-simple circuit sounds so good, you'll want to leave it on all of the time. I have compared it against some of the most well known manufactured devices, and it is easily the best. Notice that I use an LM386 IC. Yes, this chip was originally developed by Texas Instruments as a 1/2 watt amplifier, but with a little know-how, and leaving out certain parts of the circuit, it makes a killer transparent boost. 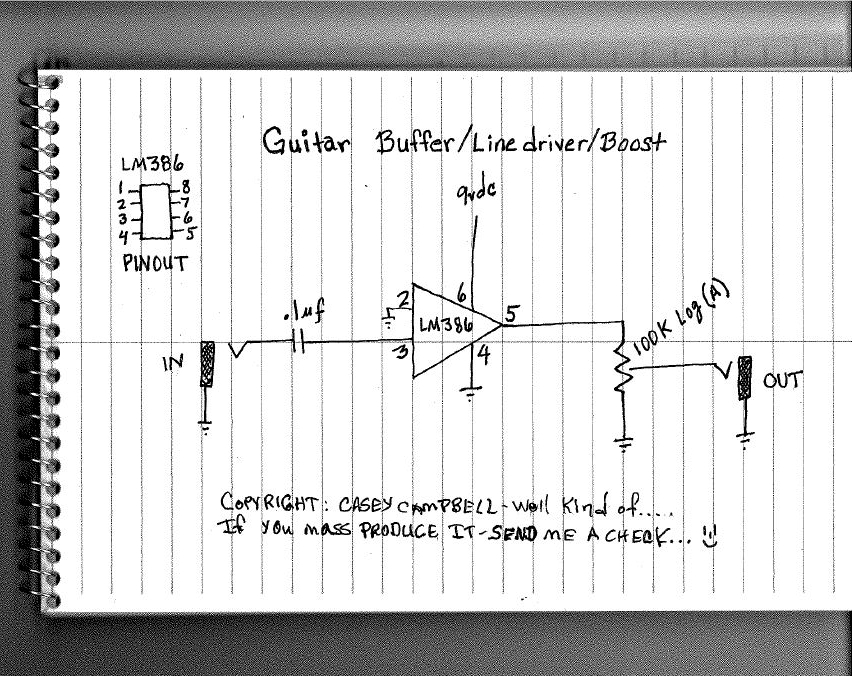 The .1uf capacitor can be a cheap ceramic cap. Don't worry, your guitar won't know the difference, and neither will anyone else. The output volume control, is a 1/2 watt 100k Audio Taper potentiometer. Set the output volume of the circuit to where the tone is boosted just a hair, and this is where this buffer/linedriver is operating at its optimum level. Too much boost (which this circuit can easily do), and you'll overdrive the input of your guitar amplifier (some folks like this). Add a 3PDT stomp switch to make this a boost. If you need an enclosure, I recommend Small Bear or Pedal Parts Plus. The total project cost is not more than $20. Super cheap & super easy to build with extraordinary results. 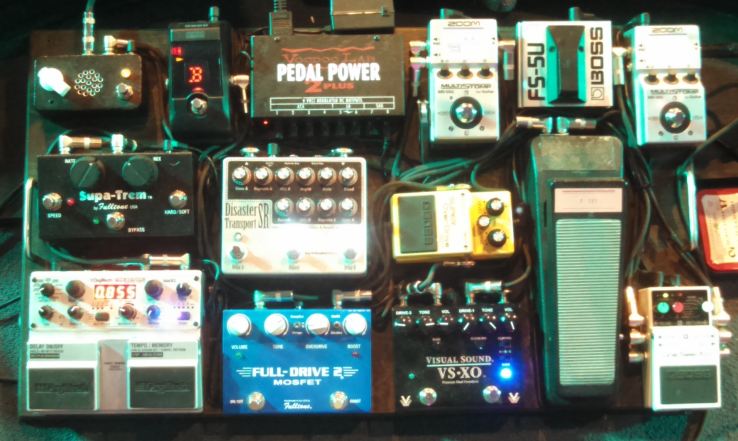 My personal pedalboard with the above circuit as a boost/linedriver (upper left-hand corner). I used to be the chief designer of boutique guitar pedals from 2008-2011 of a now defunct pedal company. This pedal was my very first prototype of this type of pedal. I built it out of spare parts ( that's why it's so ugly - Lol ). When I tested it out, I noticed it imparted a certain "something" to my tone that I loved. It's stayed on my board ever since.  I almost titled this post: "What I wish I could say to every church leader." Important First Concepts:
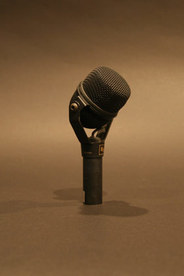
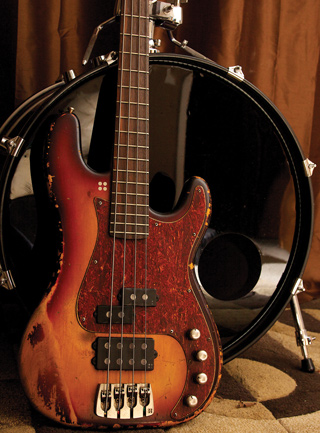
Have a Realistic Budget I remember an occasion where I was tasked to install a complete sound system for a medium-large sized congregation. Mics, all cabling, amplifiers, speakers, mixing console, outboard, monitoring, etc. Everything. When I asked the leadership what their budget was, I got the reply - "Will $1,200 do it?" You have to have a realistic budget to get the job done. If you are building a new building, you have to factor in the sound system as part of the cost of construction. You don't have to buy expensive, but you should buy smart. Priorities "Well we wanted a really nice water garden on the property. We thought it'd attract more people to our church." But your sound system is 40 years old, your speakers are blown, half the channels on your console no longer work, and your volunteer that's running it is not for sure what the difference between a fader and a mute button is. Every Part of Your Service Goes Through Your Sound System Your worship, your message (the gospel); everything. You'll spend less money if you buy quality gear in the beginning, than if you have to keep patching and replacing cheap stuff year after year. It doesn't have to be super expensive to get the job done, but it shouldn't be the cheapest. If all you can afford right now is the cheapest, then wait. Save your money until you can afford what you truly should purchase. Buy Gear You Can Grow Into "We only need 16 inputs; how cheap can we get one of them there 16 channel mixers for?" If you are running 16 inputs from the stage, then purchase a 24 channel mixing console (at least). If you purchase the bare essentials now, what happens when you grow? You'll have to purchase the same type of item a second time. You are money ahead if you purchase gear you can grow into. Purchase it smart once, and you won't have to purchase it again. Find the Balance Between Form & Function I received a call from a pastor that had heard of me from another church I have done extensive work for. His congregation was about to move into a new building, and they hadn't purchased the audio equipment yet. When I got there, I noticed that there was no mixing console area. When I asked about where he'd want the booth, he showed me to a separate room (with a door) about 8ft x 10ft totally separate from the sanctuary. Their church had a full band (drums & all). You have to realize that the construction of today's modern church buildings have to be focused on the audio/visual element. Again, everything you do, runs through your sound system. If it's installed right, it won't be ugly, and will greatly enhance your services. You say that the gospel is important, but if your audio system sounds terrible, the listener will be distracted from hearing it. It is more important for the gospel message to be clearly and cleanly heard, than for the curtains in the Sunday school classrooms to be brand new. Hearts can be changed and touched through worship, but what if your sound system sounds terrible and is a distraction? "Oh well, at least our new plastic trees we just purchased look great on stage." There Is Nothing Wrong With Buying Used Used, B-Stock, Re-furbished Gear with a warranty, etc. - are all great ideas! Nothing wrong with buying used, and especially if you get it in good working order from a reputable dealer. I buy allot of used gear from guitar center. I haven't been burned yet, and have been super happy! I would stay away from ebay and other similar online bidding sites, unless you are absolutely sure the seller has a stellar rating, and a guarantee of some sort. Training Seriously - I know I run a live sound training site, but know that I am REALLY NOT trying to sell you anything. With that said - if whoever is behind the console has no idea what they are doing, your gear and your audience can suffer. I cannot count how many times I have been called in to a facility to replace gear because of abuse. Most of the time it's the improper use of gain structure, or lack of maintenance. You are going to end up spending money you shouldn't have to because of a lack of education & training! Stayed tuned for the next article in this series as we delve into making the best use of the gear you have on a limited budget! 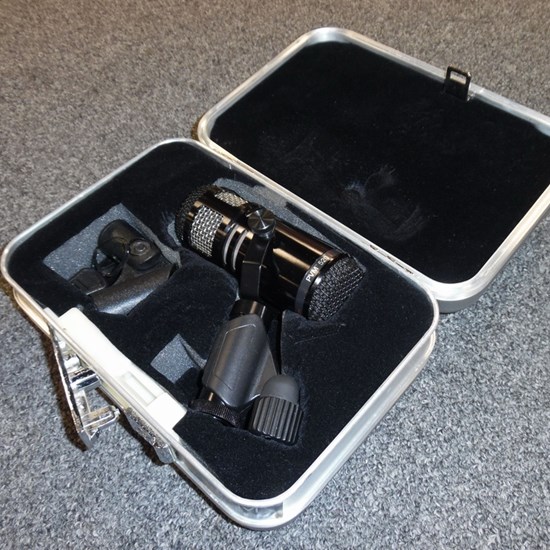 The Peavey 520i. It was about 1998 and I had a recording session with a new band I had just joined. We spent a week tracking songs & fleshing out ideas. Black faced ADATS, Ramsa console, some old rackmount gear (that's where I fell in love with the Ensoniq DP/4), a few compressors & some NS-10's with some Kleenex over the tweeters - mixing down to one of those old skool Panasonic DAT machines with the big knob in the middle. It was a load of fun, and we recorded some really cool material. Fast forward about 10 years later, and I'm listening to some of those rough mixes, and I think to myself, "Wow, that kick drum sounds really great." I call up the drummer to see if he still has the mic we used, and turns out it was stashed in a closet somewhere in his house. "Dude, you want to barter something for that mic?" "Sure man, I need some mastering work done." I get the mic, and he gets some mastering work - both happy campers. So here I am writing about a little known Peavey microphone (yes I said the "P" word) - Peavey. The name that so many love to hate. The staple brand of so many churches here in the south for the last 40 years. "Well, they may not sound the best, but they're tough!" Back to the microphone - I have used the Peavey 520i on allot of recordings since then. There's not much this microphone doesn't do well on. Everything from kick drum to violin. The latest instrument I have used it on is electric guitar. I have a Sovtek Mig50h that I love, but I wasn't totally happy with my tone. My Audio Technica Pro37r died (my first choice for electric guitar), then I tried a Shure SM-57 (the go to standard), and finally a Sennheiser e609. Still not happy. I think to myself - let's give the Peavey a try. Bingo, found it. Happy camper. You should give it a try yourself. It's a great mic you can get on the used market for very little, and can handle most studio chores with ease. The Electro-Voice N/D468 - Ok, so it's not super-duper Old Skool (released in 1999), but I love this mic, and if you haven't ever used it, you are missing out! 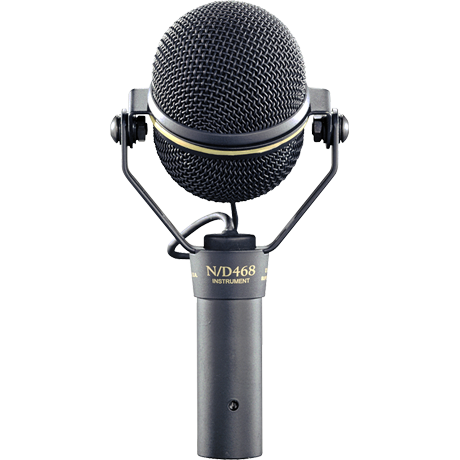 This microphone is a great all around'r - good for a variety of sources. It really excels on brass, guitar amps, drums (namely toms & snare), cymbals, and even vocals!
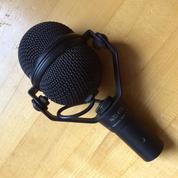
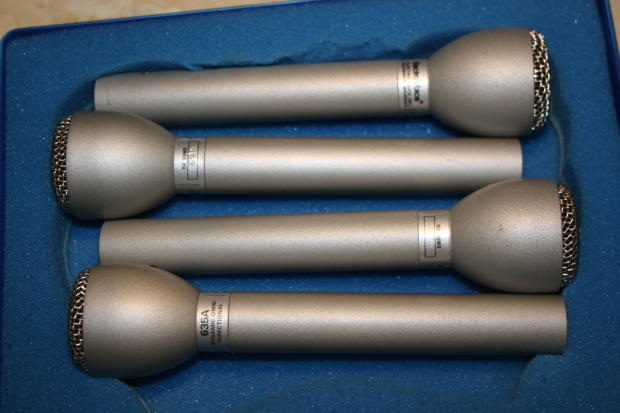 The EV 635a For this week's edition of "Old Skool Sleeper Mics," we turn our attention to the Electro-Voice 635a. This microphone ( the "a" version ) has been around since 1965. Pretty soon after this microphone came out, engineers started using it on all types of sources for both live and in the studio. This omni-directional dynamic microphone is a favorite among engineers for guitar amplifiers, vocals, & drums because as many of you already know, an omni-directional microphone won't exhibit proximity effect, and the tone of this particular microphone is unique and incredibly useful. It can be had for a song on the used market, and is usually found in almost any major studio's mic locker! Anywhere you'd use an SM-57, the 635a will more than likely excel. Here are the some downloads from EV with the specs and other details: 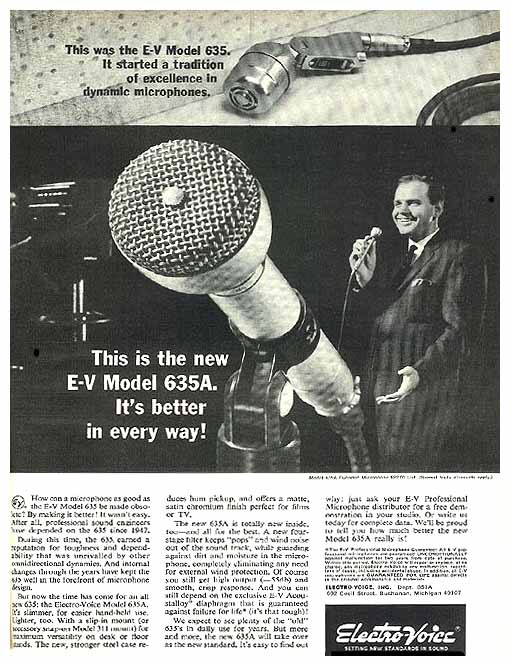 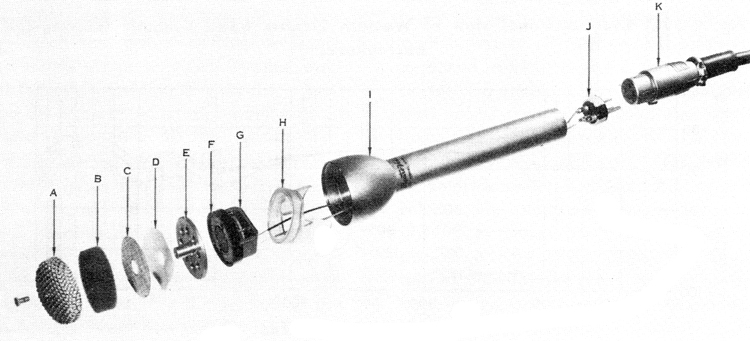 Warning, yet another satirical rant in progress...   AAAAAHHHHHH! OMG!!!!! It's like, like, like - AAAAAAHHHHH!  Dream Laaaaaaand!  "x32, x32, x32 - AAAAAAAHHHHHH!!!!!!"  Now all I need is a Line Array, and I'll be golden!!!! But first, let me put a flanger on every channel. Warning - Satirical Rant In Progress.... "Hey guys, I go to a church of about 150 members. We are looking for some new main speakers. What would you suggest?" Line Array, Line Array, LINE ARRAY!!!! 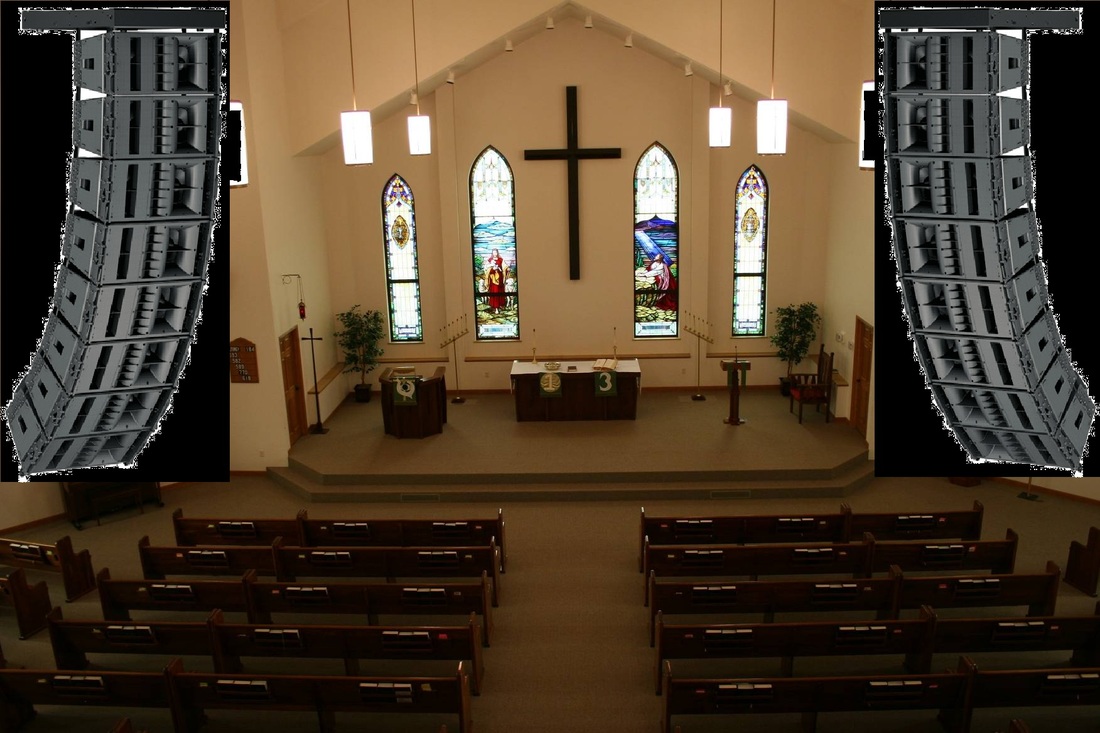 That ought to do it! How about some new speakers for your youth room? LINE ARRAY! "Hey everybody, we need some new stage monitors for our church, what would you suggest?" 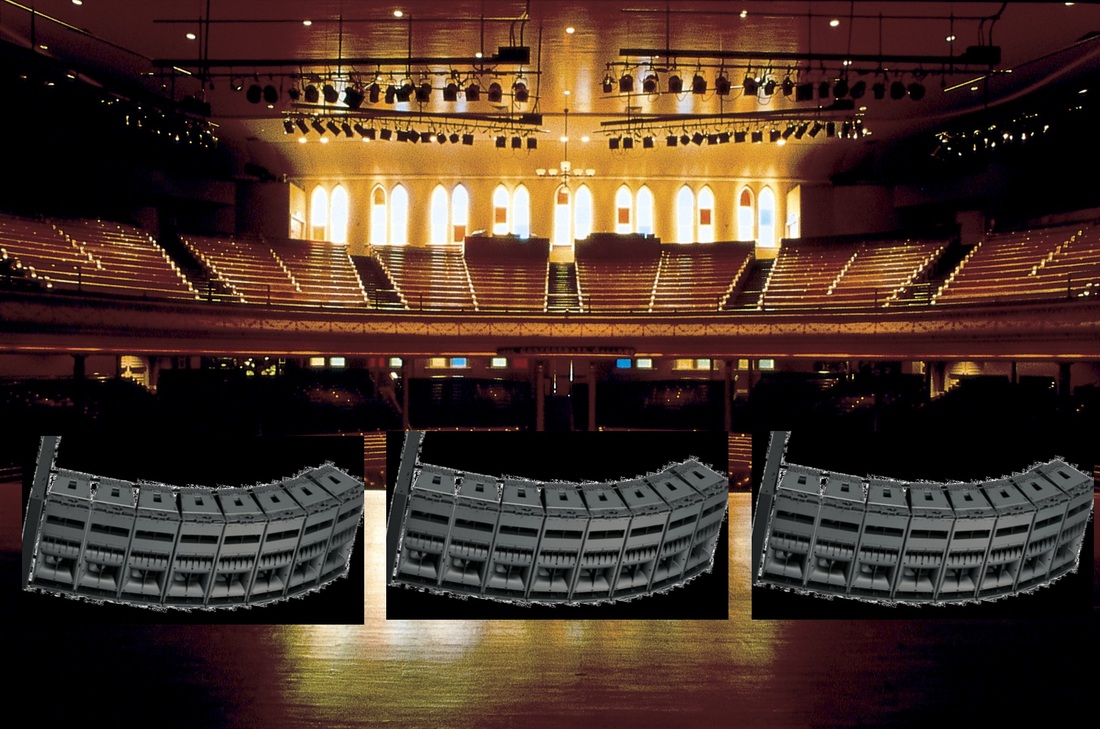 LINE ARRAAAAAAAY!!!!  Stay tuned next week as we discuss how X32's can bake you a pizza, wash your car, train your old dog how to do new tricks, make you get rid of all of your self-help books, and bring world peace!
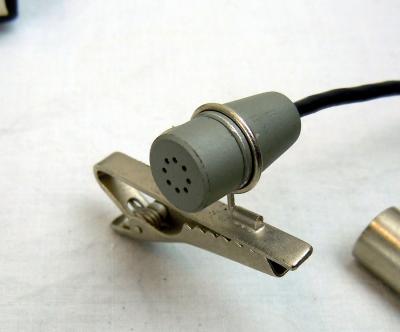
The electro-Voice co94 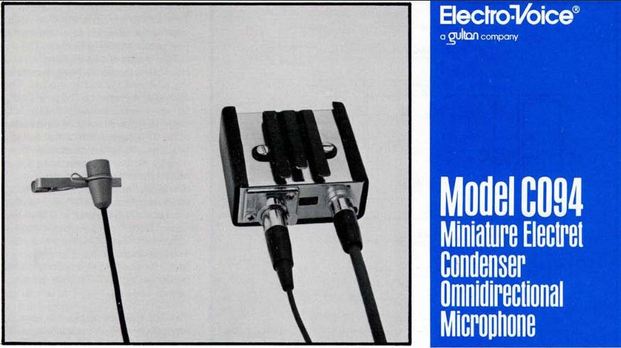 Every great once in a while, I am going to provide for you different examples of sleeper microphones that you may find in an old closet or drawer somewhere, or even for sale cheap on ebay, reverb (yea right - nothing is cheap on reverb), guitar center used, etc. For this edition of Old Skool Sleeper Mics, we turn our attention to the Electro-Voice CO94. Originally it was meant for being a lapel microphone, but what some people don't know, is that this microphone makes a killer little snare/hi-hat mic. This little guy can withstand up to 140db without distortion, so it can more than handle most snare duties. Also - it can be powered via a 9-volt, or phantom power. The only challenge can be how to mount it on a stand to get to the appropriate place. One way this can be done, is to carefully tape the brass housing of the mic to a boom arm of a microphone stand; with the mic clip taken off the end of it. Or, you can use the included clip (if it is still on the mic) to just clip it on a stand. **Cool Tip: Being that it is an omni condenser, you can also attach the CO94 to a flat surface, and turn it into a boundary microphone for room use as well. You can do this with any omni condenser microphone by the way... You can also mount the microphone pointing upside down on the drummer's shirt. The frequency spectrum shows a bump in the 7khz range, which is perfect for bringing out the sizzle in dark snares.
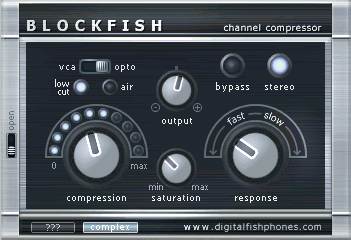
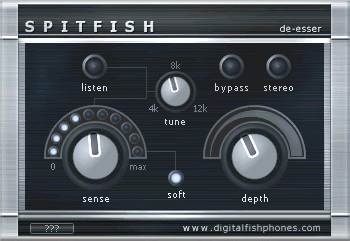
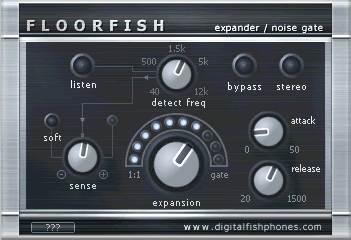
One of my passions for a very long time has been recording. Just today, I was thinking about some great little VST plugins that are true jewels that everyone should check out. Not only have I used these on numerous occasions, but they are actually free! I'm going to list some obvious choices, but I am also going to list some that you may have never heard of before. In no particular order, here they are: 1. Variety of Sound: Every one of these guy's plugins are super great. If you haven't heard of them yet, you are missing out!         2. de la Mancha: I discovered de la Mancha effects a while back, and I was super impressed. Allot of these are out of the ordinary, while others are very practical. 3. The Genuine Soundware Watkat: I absolutely love this echo/delay. One look, and you'll know what it is emulating (or at least, you should know). 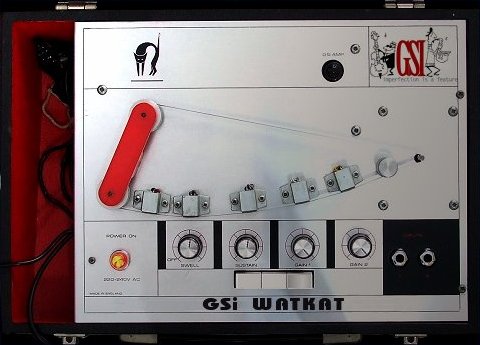 4. Tokyo Dawn Labs: Pretty cool sounding plugins. Allot of recording professionals use these, and best of all, they are free. 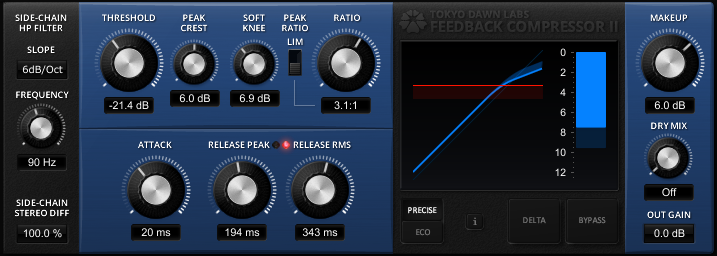  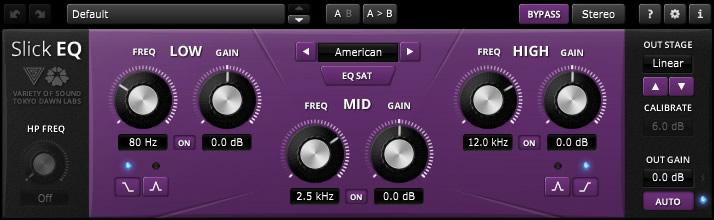 5. No list is complete without mentioning The Fish Fillets: I have especially used the compressor and the de-esser on countless occasions! 6. Anwida DX Reverb Lite: This is a cool little reverb I have used from time to time. Very smooth verb with very little CPU overhead. 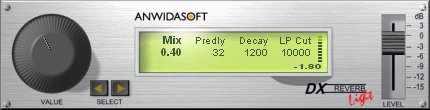 7. Tweakbench: These guys have a ton of cool & free VST effects, but my favorite is "Field." You must download it to see what it can do! 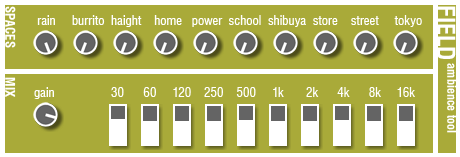 8. Dasample Glaceverb: Every now and then, this reverb really hits the spot. It has a tone all its own - a definite must hear! 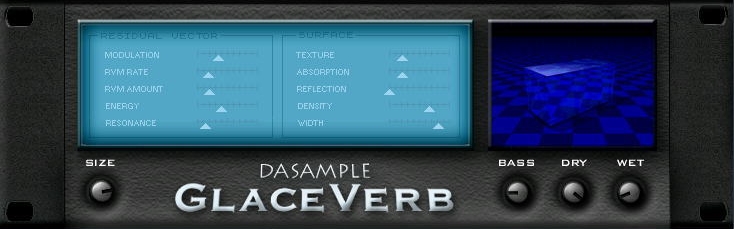 9. Izotope Vinyl: No list would be complete without mentioning this plugin. Super fun. 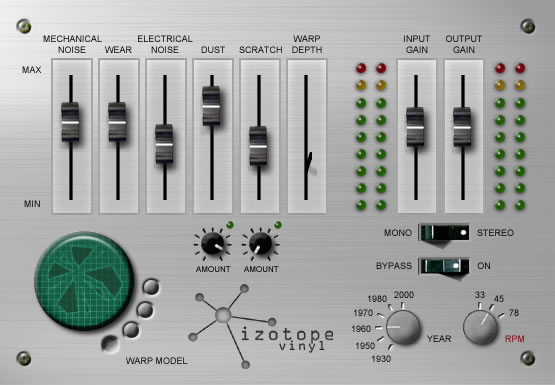 There are literally hundreds more that I could recommend, but these above will keep you busy for a while! Much love everyone!
 Go ahead, make my day One of the most powerful tools in your mixing disposal, is the mute button. I have had times when the band is killing it, and then there's some dude impersonating Henry Kaiser rocking a solo that sounds something like Yoko Ono getting in a fight with a bumble bee: There are times when somebody in the band is just not paying attention and are off in La La Land, or sometimes you'll have somebody who is convinced that they should play as many notes as possible in a worship set. This can leave you in a difficult situation because you don't want to be rude and mute them, but you know what...you totally should. Go ahead. No biggie. They should learn the meaning of the term "tasteful." One of the most effective uses of the mute button, are out-of-tune background vocals. Have you ever had that situation where you have a "vocalist" that hears everything a half-step lower than the actual song?
Mute Button. How about the guy that is convinced he should try and play the new blues pentatonic scale "he just learned" throughout the entire song? Mute Button. Or the same guy that just bought an e-bow, and decides he wants to use it during the entire worship set? Mute Button. Worship Leader: "Hey guys, let's use drum loops for the first time this Sunday morning with a drummer that couldn't play to a click if their life depended on it." That sounds like an excellent idea! Mute Button. I think you may be getting the idea now. Here's a technique developed by Courtney Love's engineer he has used countless times (I'm almost sure of it): When there is something coming across the speakers that sounds like someone is torturing a possum with a cattle prod - you grab the fader and start bringing down the volume gently, but quickly...and then in one smooth act of mercy, you bring the other hand up to the console and press the Mute Button so that the audio of the offending channel doesn't cut off too suddenly. Aaaahhhh. That's better! Sometimes (most of the time), a kick drum and a bass guitar will be all over one another in a mix, and it can be really difficult for you to get a degree of separation between the two where they sound distinct, and take up their own space. I have decided to include some basic tips if (when) you come upon this issue. So, let's dive right in!
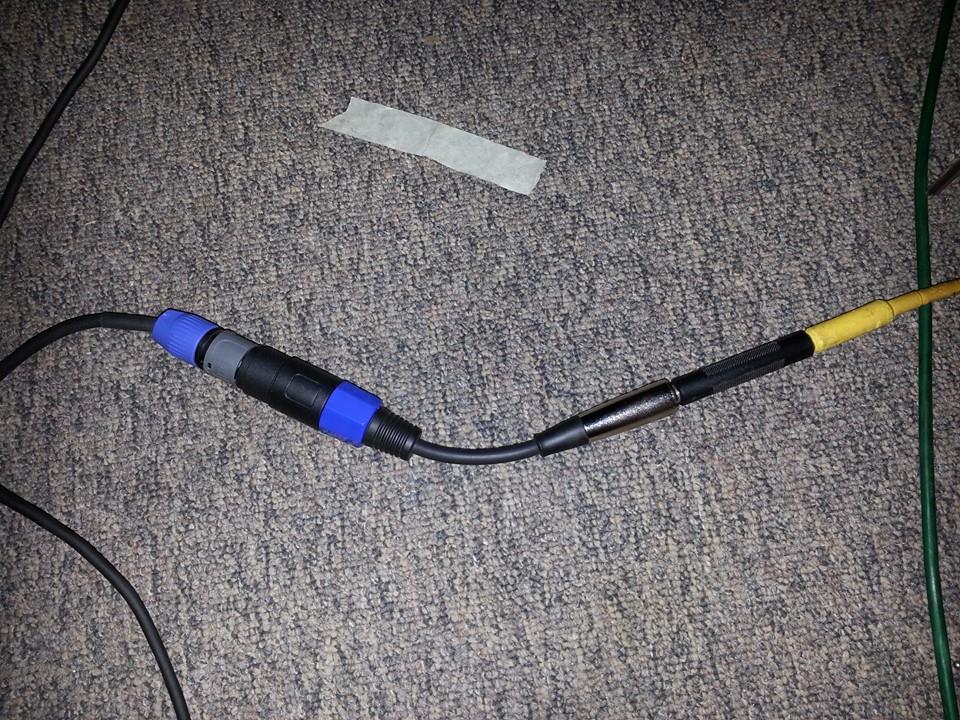
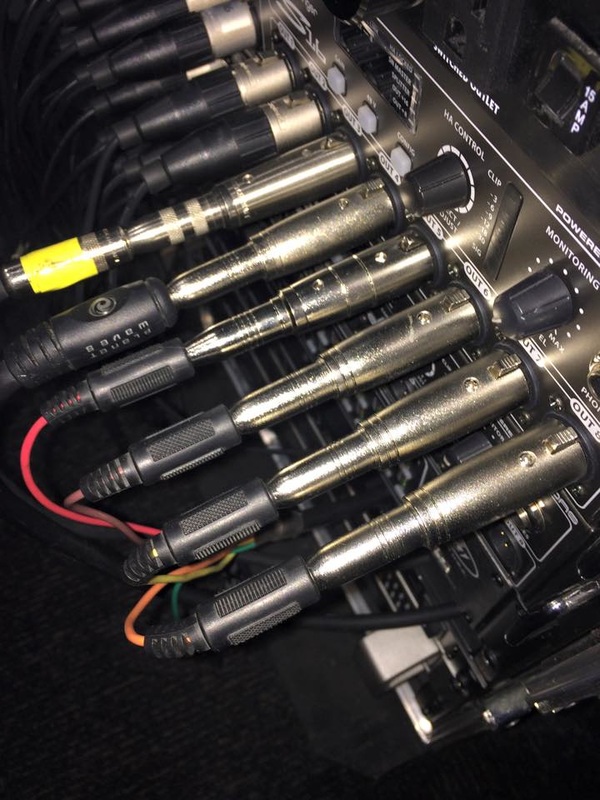
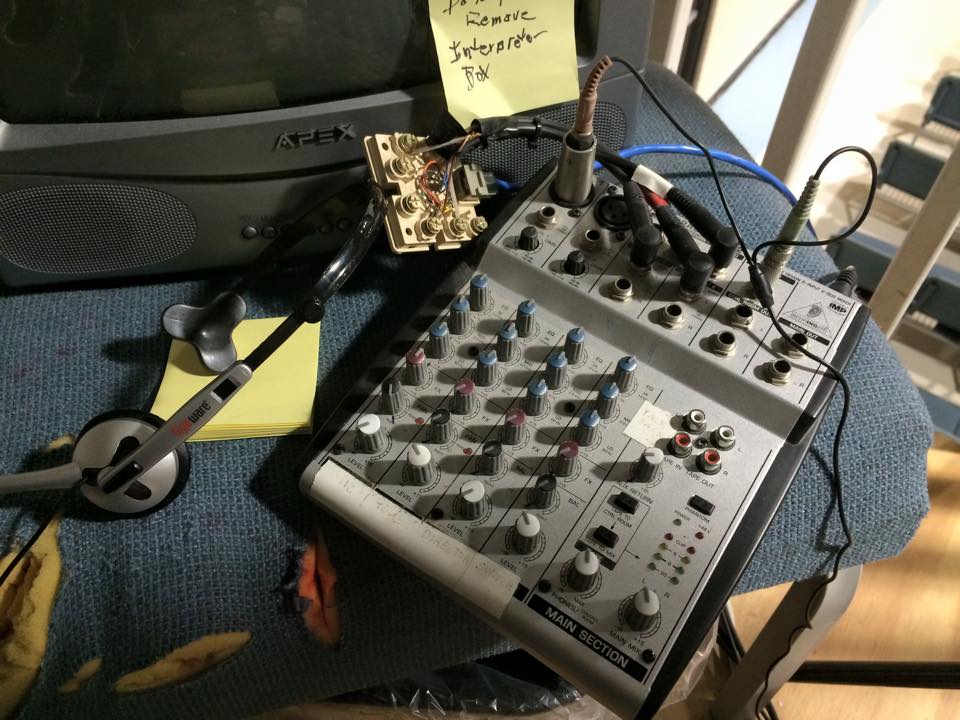
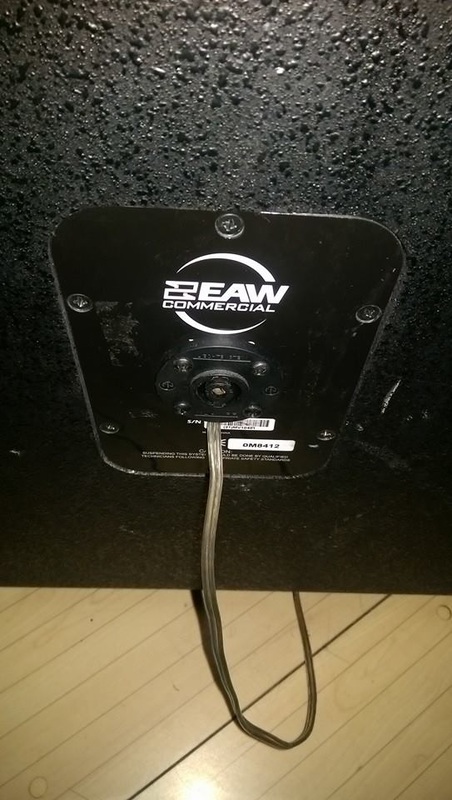
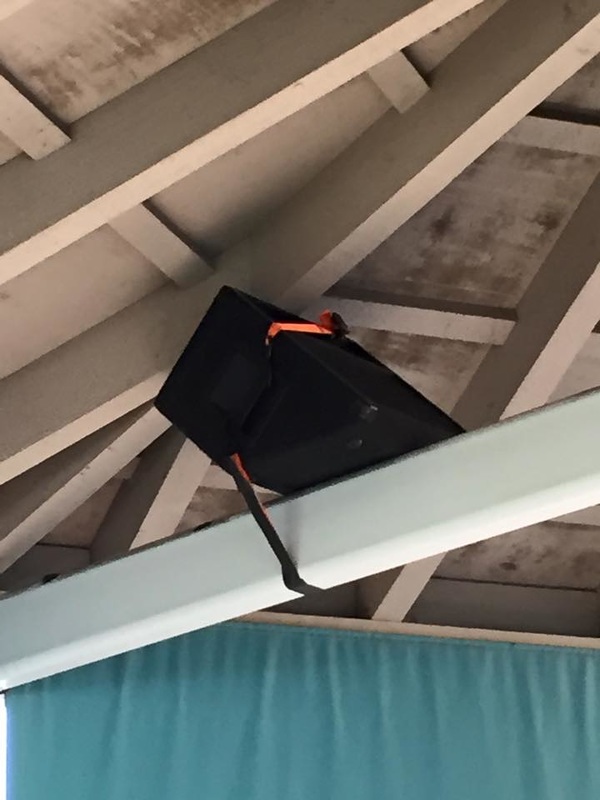
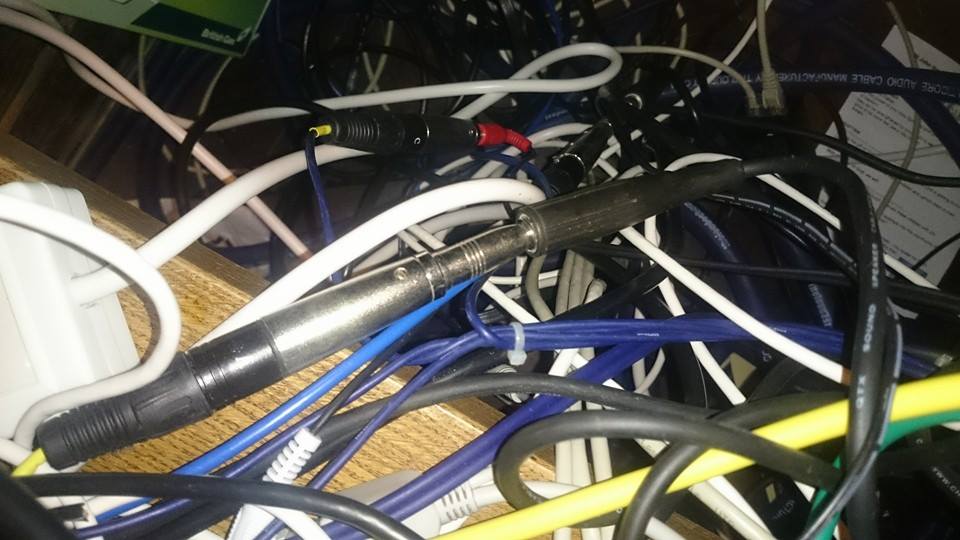
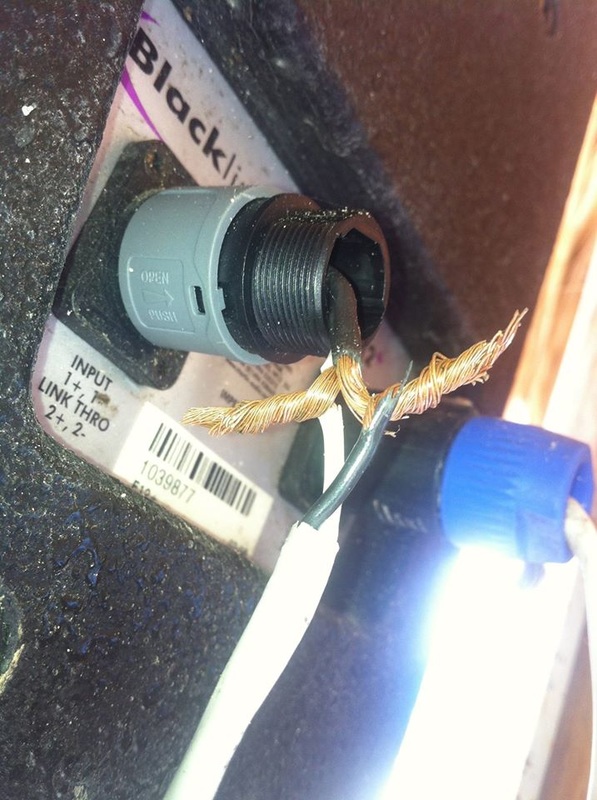
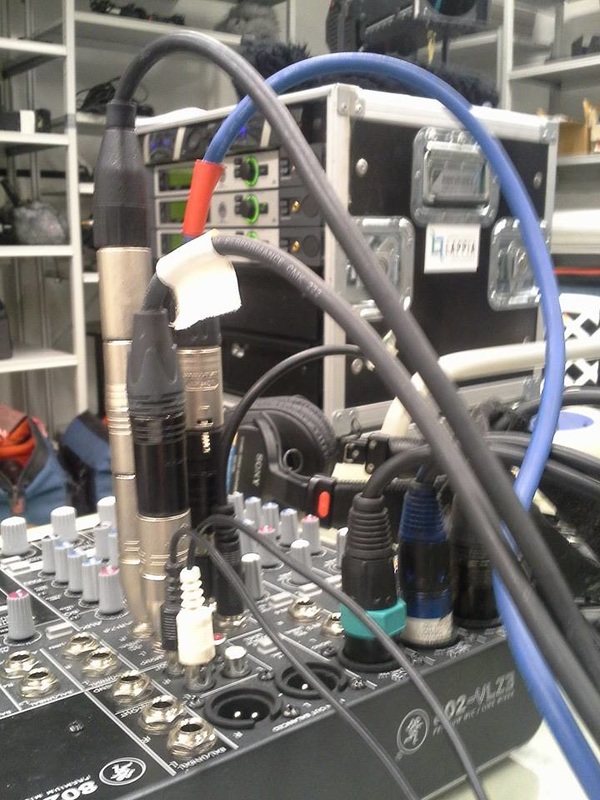
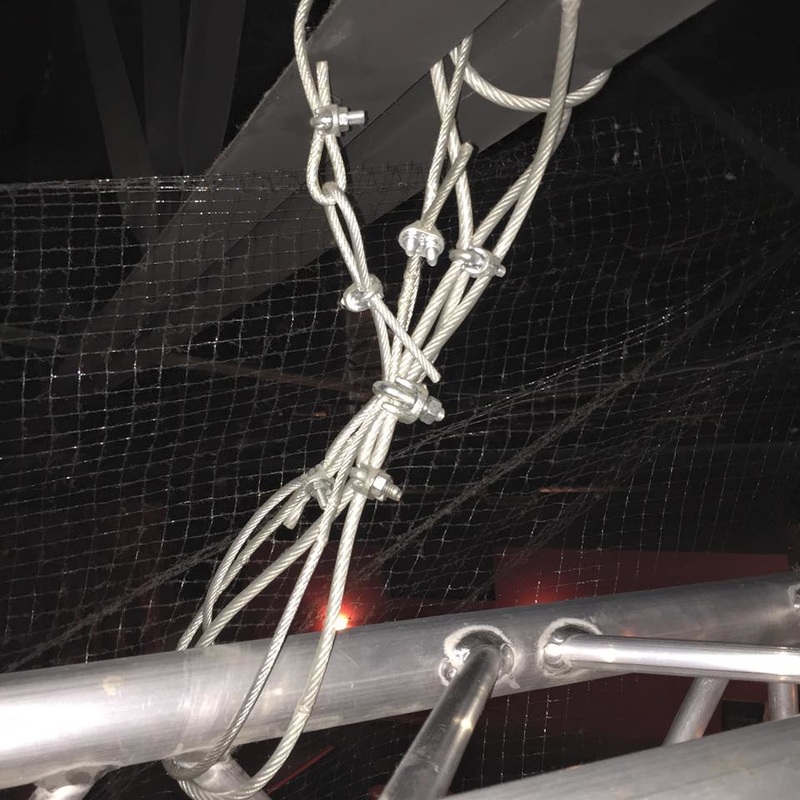
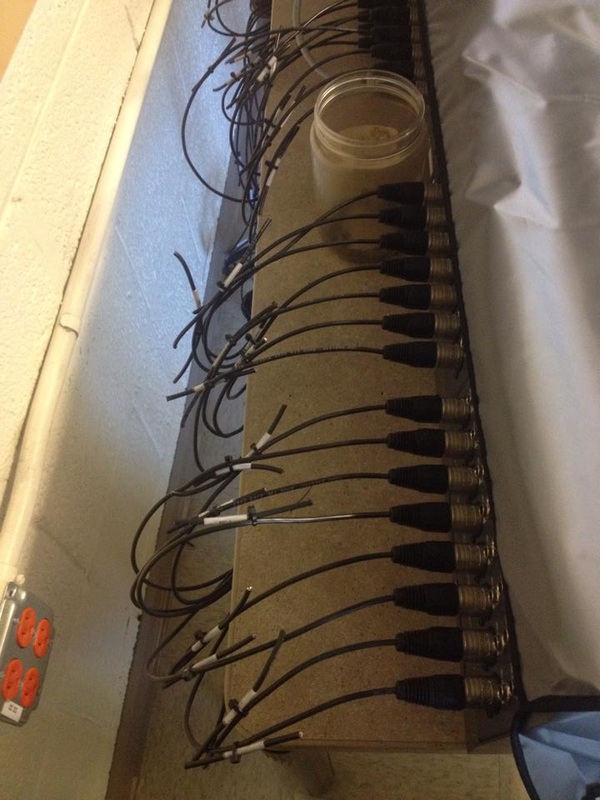
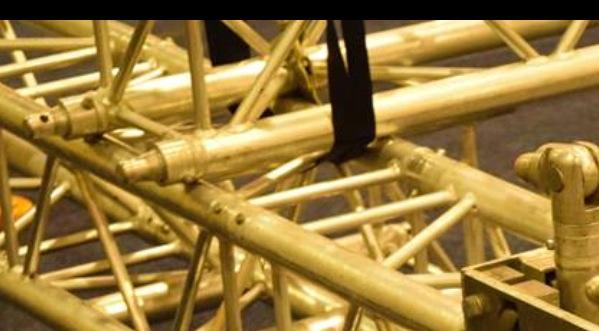
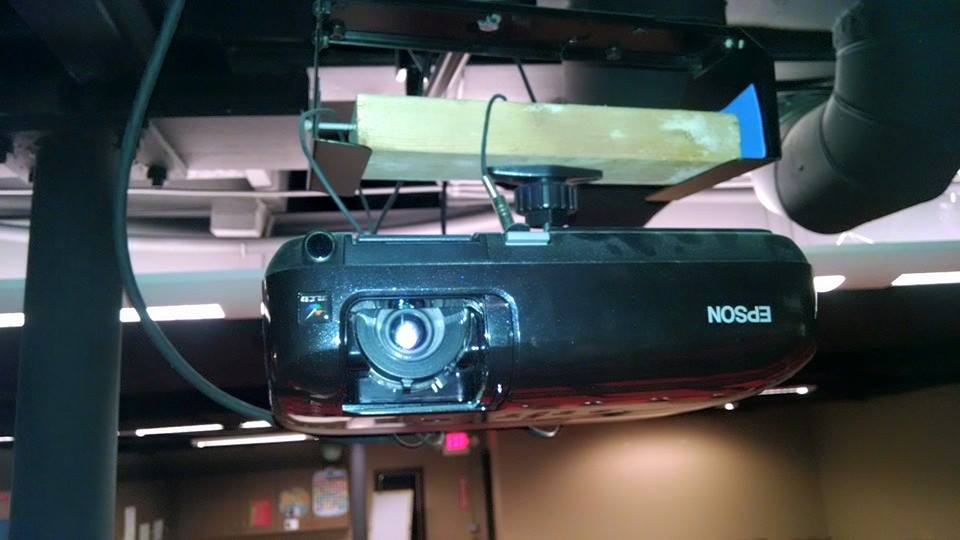
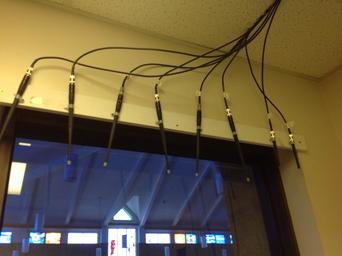
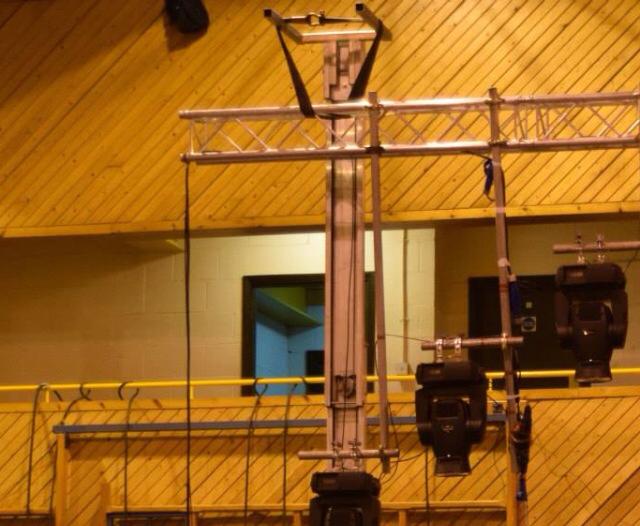
IN NO PARTICULAR ORDER (Stream of consciousness kind of stuff here folks): 1. Cut 400hz in the kick the drum (4db or greater), and then boost 400hz in the bass guitar around the same amount of db as you cut from the kick. Adjust from there. 2. Reverse the polarity of either the kick or bass (whichever sounds better). Meaning - the kick should be one polarity, and the bass should be the other. Allot of times this will get you what you need without doing anything else. 3. Add some distortion/overdrive to the bass guitar. Yes, that's right folks. A little (most of the time) is all you need. Just enough for a little hair, but more felt than heard. You may have an outboard effects processor that can do this, or you may have to use something like a Sansamp BassDriver. The BassDriver has a built-in overdrive circuit just for this purpose. EBS also makes an overdrive pedal for bass as well. 4. Change mic position of the kick drum. If the bass guitar is more boomy, then go to your kick drum & push your kick drum microphone deeper into the kick nearer the beater head. This will give it more "click," and will mostly give more separation between the two. Really, changing mic positions should be the first thing you do (or at least that's what most experienced engineers will tell you is the textbook thing to do), it's just that I forgot to put it in the Number 1 Spot! Ha! Most engineers are too lazy to actually leave the booth and would rather reach for the EQ (hence the number 1 spot above)! Zing! 5. Sometimes a little boost in the 100hz range on a bass guitar can really help too. This will give the bass guitar more of a "hard" sound that a kick drum will have a harder time reproducing (depending on the drum). This is not a rule. This could help or make it worse depending on the instruments. If you do this, you may boost around the 50-80hz range on the kick - so that as the kick is booming, the bass guitar is "thudding." Yes, "thudding" is a word because I just used it! Ha Ha ha... 6. Use compression on both (or just one) the kick drum and bass guitar. Vary the attack and release times for both within reason. Maybe a slower attack time for the kick than the bass guitar (or vice versa). You'll know when to stop when you hear it. This basically will let the initial transient through without compression and then clamp down, thus fooling the ear to give it more "punch" when you use some make up gain to equal the same amount you are actually compressing. So, if the threshold of your compressor is set to compress about 3-4 db on the gain reduction meter, then adjust the make-up gain to the same amount. Start at 20ms. on the attack, and adjust it from there. LET YOUR EARS BE YOUR GUIDE ( <<<< the best advice). 7. Change microphones (subscribe to learn about microphone types and placement, and unlock this link) on the kick drum (if you have another kick drum mic). Most churches will only have one kick drum mic, or none at all! Boooo. 8. Tell the bassist you need more high-end from his bass, because it is coming across as muddy (if this is the case). Allot of times, a bass guitar can just throw a ton of mud all over the mix. If you tell him/her that you need more "treble," they may be more resistant, than if you word it that you need more "high-end" because their bass guitar sounds like mud. "Hey bass dude, can you give me some more "high-end" because your bass sounds muddy." 9. Change out the bass guitar for a different one if you have it. 10. Parallel process your bass guitar or kick drum by multing a channel. 11. Use a drum trigger on your kick drum and blend in the triggered sample. Allot of times, this can make a really big difference in separating the kick drum from the bass. 12. Panning! If you are running a stereo mix (this can also be used in recording too), you can try panning the kick drum about 5% to the left, and then pan the bass guitar about 5% to the right. There are allot more techniques you can use to bring some separation between the kick drum and bass guitar in a mix, but the above tips should help you get there pretty quickly. One of these things may be all that you need to do; so stop when you get there, and move on to the next problem.  I get quite a few calls from churches that need me to come in and figure out what is going wrong with their sound system. It is usually one of two issues: 1. Operator Error - volunteers with no training; making poor decisions (like gain structure, making neat designs with graphic EQ controls, using the wrong cabling, etc). Kind of Like this: 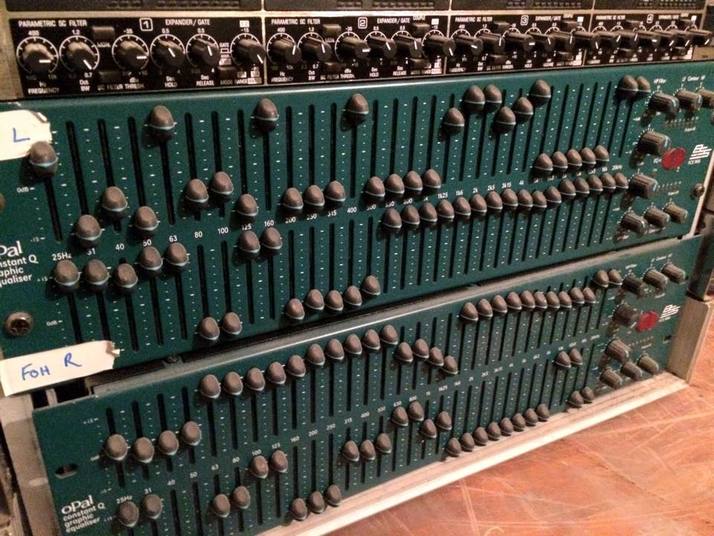 It would appear as if a 3 year old had some fun... 2. The Other Issue I Get a Call the Most About Are Band-Aids, Yup That's Right, Band-Aids - What I am referring to, are quick "fixes." A.K.A. Redneck Engineering. This is usually caused by a well-meaning volunteer not having the right cable at the time of a need, or perhaps they were trying to fix something at the last minute, and they just "made it work." There are times when every one of us will find ourselves in a pickle; where you just don't have what you need at the time. The problem is when we are satisfied with just making it work, but not making it right later. If you have to rig something up at the last minute, then fine, but go back and fix it as soon as you can. This will save you a headache later. Other band-aids include homemade speaker rigging (which can kill someone), projector mounts (the most common diy hack I have seen), multiple adapters connected together for signal cable patching, the wrong type of cabling used (like speaker cables for signal cables and signal cables used for speaker cables), etc... With that said, I now present to you, the wall of shame:
Photo Credits: The members of the AV Install Nightmares Facebook Group So, what is the solution? It's two fold. A. The most important advice I can give first, is about rigging. If you are not experienced and licensed at speaker rigging, don't do it! That's a good way for someone to get killed. I know of a church that did a DIY job on hanging speakers in the air, and a large speaker came down in the middle of a service, and killed an old lady by the stage. Not a good day. B. Learn how to solder if you don't know how to already. Have some bulk microphone, speaker, and instrument cable available with a plethora of different types of connectors ready to go. I would get at least 500 feet of microphone cable. It'll go allot quicker than what you think. My church keeps bulk cable available for use, and we went through almost 1000 ft. of it within 2 years. Here is a legit place that you can buy whatever you need: http://www.parts-express.com/cat/audio-connectors/59 I would purchase at least 6 of the following connectors (Neutrik makes a great connector, and would be the best brand to get - yes switchcraft is good, but the cable clutch system that Neutrik connectors offer, is superior in my opinion): XLR - Both male and female connectors 1/4" TRS Male - Yes, just male. This will force you to make the right cable, and not just an extension! 1/4" TS Male RCA Male 1/8" TRS Speakons - If you bi-amp, you'll need the 4 pin, and if you run full-range, you'll need 2 pin While you are at it, it's good to purchase some heatshrink. Then, once you get the materials you need, I would print this chart. It shows the wiring diagrams of different types of cables. You match the 2 connectors shown in the chart for the number given, and then scroll down to the corresponding number's wiring diagram. Super useful.
This page has some cool articles that might help as well! |
||||||||||||||||||||||||