MIXING 101 & BEYOND
This page is dedicated to helping you perfect your skill in mixing. There could be a whole website dedicated to this topic, but my goal is to hit the most important concepts to get your mixes tighter - quicker! Most of the concepts you need to learn are on other pages in this site - like: Microphone Choices, Microphone Placement, Equalization, Compression, Gain Structure, Interconnection, Cabling, the use of Effects, etc. This page will refer to those other pages, but will also include techniques particular to the art of mixing itself.
This page will be presented to you in 3 phases. The 1st phase deals with concepts regarding mixing before you even get to your console. The 2nd phase dives deeper into setting up a mix effectively once you are at your console, and the 3rd phase deals with general mixing concepts, but gets pretty deep into mixing techniques & tips. The 3rd phase sounds the coolest, but if you skip ahead, you'll miss the best information.
PHASE 1: MIXING FROM THE STAGE
What Is Mixing - Expand Your Thinking
There is a misunderstanding with today's modern audio engineers that mixing comprises of just what you do with your mixing console, and this is a really misguided way of viewing the art of mixing. The art of mixing first happens on stage with a variety of elements in order. Once that happens, you will already have a great mix that you are just perfecting once it reaches your mixing console.
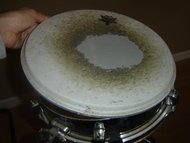 Oh yea baby, listen to the glorious thud...
A Great Mix Starts at the Source
If the instrument you are mixing already sounds terrible, what do you think it will sound like amplified? Terrible. Stop trying to polish turds and fix it at the source first. Do your drums have old drum heads on them from the 80's? Does the drummer know how to tune their instrument correctly? Is the guitarist playing through a guitar that has more points on it than the Milan Duomo through his death metal distortion pedal?
Are the instruments intonated and in good repair? Do your background singers actually know how to sing? Nothing is more important than having decent instruments and vocalists to mix. Granted, you may have little control over some of these situations, but try your best to improve what you can at the source first! Explore all of the options you may have to improve what's on stage. Don't just accept mediocre situations that can be resolved easily. An example of this, would be to put your drumset on a maintenance schedule for new heads every few months.
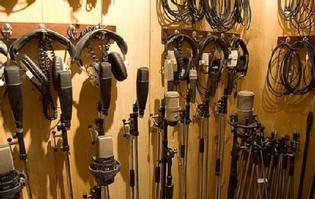
Choose the Right Microphone for the Right Source
This is a very important step in making sure you have a great mix. Are you voicing the microphone to the instrument? Are you thinking about how all of the elements will fit together as a whole while you are mic'ing them? You need to have a game plan as to what microphone would be an appropriate fit for the sound of the source. After time and experience, you will know the sound of every microphone in your arsenal, and what it is best suited for, and what it isn't. Knowing this type of information is extremely useful for voicing your mix before it even gets to you!
**Cool Tip Alert: Learn how to voice each channel before it gets to your console. This is called "making your job easier." For Example: Choose a darker dynamic microphone for your background vocals, and a brighter condenser microphone (like a Shure Beta 87) for your lead vocalist(s).
Really great engineers know how to set a mix on stage before they even get to the mixing console!
For Example: If you have two electric guitars with similar tones, perhaps you can choose a condenser microphone for one of them, and a ribbon microphone for the other. Or if you are low on funds, and only have two SM-57's (or similar) - you could mic one amp on axis and the other off-axis. You could also close mic one guitar amp, while coming out a little further from your other guitar amplifier with the other mic. You are essentially voicing the two guitars to fit better with one another; giving them their own sense of space in the mix. These are just a few random examples out of countless scenarios, but I mention them to get your mind moving in the right direction.
Really great engineers know how to set a mix on stage before they even get to the mixing console!
Mic Placement, Mic Placement, Mic Placement
I cannot stress the importance of knowing correct microphone placement for every instrument on stage. Learn how to place the mic to get what you need in your mix. Many engineers are too lazy in this respect. As long as the microphone is pointed in the general direction of what they are mic'ing, they are content to just EQ the instrument until "it's close enough." Get in the practice of changing the placement of the microphone to set the EQ of the instrument, rather than using your console to do it. Your mixes will ALWAYS sound better with knowing how to choose the correct microphone, and then placing it in the right spot on the instrument you are mic'ing. We have a full section that breaks down the mic placement of every instrument on stage here.
I cannot stress the importance of knowing correct microphone placement for every instrument on stage. Learn how to place the mic to get what you need in your mix. Many engineers are too lazy in this respect. As long as the microphone is pointed in the general direction of what they are mic'ing, they are content to just EQ the instrument until "it's close enough." Get in the practice of changing the placement of the microphone to set the EQ of the instrument, rather than using your console to do it. Your mixes will ALWAYS sound better with knowing how to choose the correct microphone, and then placing it in the right spot on the instrument you are mic'ing. We have a full section that breaks down the mic placement of every instrument on stage here.
Get in the practice of changing the placement of the microphone to set the EQ of the instrument, rather than using your console to do it.
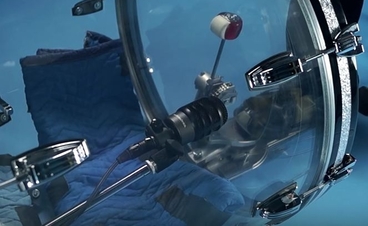
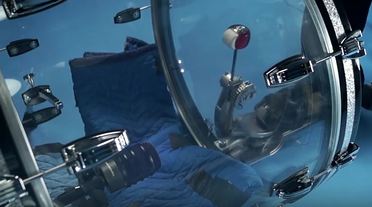
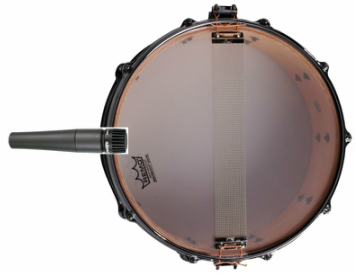
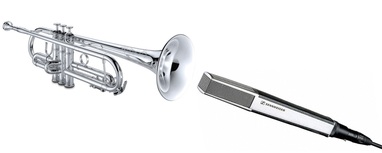
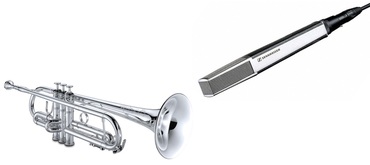
Believe it or not, moving the position of the microphone on the source just a few inches, can make a huge difference on how the instrument sounds. Any movement of the microphone in any direction can change the tone of the final product. Knowing this, an engineer can "voice" the sound of the instrument according to what he/she needs in a full band context.
Here are just a few of many examples:
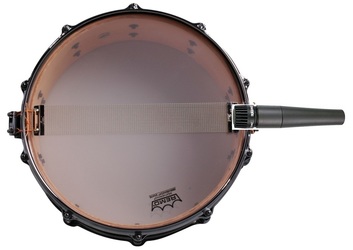
Here are just a few of many examples:
Tip Regarding Above: Make sure you reverse the polarity of the bottom snare microphone when using 2 mics (one on the top head, and one on the bottom head). This is because when hitting the snare, the top head is moving AWAY from the top microphone's diaphragm (not exactly- look up vibrational modes), while the bottom head is moving TOWARDS the bottom microphone's diaphragm. One microphone is experiencing longitudinal wave compression, while the other is experiencing rarefaction.
Note: There are rare occasions when reversing the polarity on the bottom microphone of a snare is not necessary. Older microphones may be wired where pin 3 of the XLR connector is "hot." Also, the bottom microphone may not be perpendicular with the bottom head. Let your ears be your guide on this. So how will you know? When adding the snare's bottom mic to your mix, does your snare get thin sounding? This would be a general indication that the polarity needs to be switched on the bottom mic.
Good Cabling
Make sure all of your cabling is in great shape, and you are using it correctly. Use only instrument cable for instruments, and speaker cable for non-powered speakers. Make sure every instrument cable is as short as possible for the best tone, but where the musician can still play comfortably. The longer the cable, the more affect it can have on the tone of the instrument. If you have to have a longer cable for an instrument, or you have quite a few pedals on a pedalboard, it may be time to invest in a boost or buffer to make sure you have the purest tone pushed to the instrument's amplifier. If at all possible, make sure you are running balanced cable for all audio feeds and runs to and from the console. Don't run audio cable parallel more than 3 ft. with power cables.
Make sure all of your cabling is in great shape, and you are using it correctly. Use only instrument cable for instruments, and speaker cable for non-powered speakers. Make sure every instrument cable is as short as possible for the best tone, but where the musician can still play comfortably. The longer the cable, the more affect it can have on the tone of the instrument. If you have to have a longer cable for an instrument, or you have quite a few pedals on a pedalboard, it may be time to invest in a boost or buffer to make sure you have the purest tone pushed to the instrument's amplifier. If at all possible, make sure you are running balanced cable for all audio feeds and runs to and from the console. Don't run audio cable parallel more than 3 ft. with power cables.
We all want cleaner and better mixes as engineers. So many times we focus on things like EQ, Compression, Mic Placement, etc...but one of the most overlooked facets of the mixing equation, is good cabling, and the proper installation of it. Here are some quick rules to follow:
Purchase Good Quality Cabling
This is one of the biggest issues I see time and time again. Cables are not all equal. So many issues can be resolved in a sound system if quality cabling was purchased from the very beginning. What happens, is that someone will buy the cheapest cable they can find, and then they will have to replace that cable with another cheap cable over and over. You will save money in the long run if you buy quality cabling the first time. Buy it right, and you'll only buy it once!
A. Brand
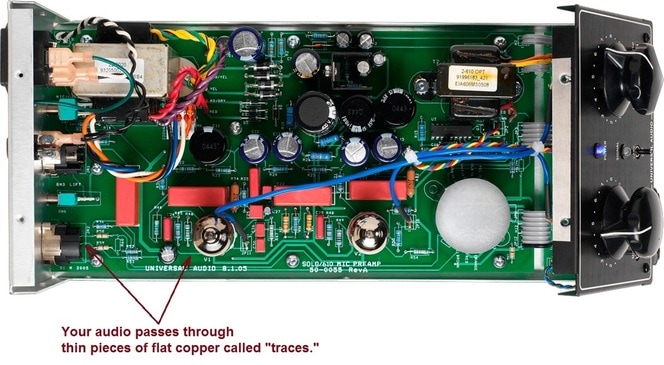
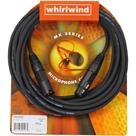
Yes, typically the brand of the cable is an instant indicator as to what you are buying. Some of these great brands include (in no particular order): Whirlwind, ProCo, & Conquest. Avoid super expensive brands, and brands with a ton of hype. You need reliability more than you need gold connectors with nitrogen infused super fairy dust leprechaun awesome sparkled copper. You are just wasting your money to make yourself feel better when you buy those "super-duper" cables because your audio will eventually pass through the cheapest & thinnest copper anyway:
And not only that, but the audio also passes through very thin & plain metal "legs" attached to components. For instance, check out this picture of one of THE most iconic microphone preamps in the world (the Neve 1073):
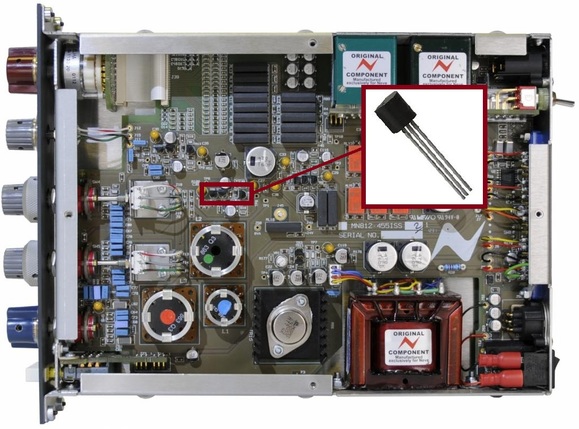
This component shown above (a transistor), is just one example of hundreds that occur in most any piece of audio equipment. Note that the legs on this transistor are not made of super expensive "treated" copper or anything else goofy. The audio that passed through your overly expensive mic cable, also passes through a ton of electronic components just like the one above.
B. Build
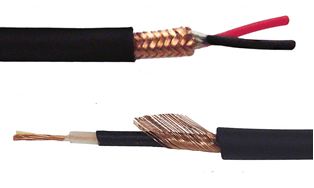
You want a cable with a braided shield (not twisted) as shown below:
You also want to open up the cable and have a look inside (if possible) to see if the cabling has been pre-tinned before it was soldered to the connector. What this means, is that whoever assembled the cable, flowed each conductor with solder all the way up to the plug. This keeps the conductors from slowly unraveling, breaking, and shorting out. When you look at the cable, each conductor should have a silver sheen. There should be no bare copper by the plug whatsoever.
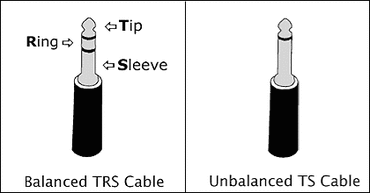
When running a 1/4" signal cable (like what you'd find running from your console to outboard processors), make sure they are Tip Ring Sleeve (TRS), balanced cables. Always run balanced cables when at all possible for connecting audio devices. A balanced cable will help you keep RF energy & hum out more effectively, than a regular unbalanced TS cable - and at much greater distances as well!
Only use a speaker cable for connecting a non-powered speaker cabinet to an amplifier. Most cables will be labeled as to what they are used for on the outside rubber/plastic jacket. If you are getting a Mexican heavy metal station coming through your instrument amplifier, it may be a good time to see if you are running a speaker cable in place of an instrument cable. If so, switch it out for a shielded instrument cable instead.
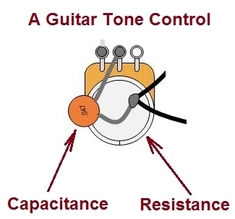
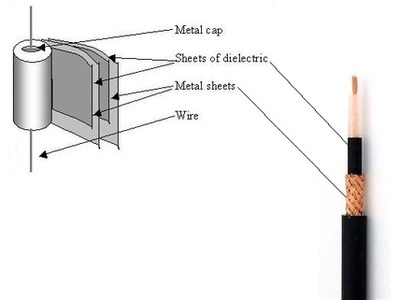
Only use an instrument cable for connecting an instrument to an amplifier. Make sure they are as short as possible to keep capacitance down. The more capacitance in a cable, the duller the tone. It's similar to turning down a tone control, like what you'd find on a guitar or bass when you run really long instrument cables. The longer the cable, the more dull your tone.
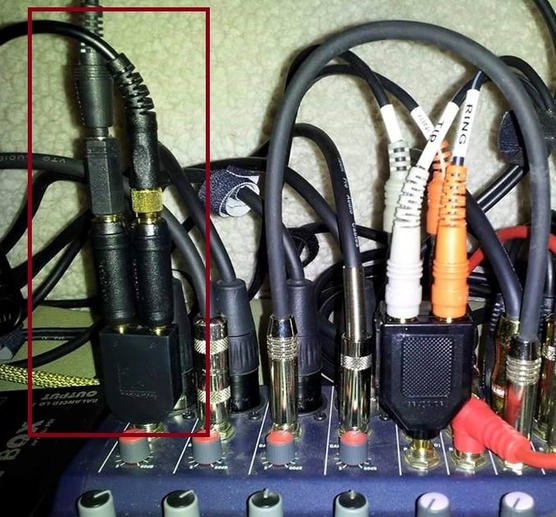
C. Stop using adapters for connections!
Build or buy the appropriate cable to make the connection instead!
Stage Monitoring
Wedges
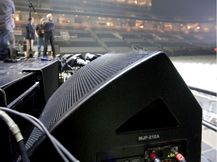
If you are running wedges for your monitoring system, and there's no separate monitoring engineer, run up to the stage pre-service while they are playing, and find out for yourself what the musicians are hearing. Ask them if they need anything else in their monitors that they aren't hearing, or hearing too much of. If the musicians on-stage are having a hard time hearing what they need, it can really affect how they play, and what they play. This in turn, can have a great affect on your mix because they aren't playing to their greatest potential.
In-Ears
This concept of hearing what the musicians are hearing is advisable for in-ear monitoring systems as well. Keep a station by your mixing console just to quickly check what the musicians are hearing. I have seen issues in in-ear monitoring systems regarding gain structure not being set correctly, and a lot of what you hear is "crunchy" because channels have too much gain, and are clipping.
Other Things To Consider

Know Your Craft
A while back I had a church contact me to help them find someone that they could hire to be their audio engineer. We put out the advertisement, and we had quite a few people respond. One of my tasks in helping them find the right person, was to ask potential candidates questions (some very basic) to see what they knew, and what they didn't know about audio. To my surprise, everyone called themselves "engineers," but most of them didn't know the most basic knowledge about running sound! During the interview, I would ask them questions like "What is a graphic EQ?" Or, "What does a compressor do?" If they got past the basic questions, I started asking them things like: "Describe to me what the threshold, attack, release, and ratio controls do on a compressor." Everyone failed to answer except one dude that stumbled through it, and guessed (to his credit he was honest in saying that he was just guessing) what the attack and release controls did, and after that, didn't know anything else. No basic EQ knowledge. Wasn't for sure the difference between balanced and unbalanced audio cables. Wasn't even for sure what the frequency range of human hearing was. Nothing. After a while of interviewing candidate after candidate, I was just praying for anyone that had the most basic knowledge so that we could hire someone (and then train them on the rest later). We finally just gave up.
You might have been called into running FOH because there was no else to do it, and you are faithful and show up on time (which anyone who has been a pastor knows, is half the battle). If I was in that situation, I would learn everything I possibly could in audio so that I could be the best I could be.

Acoustics
What does your room sound like? You may have to set up temporarily in a rough room like a gymnasium that doesn't belong to your church, and in that regard, you can be in a difficult situation because you have very little control over your acoustic space. This is called a "bummer," and all you can do, is do the best you can. If you happen to be in your own building though, and your sanctuary is very reverberant, it may be time to acoustically treat your space. If you have this professionally done, it can cost a pretty penny no doubt. If you have the budget for it, I'd say go for it. Just make sure you have a reputable acoustician to do the work. Now, if your congregation is low on funds, you can acoustically treat your sanctuary yourself just by having some basic acoustics & construction knowledge. I can see all of the bulging eyeballs of old cranky engineers everywhere rolling, but it's really not a black art where magic fairies from a far distant land impart sparkly knowledge dust on the brains of an elite few. Can you do it wrong? Of course you can, but you can also learn how to do it right! Case in point: I just worked with a church here in town that had a nightmare situation in the sanctuary they were in. There was so much room verb going on, there was hardly any definition whatsoever. With a little imparted know-how and some time, they treated their own room with the help of some carpenters in their church, and the difference was night & day!
What does your room sound like? You may have to set up temporarily in a rough room like a gymnasium that doesn't belong to your church, and in that regard, you can be in a difficult situation because you have very little control over your acoustic space. This is called a "bummer," and all you can do, is do the best you can. If you happen to be in your own building though, and your sanctuary is very reverberant, it may be time to acoustically treat your space. If you have this professionally done, it can cost a pretty penny no doubt. If you have the budget for it, I'd say go for it. Just make sure you have a reputable acoustician to do the work. Now, if your congregation is low on funds, you can acoustically treat your sanctuary yourself just by having some basic acoustics & construction knowledge. I can see all of the bulging eyeballs of old cranky engineers everywhere rolling, but it's really not a black art where magic fairies from a far distant land impart sparkly knowledge dust on the brains of an elite few. Can you do it wrong? Of course you can, but you can also learn how to do it right! Case in point: I just worked with a church here in town that had a nightmare situation in the sanctuary they were in. There was so much room verb going on, there was hardly any definition whatsoever. With a little imparted know-how and some time, they treated their own room with the help of some carpenters in their church, and the difference was night & day!
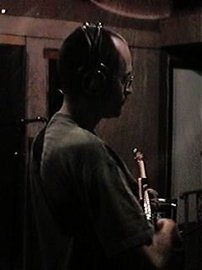 Yours Truly: Circa 2000 laying down some guitar tracks
Musicians
If the person behind the voice or instrument isn't bringing their "A game" with a good skillset at their disposal, your mix can suffer. I've seen drummers that couldn't hit the snare in the same spot if their life depended on it. Or the bassist that is so inconsistent, it is an absolute chore to get any type of foundation in the rhythm section going. This is a hard topic because these are people with real feelings and insecurities. Truly great audio engineers are the ones whom can bring out the best performance from the musicians on stage, and the performers hardly ever knew that the engineer had been coaching them the whole time! People skills are one of the most basic foundational skills an audio engineer has to possess! You have to learn how to say certain things gently to get what you need. For instance, if you have a bassist whose bass sounds really muddy, the wrong thing would be to say, "Hey dude, that bass sounds horrible. Can you make it more trebley because it sounds like a big muffled mess." A better thing to say would be, "Hey dude, that bass sounds really huge! Would it be OK if you could give me some more high-end to give it a little more definition, because I don't want to lose you in the mix."
If the person behind the voice or instrument isn't bringing their "A game" with a good skillset at their disposal, your mix can suffer. I've seen drummers that couldn't hit the snare in the same spot if their life depended on it. Or the bassist that is so inconsistent, it is an absolute chore to get any type of foundation in the rhythm section going. This is a hard topic because these are people with real feelings and insecurities. Truly great audio engineers are the ones whom can bring out the best performance from the musicians on stage, and the performers hardly ever knew that the engineer had been coaching them the whole time! People skills are one of the most basic foundational skills an audio engineer has to possess! You have to learn how to say certain things gently to get what you need. For instance, if you have a bassist whose bass sounds really muddy, the wrong thing would be to say, "Hey dude, that bass sounds horrible. Can you make it more trebley because it sounds like a big muffled mess." A better thing to say would be, "Hey dude, that bass sounds really huge! Would it be OK if you could give me some more high-end to give it a little more definition, because I don't want to lose you in the mix."

Vision
Meet with the worship leader & pastor to find out what their vision is for the songs and service every time before they get on stage. Find out the intricacies of each song and the message. Read the lyrics and ask yourself, "Is there anything I can do with what I have to help the band communicate the message of this song any clearer?" Is there a guitar solo in the mix? Which vocalist is singing each song (if more than one). Effects choices. Instrument changes. Videos & Announcements. Be excellent in your communication. I have a friend that says "excellence creates an atmosphere of peace." I would like to slightly tweak that quote and say that "excellence and preparation creates an atmosphere of peace;" especially in regards to running sound.
Meet with the worship leader & pastor to find out what their vision is for the songs and service every time before they get on stage. Find out the intricacies of each song and the message. Read the lyrics and ask yourself, "Is there anything I can do with what I have to help the band communicate the message of this song any clearer?" Is there a guitar solo in the mix? Which vocalist is singing each song (if more than one). Effects choices. Instrument changes. Videos & Announcements. Be excellent in your communication. I have a friend that says "excellence creates an atmosphere of peace." I would like to slightly tweak that quote and say that "excellence and preparation creates an atmosphere of peace;" especially in regards to running sound.
PHASE 2: THE ART OF MIXING

In the year 1632, the emperor Shah Jahan built a massive & beautiful tomb in memory of his late wife Mumtaz Mahal. This massive mausoleum is known as the Taj Majal - one of the most beautiful buildings in the world. A story goes, that during the construction of it (which took several years), the emperor became totally obsessed with the details of the building phase. One day while he was visiting the building site, he accidentally tripped over a wooden box and ordered it to be thrown out of the area. To his surprise, it contained the body of his beloved late wife for whom he was building the Taj Mahal for!
Sometimes we can be so focused on the details of what we are doing and how we are doing it, that we miss the big picture. I have found this truth to be relevant in live sound. Is our primary focus on the technology, or the mix? Are we too caught up in the details that we are missing the big picture of what is happening in the moment? Are our eyes focused on a screen, or are our ears focused on the music?
Sometimes we can be so focused on the details of what we are doing and how we are doing it, that we miss the big picture. I have found this truth to be relevant in live sound. Is our primary focus on the technology, or the mix? Are we too caught up in the details that we are missing the big picture of what is happening in the moment? Are our eyes focused on a screen, or are our ears focused on the music?
Gear, Gear, and, More Gear
Have you ever noticed that there's more gear than ever available to purchase, and while all of this is cool and nice, the mix doesn't necessarily get any better? Technology should NEVER get in the way of what you are doing as an engineer. It should just be a vehicle to the destination. If you find yourself staring at a screen most of the time during the set, there's something wrong there. Great engineers "play" their consoles with the band. You have to get to the point where you are mixing by instinct, rather than laboring heavy over all of the details.
If I were to ask you a multiple choice question about what the most important piece of gear you have as an audio engineer, what would you choose out of these options:
a. The mixing console?
b. The speakers?
c. The microphones?
d. The outboard gear (i.e. compressors, eq's, effects)?
e. None of the Above
And The Answer Is:
So up until this point, I have spent the last 9 months writing a lot of training material - tirelessly getting you ready to read what is down below this paragraph. I have poured over all of the other articles on this site on numerous occasions, and refining it on a consistent basis (I'm continually doing this) to get you to the point of where you are currently. Do you have a thorough grasp on equalization, compression, microphone choice, microphone placement, cabling & interconnection, gain structure, signal flow, etc? If you have skipped everything else, and are reading this first, you are doing yourself no favor. It's kind of like reading the ending of the book before you've read how it even got there in the first place. The joy is in the journey, and reading how to mix first is like building a house with no foundation. Kind of like the "wax on wax off" scene in the first Karate Kid. Hay Yaaawww!
Implement A Pre-Mixing Routine
It Could Look Like This. This will save you a ton of heartache and stress.
Then Develop a Mixing Routine Like This:
Set the Gain Structure of all of your channels and equipment while the full band is playing. Setting up your system to unity gain is an incredibly important first step in mixing cleanly, and saving yourself some stress later.
Enable the HPF function for all channels that has an instrument that does not extend to the lower end of the frequency spectrum. This could include: Vocals, Guitars, Snare Drum, Hi-hat, etc. Enabling the High Pass Filter on vocals will get rid of a lot of handling noise & plosives. Enabling a High Pass filter for a snare drum will impede low end frequency content from the neighboring kick drum bleeding into the snare channel. I have had numerous occasions where other engineers have approached me to say that my mixes are some of the "cleanest" they have ever heard. Correctly setting the gain structure of my equipment, and the use of the high pass filter on non-bass type instruments has a lot to do with this.
Now that you have set the gain structure of your system, and have enacted the HPF filter as mentioned above, now it is time to rough in the mix; starting with the volume of each channel. Start with the kick, snare, bass guitar, & lead vocals (more on this later). Then blend in the other instruments and BGV's. Note: Some engineers prefer bringing up the lead vocal first, and then blending in the rhythm section and other instruments around it. Find what works for you. While you are at it, you can also set up your sub-groups to make your life easier in the heat of a mix.
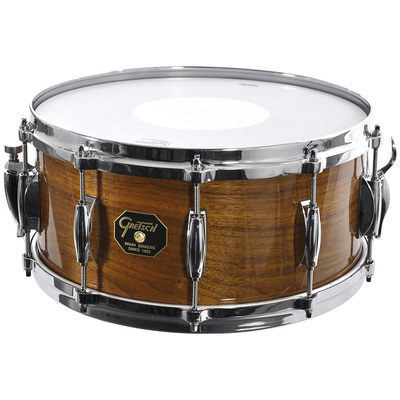
While the band is playing, check the tone of every instrument; roughing in the EQ of each channel until you've worked your way through the entire band. Work quickly and don't spend too much time on one instrument. Don't bother just working on one instrument while the rest of the band waits, unless there is a serious issue you are trying to resolve sonically (the only exception to this is can be acoustic guitar). Most of the time, these can be resolved by changing the microphone, the microphone position, or the instrument. Let's say that you have an issue with the snare drum ringing like mad. Don't spend any time trying to notch it out with an EQ. Total waste of time. The drummer needs to re-tune his/her drum, or tweak it out by head tension adjustments on the top or bottom head, or with moon gels, a wallet, tape, or whatever the drummer prefers that will get the job done. Any decent drummer should be able to adjust out any {{ring}} very quickly.
The Audience Will Hear Instruments In A Full Band Context
Spending tons of time on every instrument separately; trying to get each one to sound as big as possible, is a mistake. What do you think will happen once you blend all of these HUGE sounding instruments together once the full band is playing? Rather than making each instrument sound as big as possible, make them sound as natural as possible. Try to make the sound of the instrument coming out of your speakers, what it would sound like if you were standing right in front of it unamplified.
Spending tons of time on every instrument separately; trying to get each one to sound as big as possible, is a mistake. What do you think will happen once you blend all of these HUGE sounding instruments together once the full band is playing? Rather than making each instrument sound as big as possible, make them sound as natural as possible. Try to make the sound of the instrument coming out of your speakers, what it would sound like if you were standing right in front of it unamplified.
Rather than making each instrument sound as big as possible, make them sound as natural as possible. Try to make the sound of the instrument coming out of your speakers, what it would sound like if you were standing right in front of it unamplified.
Hey Guys, Spread Out!
Remember that one of your goals during a sound check, is for every instrument to have its own sense of space. This really is a two part process. Their Part: Each member of the band has to be cognizant of their own spot in the frequency spectrum. The worst thing in the world is to have multiple guitarists, a keyboardist, a piano player, and about 10 vocals all in the same spot sonically. Really great worship bands will know this instinctively, and will adjust their parts throughout the set. Your Part: You may have to coach them to spread out sonically so that you can get a better mix.
Remember that one of your goals during a sound check, is for every instrument to have its own sense of space. This really is a two part process. Their Part: Each member of the band has to be cognizant of their own spot in the frequency spectrum. The worst thing in the world is to have multiple guitarists, a keyboardist, a piano player, and about 10 vocals all in the same spot sonically. Really great worship bands will know this instinctively, and will adjust their parts throughout the set. Your Part: You may have to coach them to spread out sonically so that you can get a better mix.
What is Sound Localization?
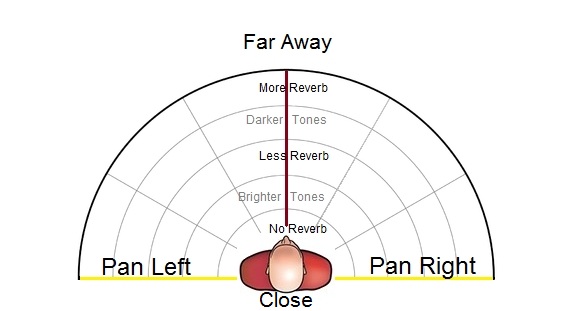
In a nutshell, it's just the fact that your brain - even though sound travels down the same 2 fixed ear canals, can localize where the source of a sound is located. This means that if something behind you, & to the right makes a sound, you can perceive its location. Sound localization is an awesome gift God has given us as engineers, because we can shift sounds in the soundstage; which gives us an extreme amount of options when mixing. The ability to put each instrument and voice in its own place (as you can imagine), is a powerful tool in creating dense and rich mixes.
In a nutshell, it's just the fact that your brain - even though sound travels down the same 2 fixed ear canals, can localize where the source of a sound is located. This means that if something behind you, & to the right makes a sound, you can perceive its location. Sound localization is an awesome gift God has given us as engineers, because we can shift sounds in the soundstage; which gives us an extreme amount of options when mixing. The ability to put each instrument and voice in its own place (as you can imagine), is a powerful tool in creating dense and rich mixes.
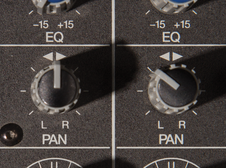
Using Panning to Move An Instrument
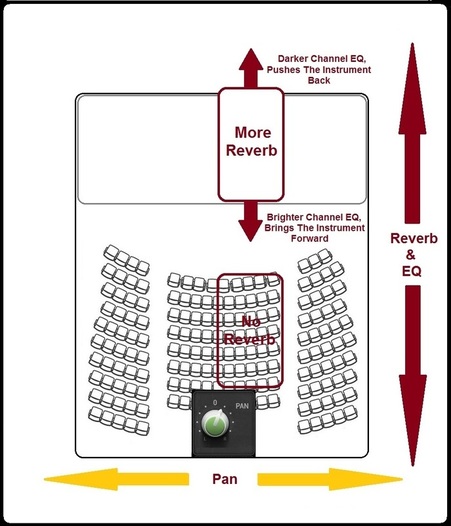
If running a live sound system in stereo (this is not always preferable), you can also use the Pan Knob to place different instruments in their own space. One technique, is to use the actual musician's place on stage to dictate where you pan the instrument. This doesn't always work (like if a bassist is way off on one side, or the drums are on a particular side), but it can still be used for vocals, guitars, etc. This imparts a degree of realism; allowing the brain to line up sonically what the eyes of the audience are seeing. You can also use panning for stereo-based instruments - like a keyboard for example. The left channel can be panned far left, and the right channel can be panned far right. This opens a hole in the middle of the stereo image for the most important elements of a mix to reside. This is especially cool for drum overheads, drum machines, piano, a Leslie cabinet, etc. Important elements to keep in the middle (traditionally), would be Kick, Snare, Bass, and Vocals. Because Kick and Bass take up similar frequency areas, a kick can be panned slightly to the left (up to 10%), while the bass guitar can be panned slightly to the right. This can also be done with snare and lead vocals as well so that they don't end up stepping on one another.
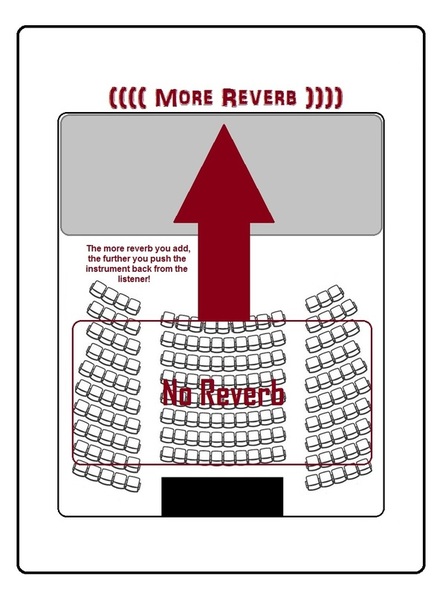
Using Reverb To Move An Instrument
If you want to push something back, use reverb. The more reverb, the further back you are pushing the instrument.
If You Have An Analog Console: When running your reverb from an aux on your console, to your effects processor, and then back to an open channel, you give yourself a ton of options sonically - like quickly EQ'ing reverb returns. Remember, your ears are used to sounds that are absorbed in a room by absorbent materials. Taking some treble content out of your reverb returns will give a greater degree of realism for reverbs in your mix. The same technique can be applied if your reverb processor has a "High Cut" control - and indeed this is the very purpose why it is included. This will help a track sit in a mix more effectively.
**Cool Tip Alert - Pre-Delay is Your Friend:
**Cool Tip Alert - Pre-Delay is Your Friend:
If you look closely at your reverb processor in your rack (or digital console), you will notice that there is a control called "Pre-Delay." Pre-delay on a reverb is an extremely useful control for tweaking how fast or slow the onset of reverb happens. If you find that the reverb you are using smears too much of the image of your instrument, thus losing definition, you can tell your reverb to wait a few moments before actually kicking in and being heard. This will allow the initial transient of the sound source to come through, and then the reverb will start...thus preserving the clarity of your instrument, but having the sweetness of verb as well. A good place to start is anywhere from the 30ms - 100ms. What's even cooler, is that you can actually time your reverb pre-delay to be in rhythm with the song. 60,000 divided by beats per minute = delay time. Half it. Quarter it. Etc Etc Etc. There are also delay charts you can download online as well to help you derive your calculations quicker. This chart can be useful for lining up any reverb or delay effects if you don't have a tap tempo option available on the processor. Remember, sound travels at about 1 foot per millisecond. Now, if you want the reverb to behave more naturally and as if there are walls - let's say around 100 feet from the sound source, then you can hard set your pre-delay to 100 ms. This in turn will make the reverb behave as what you might hear in a real situation...where the sound wave will travel 100 feet before it bounces back and the onset of reverb happens.
Using Equalization To Move An Instrument
To bring an instrument forward in the mix, you can make it brighter with EQ. To bring the instrument back in the mix, you can make it darker with EQ. This can be used on an instrument's channel, or you may also use EQ on a reverb return to fine tune perceived ambiance.
To bring an instrument forward in the mix, you can make it brighter with EQ. To bring the instrument back in the mix, you can make it darker with EQ. This can be used on an instrument's channel, or you may also use EQ on a reverb return to fine tune perceived ambiance.
PHASE 3: PUTTING IT ALL TOGETHER
Make Sure You Can Always Hear These 4 Main Elements In Every Mix
Always make sure these 4 elements are always heard, and you are halfway there to a great mix. Once you have these going, bring up the other instruments to support your 4 main elements.
Getting Separation Between Instruments
Many times when mixing, you will notice that there are instruments that take up close to the same frequency range. This can be a problem because they can "step" on one another, and getting any clarity and definition for each can be a challenge. This is just part of the game, but with a little know-how, you can overcome this type of situation pretty easily. Let's take the kick drum and bass guitar for instance. These two instruments are "infamous" for competing for the same audible space in a mix. It could only take just a couple of the following techniques to resolve the situation, but to get your mind fully wrapped around this concept, I am going to leave you a lot of options:
In No Particular Order:
1. Cut 400hz in the kick the drum (4db or greater), and then boost 400hz in the bass guitar around the same amount of db as you cut from the kick. Adjust from there.
2. Reverse the polarity of either the kick or bass (whichever sounds better). Meaning - the kick should be one polarity, and the bass should be the other. A lot of times this will get you what you need without doing anything else.
3. Add some distortion/overdrive to the bass guitar. Yes, that's right folks. A little (most of the time) is all you need. Just enough for a little hair, but more felt than heard. You may have an outboard effects processor that can do this, or you may have to use something like a Sansamp BassDriver. The BassDriver has a built-in overdrive circuit just for this purpose. EBS also makes an overdrive pedal for bass as well.
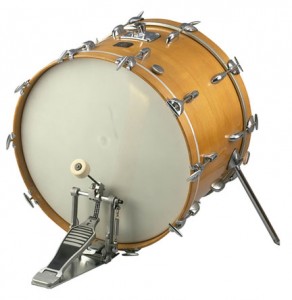
4. Change mic position of the kick drum. If the bass guitar is more boomy, then go to your kick drum & push your kick drum microphone deeper into the kick nearer the beater head. This will give it more "click," and will mostly give more separation between the two. Really, changing mic positions should be the first thing you do (or at least that's what most experienced engineers will tell you is the textbook thing to do), it's just that I forgot to put it in the Number 1 Spot! Ha! Most engineers are too lazy to actually leave the booth and would rather reach for the EQ (hence the number 1 spot above)! Zing!
5. Sometimes a little boost in the 100hz range on a bass guitar can really help too. This will give the bass guitar more of a "hard" sound that a kick drum will have a harder time reproducing (depending on the drum). This is not a rule. This could help or make it worse depending on the instruments. If you do this, you may boost around the 50-80hz range on the kick - so that as the kick is booming, the bass guitar is "thudding." Yes, "thudding" is a word because I just used it! Ha Ha ha...
6. Use compression on both (or just one) the kick drum and bass guitar. Vary the attack and release times for both within reason. Maybe a slower attack time for the kick than the bass guitar (or vice versa). You'll know when to stop when you hear it. This basically will let the initial transient through without compression and then clamp down, thus fooling the ear to give it more "punch" when you use some make up gain to equal the same amount you are actually compressing. So, if the threshold of your compressor is set to compress about 3-4 db on the gain reduction meter, then adjust the make-up gain to the same amount. Start at 20ms. on the attack, and adjust it from there. LET YOUR EARS BE YOUR GUIDE ( <<<< the best advice).
7. Change microphones on the kick drum (if you have another kick drum mic). Most churches will only have one kick drum mic, or none at all! Boooo.
8. Tell the bassist you need more high-end from his bass, because it is coming across as muddy (if this is the case). A lot of times, a bass guitar can just throw a ton of mud all over the mix. If you tell him/her that you need more "treble," they may be more resistant, than if you word it that you need more "high-end" because their bass guitar sounds like mud. "Hey bass dude, can you give me some more "high-end" because your bass sounds muddy."
9. Change out the bass guitar for a different one if you have it.
10. Parallel process your bass guitar or kick drum by multing a channel.
11. Use a drum trigger on your kick drum and blend in the triggered sample. A lot of times, this can make a really big difference in separating the kick drum from the bass.
12. Panning! If you are running a stereo mix (this can also be used in recording too), you can try panning the kick drum about 5% to the left, and then pan the bass guitar about 5% to the right.
13. If you are having a hard time getting any attack from the kick drum, you may find that the kick drum beater may be made out of felt. Switch it out for hard plastic or wood to increase the amount of "click" with each hit.
There are a lot more techniques you can use to bring some separation between the kick drum and bass guitar in a mix, but the above tips should help you get there pretty quickly. One of these things may be all that you need to do; so stop when you get there, and move on to the next problem.
The same type of concepts as listed above can be used for other instruments as well. Obviously the above techniques are for low end instruments, but the point is that you don't have to settle for a muddy mix where everything is stepping on each other. There are always answers for this kind of mixing issue. Don't settle for anything less than outstanding!
Don't settle for anything less than outstanding!
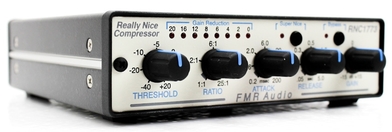
Compression
On our compression page, we go over a ton of useful information regarding how to use a compressor. Learning how to use a compressor can really take your mix to the next level. Do you know how to patch in a compressor on a channel, and what settings to use for each instrument? You should become a member (it's cheap at only $9.95 for an entire year - that's less than a dollar a month) to unlock a massive amount of training material to find out!
Compression & limiting can make a big difference in how the ear perceives an instrument's place sonically. A small example of this, would be the attack control. You can really change the flavor of an instrument's transient (the initial attack or hit of an instrument) by adjusting the attack of your compressor.
**Cool Tip Alert: You can also adjust the audible attack of an instrument by your microphone choice. A large diaphragm microphone will have a slower transient response than a small diaphragm microphone. The larger the diaphragm of the microphone, the more weight, mass, and surface area it will have. This will make its response slower in recovering from the compression area of a sound wave. For Example: If you find that your cymbals have more attack than "bloom," you could switch your small diaphragm condensers to large diaphragm condensers, or for an even more smeared attack, ribbon microphones could be the ticket.
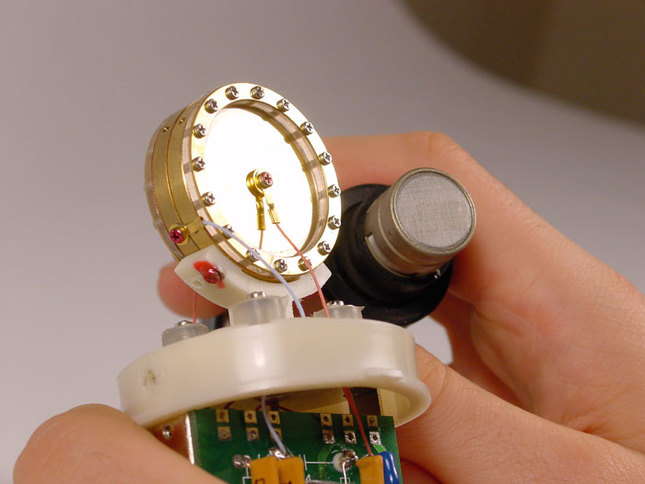
A microphone's transient response: The smaller the surface area of a microphone's diaphragm is, the faster the diaphragm will return back to point 0. For a very accurate representation of an instrument, SDC's are the way to go. Now if an instrument is too strident, it might be a better option to mic it with a dynamic microphone or ribbon.
So that you can get a visual representation of the transient responses from two different types of microphones, I went looking for a picture for a comparison. I found this graphic on the Shure site that shows this phenomenon perfectly:
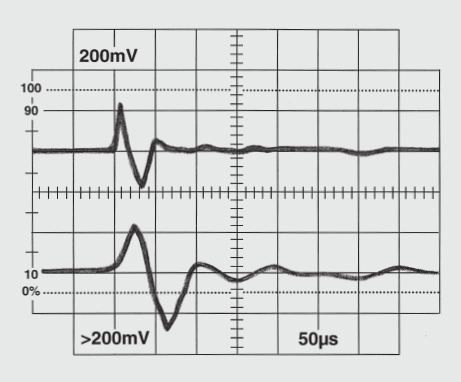
The top transient is from a condenser microphone. The bottom transient is from a dynamic microphone. Notice how sharp and fast the onset of the wave is on the top vs. the bottom transient response from a dynamic microphone. Notice how elongated and "smeared" the bottom transient is. Had there been a ribbon microphone represented in this graphic, it would have even been more elongated...
Dynamic microphones can be really great at spot mic'ing cymbals as well. Take the Shure SM7b for example. It makes a really great hi-hat mic (it's also a great mic for all kinds of sources). Check out how "soft" the SM7b renders the hi-hat on this track:
I used to play a lot of sessions with a really great drummer, but the dude used to punish his hats, and we found out really quickly that a dynamic microphone (or sometimes no microphone at all) was really in order when he recorded a session with us.
**Cool Tip Alert Again: You can really "glue" an instrument group of a mix together by placing a compressor or limiter on a sub-bus, and processing that group with the same dynamics processor via a sub-bus insert. This works great with drums, vocals, string sections, brass sections, etc. The same technique can apply with effects as well. Placing a reverb on a sub-group of vocals can trick the ear in putting everyone in the same reverberant "space."
Compression Via Parallel Processing: You can "mult" an instrument (click here for more information about multing), giving you the same track on 2 channels.
Now insert a compressor (or any effects processor) on the 2nd channel while leaving the original channel totally dry and unprocessed. This is called parallel processing. With the multed channel, you can EQ it, compress it, place any type of effects on it, etc.
**And Yet Another Cool Tip Alert: If you need a thicker female vocal, you can set up a compressor with a large ratio (like 6:1 or above) and compress the mess out of the multed channel. EQ and blend that channel to taste with the unprocessed channel - letting the unprocessed channel be the star of the show, and the multed heavily compressed channel blended to taste as a support track. Instant meat and girth. I call this the "vocal thickenator." Or perhaps I could called it "The Mighty Girthenator!" Ha! This technique also works great if you need a meatier kick drum, or even a thicker snare.
**And Yet Another Cool Tip Alert: If you need a thicker female vocal, you can set up a compressor with a large ratio (like 6:1 or above) and compress the mess out of the multed channel. EQ and blend that channel to taste with the unprocessed channel - letting the unprocessed channel be the star of the show, and the multed heavily compressed channel blended to taste as a support track. Instant meat and girth. I call this the "vocal thickenator." Or perhaps I could called it "The Mighty Girthenator!" Ha! This technique also works great if you need a meatier kick drum, or even a thicker snare.
Now Work On Your Rhythm Instrument(s)
The foundation of every mix is the rhythm section. The rhythm section typically means drums, bass guitar, and rhythm instrument(s) (like a guitar or a piano playing the main chords of the song). If these 3 elements aren't happening, everything else will suffer. The rhythm section is the cake, while the lead vocal is the frosting.
Once you have your kick drum, snare drum, bass guitar, and lead vocals predominate in the mix, now is the time to work on the main rhythm "chording" instrument. This is the instrument that is the one that is carrying the song. Some songs are predominantly lead by piano or similar, while others are lead by guitar rhythmically. Blend this instrument just below your 4 Main Elements (as noted above) where it is cleanly heard with the rest, but not stepping on the vocals. Remember, the lead vocals are the star of the show. The frosting. No one walks away from a gig humming the snare drum. It's the melody that should always rule the show.
Remember, the lead vocals are the star of the show. The frosting. No one walks away from a gig humming the snare drum.
Now Work On Everything Else
Once your 4 Main Elements are up and slamming, and then your rhythm instrument is blended in & supporting the lead vocals; now it is time to bring everything else in as support. From here, you can add verb to certain elements to push them back, or dry them up to bring them forward. You can also make the background vocals a little darker if they are stepping on your lead vocals. A channel's fader is usually the most effective means in which to bring certain sounds forward or back in a mix. If you are running stereo, you can pan certain elements out of the way from each other. If you are running mono, you can use EQ, Reverb, & Volume to place the different instruments where you need them in the mix.
Remember that the song rules the moment. A song is like part of a journey that everyone is a part of. The song will dictate what you do for the mix, what parts are featured, and what parts are there just for feel.
The Big Picture
During the actual mixing process, don't get so focused on the individual instruments, that you lose sight of the big picture.
During the actual mixing process, don't get so focused on the individual instruments, that you lose sight of the big picture.
