((( DEALING WITH SYSTEM FEEDBACK )))
 How It Happens
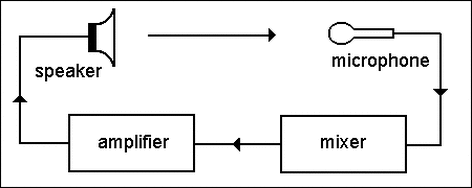
Feedback can be a real pain. It has happened to everyone at one time or another. This page will not only help you quickly deal with it when it happens, but put into place practices that will greatly lessen it's occurrences.
Be Excellent About Proper Gain Structure
Most of the time, feedback happens because the gain on one or more channels is too high. This is also common with acoustic instrument preamplifiers as well. Check out our page on setting appropriate gain structure, and put these steps into practice. This will kill most of your feedback issues up front.
Proper Placement of Stage Monitors
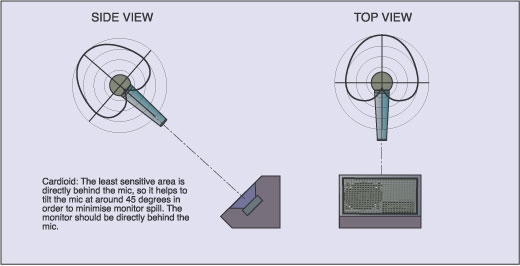
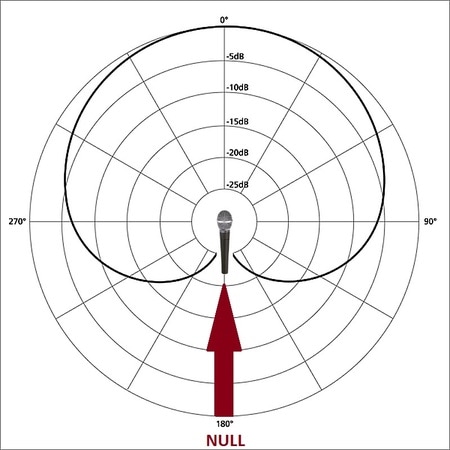
There have been MANY times that all I had to do to kill a feedback issue, was to move the monitor to the null position of the microphone it is sitting by. The null is the area in which the microphone is least sensitive to picking up sound:
In Ear Monitoring
One of the many positive outflows of having an in-ear monitoring system, is that there are no on-stage monitors near microphones. Having in-ear monitors will cut back on a large amount of feedback issues a band will have.
One of the many positive outflows of having an in-ear monitoring system, is that there are no on-stage monitors near microphones. Having in-ear monitors will cut back on a large amount of feedback issues a band will have.
The Polarity Switch
A really powerful tool to kill feedback on most mixing consoles, is the polarity switch. It is usually located by the top-most gain/trim knob on each channel. Not every console has one (some of the cheaper consoles leave it off), but most do. A lot of times I may be right in the middle of working on something, and a feedback issue starts to arise. It's a very quick solution to hit the polarity switch on whatever channel is giving you the feedback issue. Basically you are flipping the wave of the channel 180 degrees opposite as to what it was before, and this will a lot of times kill any ringing you may have on that channel. This is especially effective with acoustic guitars. As a matter of fact, most external acoustic guitar preamps have this option built into them for this very purpose.
Proper Microphone Technique
A very frustrating thing for any engineer is for a vocalist to sing with the microphone far from their mouth. This causes you to have to crank the gain to get anything intelligible from the performer. As an engineer you have to coach the vocalist on "eating the microphone." You may say something like, "You have a great voice, but I am having a hard time picking it up because you aren't close enough to the mic."
Microphone Pattern Selection
You may be using an Omni condenser microphone on a choir and having a ton of feedback issues. You really want to turn up the choir, but every time you put any type of gain on them, you get feedback. Try using a Cardioid condenser instead, and try to point the null of the microphone(s) to the monitors (if possible). If you are not for sure of the pickup pattern of the microphone(s) that are giving you feedback issues, you can usually find the model number of the mic on the mic itself, and then from there you can google its' specs and it will show you the pickup pattern.
You may be using an Omni condenser microphone on a choir and having a ton of feedback issues. You really want to turn up the choir, but every time you put any type of gain on them, you get feedback. Try using a Cardioid condenser instead, and try to point the null of the microphone(s) to the monitors (if possible). If you are not for sure of the pickup pattern of the microphone(s) that are giving you feedback issues, you can usually find the model number of the mic on the mic itself, and then from there you can google its' specs and it will show you the pickup pattern.
Dealing With a Particular Instrument's Feedback
Most of the time, if you've done all of the above, you will rarely have a feedback issue, but if you still do, you can use the parametric EQ located on each channel of your console to kill it. Over time your ear will become so trained, that you usually can get really close to the frequency that is feeding back, and trim it on the channel's EQ. If you have trouble though, there are a couple of effective methods.
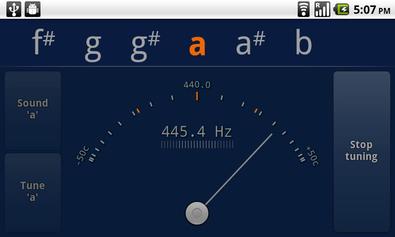
1. This will sound crazy, but works great: If it is a low-mid hum type of feedback, you can take a guitar tuner app on your phone and hum the same tone that is feeding back. Most tuners will show what frequency you are humming like this app:
Or if the sound is loud enough (be careful), it may register on the tuner itself.
2. Once the tuner shows you what frequency it is, you can trim it on the channel's parametric EQ.
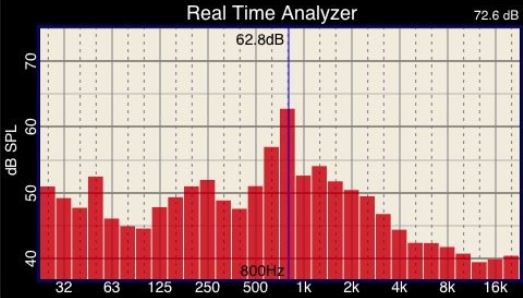
The most effective tool to use for determining what frequencies are troublesome, is a Real Time Analyzer (RTA). The hardware versions are usually pretty expensive, but you can get a free one as an app on your smart phone. More about this below...
It's super easy with a digital console
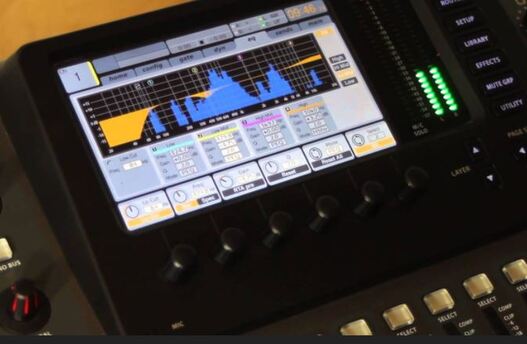
With a digital console, you can easily see what frequency is causing feedback issues by going to that channel's EQ and watching the built-in Frequency Analyzer.
Ringing Out An All Analog System
The Materials You'll Need -
- Real Time Analyzer (RTA). You can find a free RTA app for your smart phone in the app store. The one I use is called Spectrum Analyze.
- Graphic EQ
- Dayton Audio imm-6 - Located here, although your cell phone's microphone is usually accurate enough for this kind of work.
Basically, ringing out a sound system is gently pushing the volume of the monitors and/or mains until it goes into feedback, and then trimming the frequency that the feedback centers on with a graphic EQ.
Make sure your system isn't too loud because you don't want to damage your speakers. You are basically gently pushing the volume until you get on the edge of feedback (you'll hear it start ringing...just don't let it go wild). From there you can view an RTA (Real Time Analyzer) to see what frequency is ringing; then you trim that offending frequency with a graphic EQ.
Monitor System - (If you have an In-Ear System, this process is not needed)
If you have monitor wedges on stage, and you don't want any feedback issues happening mid-service, you can ring out each monitor send very easily and quickly.
1. Make sure each monitor send out has a graphic EQ on it. If not, you cannot effectively ring out that send. A 31 band EQ is ideal, but a 15 band EQ will work.
2. Unmute all channels
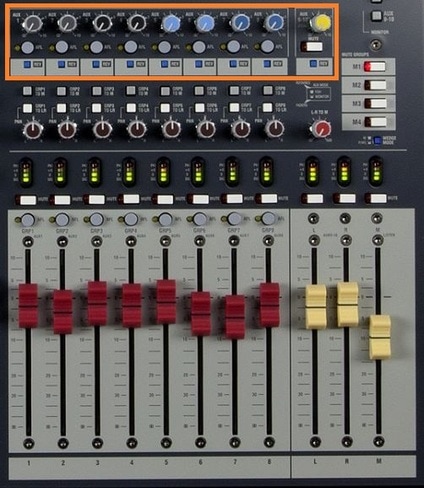
3. Gently push the master aux knob 1 in the master section of the console until you hear that aux send start to feedback.
As you hear it start to feedback, look at your RTA to see what frequency is predominantly showing, and then reach for the graphic EQ that corresponds to that aux channel, and trim that frequency until you hear the feedback go away. Repeat step 3 for each Aux Monitor Send until you have worked through them all.
Ringing Out the Mains
1. Pull the main faders all the way down
2. Unmute all active channels
3. Push all active channel faders up 3/4 of the way including sub-group faders.
4. Gently raise the main faders until you hear your system start to feed back. Don't let it get too loud as you don't want to damage your speakers.
5. Look at your RTA to see what frequency is the highest shown, and then trim that frequency on your graphic EQ until the feedback goes away.
