USING REVERB
General Thoughts about Reverb, Delay, & Other Effects
Just because you have a Reverb or Multi-effects unit doesn't mean that you have to use it. When mixing, the goal is creating a sonic picture. Will the mix you are creating be better off if you use that flanger on the violin? Probably not.
Don't use something just because it is there. Have purpose and meaning when mixing, and work from there. If you are already in a very reverberant room, would adding more reverb to everything really help your mix? Try mixing clean (no effects) first; then make a decision from there. When using a reverb, it is better to err on the conservative side than use too much.
Reverb gives the illusion of pushing an instrument away from the listener, creating a sense of space. This is not always a good thing. Most of the time, effective use of reverb means that it is "felt" rather than distinctly heard. We'll talk more about this as we go further along on this topic. Again,
Just because you have a Reverb or Multi-effects unit,
doesn't mean that you have to use it.
But if you do, there are different types of reverb you can use according to the sonic goal you have in mind, what would benefit the song.
Here are the six most used reverb types:
Here are the six most used reverb types:
Plate Reverb
In 1957, a company called EMT introduced a reverb that worked by placing a speaker-type instrument called a transducer in the middle of a large piece of sheet metal. This transducer converted audio into vibrations that would travel through the plate; these vibrations were then reproduced as reverb via a pickup mounted on the each side of the plate. (The stereo version was introduced in 1961.)
Plate reverbs are typically used for vocals and snare drums, but they can equally find their place on other types of instruments as well. It's great that we now have fairly accurate simulations of plate reverb because the original was around 600 pounds!
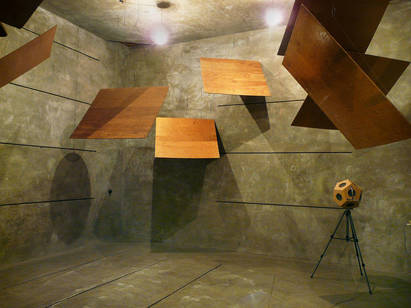
Chamber Reverb
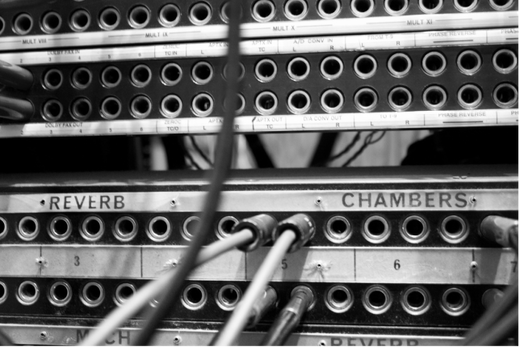
This type of reverb can be heard on most records from the 40's and 50's. This was one of the first reverbs ever used in recording. A chamber reverb is created by putting a playback speaker in a reverberant room where a microphone is placed to capture the resultant reverb from the music being played. The amount and voice of these types of reverbs were/are controlled by adjusting many factors: microphone placement, absorption panels, volume of music in the room, defraction panels, and the type of room itself. Many studios in the 50's and 60's actually had special rooms constructed of concrete for this sole purpose. This type of reverb is usually lush and rich.
This type of reverb can be heard on most records from the 40's and 50's. This was one of the first reverbs ever used in recording. A chamber reverb is created by putting a playback speaker in a reverberant room where a microphone is placed to capture the resultant reverb from the music being played. The amount and voice of these types of reverbs were/are controlled by adjusting many factors: microphone placement, absorption panels, volume of music in the room, defraction panels, and the type of room itself. Many studios in the 50's and 60's actually had special rooms constructed of concrete for this sole purpose. This type of reverb is usually lush and rich.
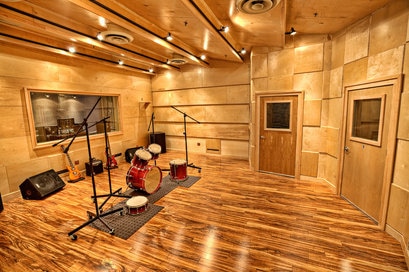
Room
This type of reverb emulates what you'd get in a smaller space with lower ceilings. Room reverbs are used when you want a shorter reverb just to enhance the instrument, not necessarily create the impression of cavernous space. It is important to note that anyone can create a room, hall, or chamber reverb without hardware or software. All you really need are some playback speakers, a couple of microphones, and a decent room(s). Placing the microphones in X/Y configuration will guarantee the signals will remain in phase. Or you could just use one mic for a mono verb.
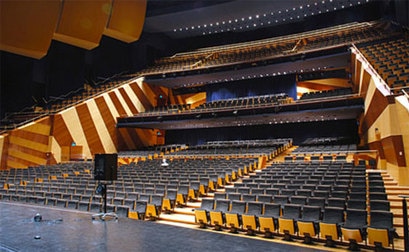
Hall
As the name would suggest, a hall reverb is like the reverb you'd get if you were sitting in a large concert hall. Halls are currently some of the most used reverb types in the industry. They are known for being bigger, richer, and with longer reverb times. Plate reverbs are generally the preferred reverb for snare, but, on the right song, a hall reverb with a very long decay can be killer!
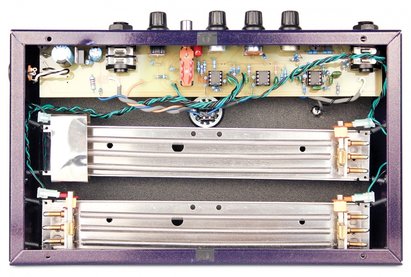
Spring
The spring reverb was originally conceived in the 1930's by the great Laurens Hammond, proprietor of the Hammond Organ. Today, spring reverbs are mostly used in guitar amplifiers. They really came into popularity in the 50's, 60's, and 70's.
Spring reverb is created by having a long spring in a rectangular can-type structure with a transducer on one side of the spring and a pickup on the other. As the sound travels through the springs via the transducer, the pickup captures the resultant reverb. Springs actually were used quite a bit in studios during the 60's and 70's. Usually there is a "shimmer" on spring reverbs that is hard to reproduce anywhere else.
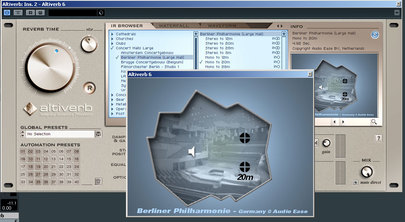
Convolution Reverb
This reverb is the newest of the bunch; it is more common with software plug-ins, but some hardware units are out there, too. This type of reverb uses impulse responses: a series of short bursts of white noise or even hand claps can be sent through just about anything—rooms, halls, bathrooms, other reverb processors, guitar cabinets, etc.; then the resultant reverb is captured by a microphone(s). After some magical math is done by little electronic elves, you can use that reverb on just about anything.
Back in the day, if you wanted the reverb of a famous room or hall somewhere, you'd have to travel. Not so anymore. With convolution reverb, it is possible to have any reverb sound on the planet without ever leaving your church sanctuary, studio, or house. This is because there are people all over the world that have captured these IR's (impulse responses) and share them online. From there, the IR's are loaded into your convolution reverb processor. Because IR's can even be captured through any machine or gear, you can access reverb processors that are out of most people’s budget and be able to use the reverb they feature.
Reverb Controls and Parameters
Reverb units have a variety of controls and parameters so that you can customize the sound. If you are newer to using a reverb unit but want to tweak a certain verb to better suit the situation, you can pull up a preset you like; from there, use this list to further enhance it.
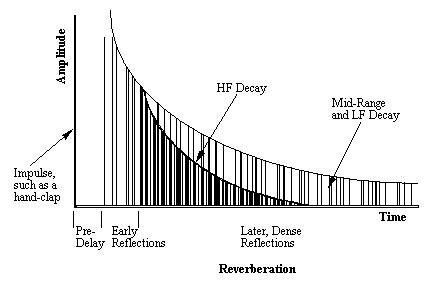
As you read the descriptions that follow, the above diagram will help you visualize what is actually happening when you adjust the different types of controls and parameters.
As you read the descriptions that follow, the above diagram will help you visualize what is actually happening when you adjust the different types of controls and parameters.
- Reverb Time/RT-60 or Decay This is the time it takes a signal to drop by 60 decibels. Basically you can adjust how long the reverb actually lasts on a reverb processor. On the actual reverb unit, this will show up in milliseconds or seconds.
- Reverb Type Recall the different types of reverb described in the previous section. Hall and Plate verbs are the most widely used, but feel free to experiment with others; remember that choosing the right reverb is really dependent on what you'd like to achieve. Just know that some reverbs are more commonly used for certain instruments than others. Sometimes a chamber or room reverb can really add the right amount of "spice" to an instrument and will help it sit better in the mix. It is common to place a particular type of verb on a sub-group (like on vocals) thus adding some "glue" to several voices. Instead of 5 or 6 different vocals all seemingly singing separately, placing them on a sub-group with the same reverb inserted in can really bring them together sonically.
- Pre-Delay This is arguably one of the most important controls on a reverb processor. Pre-delay basically sets the time of the onset of reverb once the sound of the instrument is produced. It is important because it tells the reverb to wait a certain pre-set amount of time before you actually hear it. This allows the original sound to be produced first before the reverb happens, thus preserving the instrument’s definition and clarity; it prevents smearing the sound of an instrument from reverb that begins too soon. Simply stated, Pre-delay says to the reverb: "Ok, reverb, hold on for a little bit until the original sound is heard so that we can hear it clearly, before we hear you. We'll let you know when you can go."
- Early Reflections This is probably the name of a cheesy 80's band that sings nothing but power ballads...oh wait, that's already been done by Aerosmith and REO Speedwagon! Ha! Actually, Early Reflections simulates what you'd hear bouncing off the closest walls in a room before you actually hear the combined reverb. If the early reflections time is set really short, it'll simulate a smaller room; if it is set really long, it'll simulate a larger room. The longer the time, the further back you push the walls.
- Damping or High Damping This simulates the stuff in the room that absorbs high frequencies. If you are sitting in a church sanctuary that is empty and there is no carpet on the floor, the damping factor would be a lot lower than if you had the sanctuary packed with a lot of people wearing cotton. A large, tiled bathroom doesn't have much damping as would a living room with curtains, couches, and carpet.
- Density The more density, the more reflections/echoes are heard vs. the actual reverb itself. Be careful with this parameter; depending on what you want to achieve, it is easy to get too much. To give a mental picture, a large hall will have a lower reverb density than a bathroom
- Diffusion This control basically tells the reverb to sound as if it is being scattered, bouncing off items in all directions. In the real world, this is like sound hitting a porous brick wall with pictures, bookshelves, and other items in the room versus solid flat walls on all sides; or imagine turning a perfectly square room into a room in which all of the walls are varying lengths.
- HP/LP aka High Pass/ Low Pass aka High Cut/Low Cut - This controls how much treble (Low pass) or bass (high pass) you'd like to take out of a mix. In a real world situation, you hardly ever hear a reverberated sound with as much treble as the original signal. Usually, as sound is being bounced around in a room, the treble part of it is being absorbed by carpet, clothes, seat cushions, big poofy old lady hair, etc! If you want a reverb to be more natural and sit in a mix better, filter out the high end a little (or a lot). Try filtering down to around 5khz and adjust from there. The more treble you cut out, the darker the verb. If you want the reverb to be more prominent, filter out the bass instead. Start up to 400hz and adjust from there.
- Width This is usually represented in %. This basically acts to widen the sound of reverb in a stereo based system. This can sound really cool, but be careful: if you are in mono (most sound systems are mono), you are basically tweaking the phase of one side of the reverb with the other (like adding a bit of delay to the overall reverb on one side) thus causing some frequencies to possibly cancel out.
- Mix This is the control that tells the unit how much of the reverberated signal to "mix" in with the dry signal. Typically the higher the percentage rate, the more the reverb is heard.
| reverb_worksheet.pdf | |
| File Size: | 199 kb |
| File Type: | |
UNCOMMON REVERB
Piano Verb
One of the coolest analog reverb processors you can find is a piano. That's right! With just a little bit of hardware, you can add a very unique sounding reverb to your arsenal of effects when mixing.
How Does It Work?
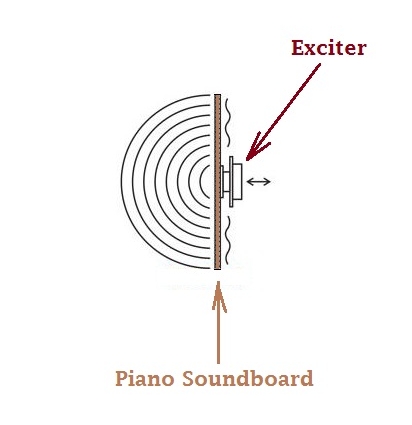
By sending audio to the piano with the sustain pedal pressed, the strings will sympathetically ring according to each note played via vibrational coupling from the track you send to it. This is accomplished by using a device called an exciter. Say what?
What Is An Exciter?
How Does It Work?
By sending audio to the piano with the sustain pedal pressed, the strings will sympathetically ring according to each note played via vibrational coupling from the track you send to it. This is accomplished by using a device called an exciter. Say what?
What Is An Exciter?
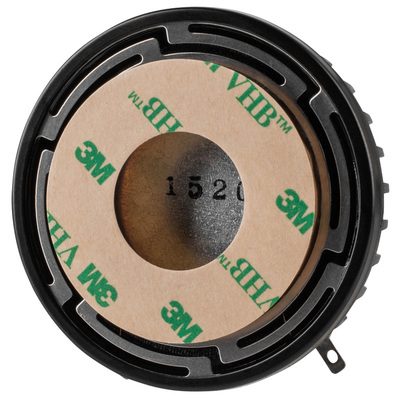
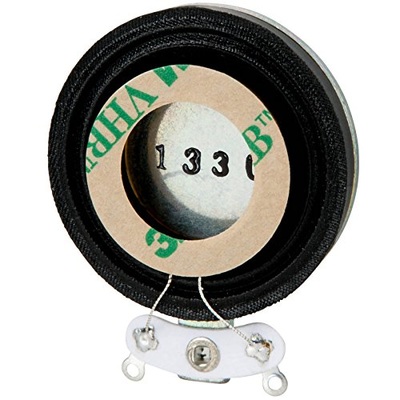
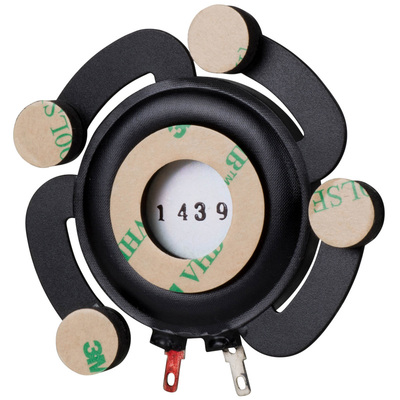
In layman's terms, an exciter is basically the motor of a speaker that can be attached to most surfaces. When music is played through it, it turns that surface into a speaker. It's hard to imagine that something like this could even work, but I assure you, it actually works really well!
What You'll Need
• Piano in an unused room
• An exciter - 2 is ideal for better coverage (don't worry, they're usually cheap) but one will work okay if that's all you can afford.
• A small amplifier—This can be anything 100 watts or lower, full range.
• A condenser microphone(s)
• Shielded signal cabling from your mixing console to the amp
• Speaker cable from the amp to the exciter(s)
How To Do It
• Place the exciter(s) on the piano's soundboard or plate.
• Place a brick, sand bag, or microphone base on the sustain pedal to hold it down so that the strings vibrate freely.
• Run an open auxiliary out from your console to an amplifier that will power the exciters.
• Place the microphone where the reverb from the strings sounds the best.
• Send the microphone cable(s) to an open channel (or channels panned if running stereo) on your mixing console & blend the resultant verb to taste.
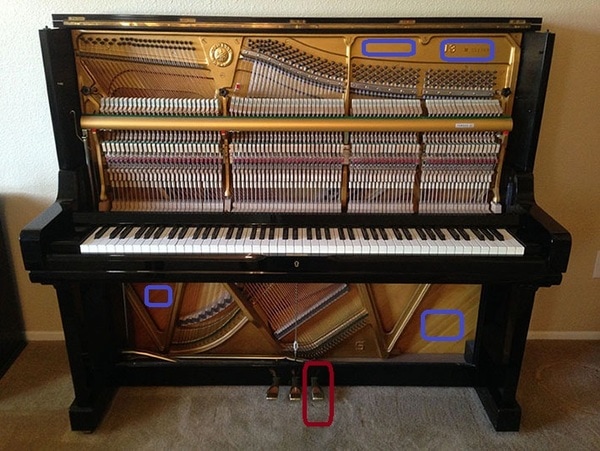
The rectangles in blue show you possible places where you can place an exciter. You can also try placing the exciters on the back of an upright piano was well. Experimentation is the name of the game here. Place the exciters where the strings ring the most when music is played through them. Place a brick, or a heavy microphone base gently on the sustain pedal (marked in red) to hold it down so that the strings vibrate freely.
Important Concepts
• Be sure to purchase higher wattage exciters; some come in very low wattage and typically won't work well for this purpose. A 20-40 watt exciter usually will work well. Dayton makes some pretty decent ones.
• Use at least 2 exciters if you can, one on the bass side and one on the treble side of the piano.
• Run a microphone to where you are miKing the strings to catch the sympathetic ringing reverb they produce. This type of reverb can actually be sound quite pleasant!
• Using this type of reverb can bring a greater sense of realism to electronic piano sounds.
• Avoid bass "shaker" type exciters. They are not right for this application due to their limited frequency response.
• If you don't want to use an exciter, an old method is to use a studio monitor, or something similar firing into the strings on the bottom of the piano sitting on the floor. This is the old school way, but exciters will work better and will keep excess bleed from the microphone(s). The exciter will physically vibrate the piano.
• Please don't use a $100,000 Bosendorfer Grand Piano or anything remotely similar unless you'd like to be tortured with a cattle prod by the musical director. The beauty is to find an old unused upright that is being neglected so that you can put it back to use!
• A room that is not used during a set or service is most preferable so that there won't be any extraneous noises that make their way into your new found verb.
Utilizing Room/Chamber Reverb In A Facility
Did you know that in most facilities you may have an extra reverb processor you didn't know about? Yup. It very likely has been there right under your nose the whole time, and you didn't even realize it.
Back in the 1950's and 60's, recording studios didn't have digital reverb effects processors. Instead, to get reverb on a track, they'd use something called an echo chamber. Basically, an echo chamber is comprised of a reverberant room with a speaker and a microphone. Often, the verb in an echo chamber can sound awesome; this is part of what made some of the older recordings so pleasing to listen to.
Back in the 1950's and 60's, recording studios didn't have digital reverb effects processors. Instead, to get reverb on a track, they'd use something called an echo chamber. Basically, an echo chamber is comprised of a reverberant room with a speaker and a microphone. Often, the verb in an echo chamber can sound awesome; this is part of what made some of the older recordings so pleasing to listen to.
Let's Do This!
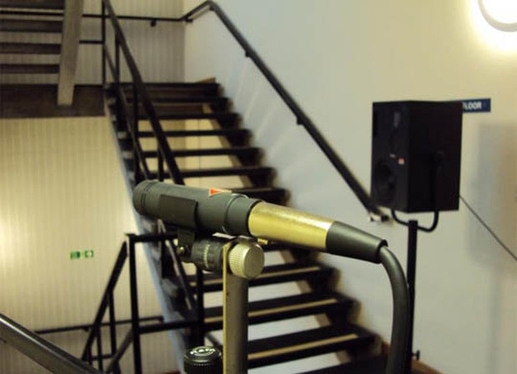
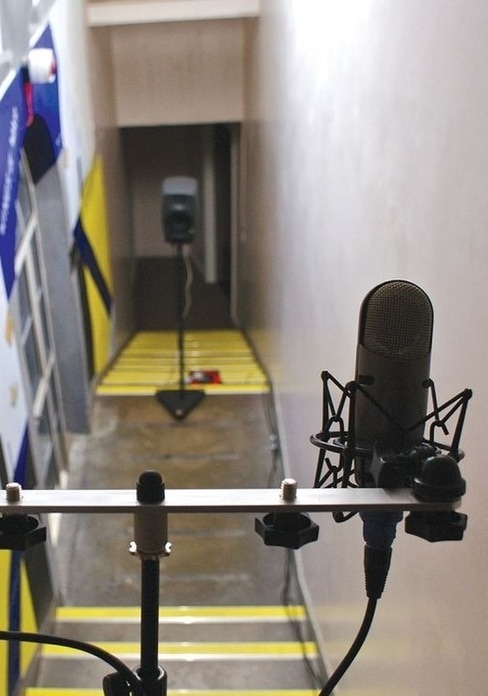
Well guess what, you can do the same thing, too, in a live setting. "How is this possible?" you may say. It is quite simple, actually. Check the facility; find out if there is an old abandoned hallway or perhaps a reverberant bathroom that is no longer in use. Or you may have a stairwell or perhaps a long hallway near the console or stage area. The perfect DIY echo chamber is a space that will not be used, where you can pump an audio feed from a console channel to it, and it won't disturb anyone
From there, find an unused Aux channel; feed that to a powered speaker or amplifier that will be powering a speaker to your verb-y room. This speaker typically fires on the far side of a DIY echo chamber. Now place a condenser microphone on the other side of the room; listen for a sweet spot in the room where the verb sounds the best. Place the microphone(s) in that spot and feed that signal back into an empty channel on your console. This will be your natural reverb channel; it behaves just like any other reverb/echo return on your console.
Tweak It!
If the room is too verb-y, you can tame it with some type of absorbent material, like couch cushions, a mattress, an old blanket, etc etc etc. You can also "tune" the reverb return on your console by using a channel EQ or a High-Pass filter if necessary, but the reverb from your DIY echo chamber may sound awesome just as it is. Let your ears be your guide. It may take some experimentation to get what you like, but be patient; you'll get it.
If you really know what you are doing, you could use a delay unit to get some pre-delay going as well. Using the 60,000/BPM equation, you can also time this pre-delay to the tempo of the song.
What Type of Hardware Do You Need? and Other Questions
Speaker
Find a decent-sounding speaker. It can be an unused stage monitor. Powered speakers are the easiest to use because you don't need a separate amplifier, but use whatever you have that sounds good. Experiment with speaker placement. You can try firing directly into a wall or perhaps coming from a corner.
Microphone(s)
An omni microphone is usually preferred, but any type of condenser mic will work. If it's a cardioid, you can try pointing the microphone towards a wall with the back of the microphone facing the speaker. Some folks prefer ribbon microphones, which definitely impart a different tone to a reverb. Use a stand to experiment with different heights and angles. Note: Don't forget to enact phantom power if you are using a condenser mic. If it is a typical ribbon microphone, make sure the phantom power is turned off so that you don't fry the ribbon.
How Loud
It doesn't have to be loud. Anywhere from the 60-80db range will be plenty loud enough to get what you need from your DIY echo chamber.
