Sound Instruction
  • Home
  • What's New
  • The Basics of Sound
    • The Nature of Sound
    • Acoustics
    • Microphones
    • Loudspeakers >
      • Loudspeakers - Continued
    • Amplification
    • Understanding Alternating Current
    • Circuit Values
    • Amplifier Arrangements
    • Transistors
    • Interstage Coupling
    • Noise
    • Distortion Effects
    • Using an Oscilloscope
    • Frequency Response
    • Power Amplification
    • Phase Splitting Circuits
    • Audio Transformers
    • Distortion
    • Shielding
    • Cabling
    • Electro-Acoustics
    • Audio & Hearing
  • Microphone Types
  • Mic Placement
  • Gain Structure
  • Demystifying The Mixing Console
  • Equalization
  • Compression
  • The Ins & outs
  • The Sub Bus
  • The Voicing Concept
  • Reverb
  • Good Habits
  • Psychoacoustics
  • Stage Isolation & Drum Booths
  • System Feedback
  • System Noise & Hum
  • Electronic Repair
  • Speakers
  • Tips & Tricks
  • Noise Gates
  • Mixing 101 & Beyond
  • DIY Projects
  • Digital Audio Basics
  • Stage Lighting
    • Lighting Basics
    • Brightness
    • Color
    • Controls
    • Smoke
  • Books
    • Yamaha Sound Reinforcement Handbook
    • Sound Recording & Production
    • The Art of Record Production
    • Recording & Production of Sound
    • BBC - Microphones
    • Microphones - 3rd Edition
    • How To Build A Small Studio
    • Acoustic Techniques for Home & Studio
  • The Blog
  • References Page

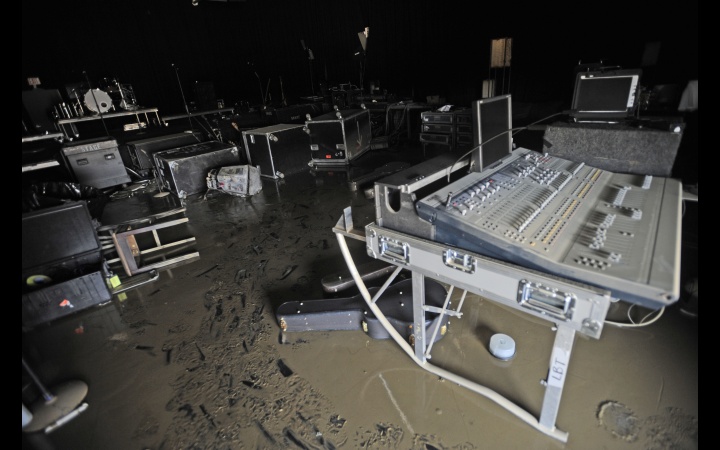
Recover Your Gear From A Flood!

8/17/2016

0 Comments

 
Picture

Disclaimer: The following information is not for tube amplifiers of any sort.  Tube amplifier circuits can have a high voltage/current potential, and can:
 
A. make you lose control of your bowels.
B. kill you.
C. make you lose control of your bowels and kill you!  

If you don't know what you are doing with a tube amp or any other high voltage circuit, take it to a professional!
 
​

1st phase - TAKE IT APART!

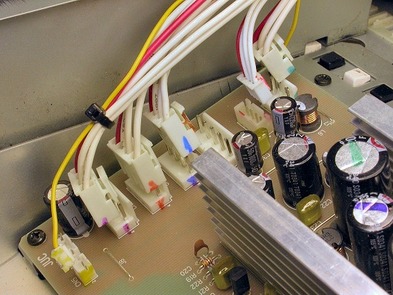
PictureIf you don't have colored markers, you can number and letter each connection. Also take a picture of everything before you disconnect it.
​Once you get your gear out of the flooded area, it's time to jump right in and get it repaired.  If you follow all the steps in this guide, you can have a fairly large chance at getting your gear operational again.  The very first thing I want to tell you, is to not wipe the unit down before you take it apart.  Don't wipe it down yet.  This will keep extra dust and debris from getting into any type of controls, jacks, and sockets the unit may have.  Also - resist the temptation in trying to power your flooded gear back up to see if it works. Keep power away from your flooded gear until we are done with all the steps in this guide and the others that are to follow. 

  1. Take the unit totally apart!  As you are doing so, make sure you document everything by taking pictures and notation.  
  2. All wiring harnesses and ribbon cables can be marked with a sharpie or colored markers.  I prefer an alphanumeric system - like A1, A2, A3, etc.  
  3. Keep the screws from each part of the unit in different ziplock bags or envelopes.  Label each accordingly and again, take pictures of every part of the circuit before you disassemble it.  

0 Comments

Your comment will be posted after it is approved.


Leave a Reply.


    Do you like vintage recording gear and articles?  You should visit our sister site: The Vintage Audio Portal!


    **Advertise With Us! We have thousands of visitors a day. Contact us here to learn more.

    Archives

    August 2021
    December 2019
    August 2019
    December 2018
    November 2017
    August 2017
    July 2017
    June 2017
    May 2017
    March 2017
    February 2017
    December 2016
    November 2016
    September 2016
    August 2016
    July 2016
    June 2016
    May 2016
    March 2016
    February 2016
    January 2016
    December 2015
    November 2015
    October 2015
    September 2015
    August 2015
    July 2015
    June 2015
    May 2015
    April 2015
    March 2015
    February 2015
    January 2015
    December 2014
    November 2014


    Categories

    All


Powered by Create your own unique website with customizable templates.
  • Home
  • What's New
  • The Basics of Sound
    • The Nature of Sound
    • Acoustics
    • Microphones
    • Loudspeakers >
      • Loudspeakers - Continued
    • Amplification
    • Understanding Alternating Current
    • Circuit Values
    • Amplifier Arrangements
    • Transistors
    • Interstage Coupling
    • Noise
    • Distortion Effects
    • Using an Oscilloscope
    • Frequency Response
    • Power Amplification
    • Phase Splitting Circuits
    • Audio Transformers
    • Distortion
    • Shielding
    • Cabling
    • Electro-Acoustics
    • Audio & Hearing
  • Microphone Types
  • Mic Placement
  • Gain Structure
  • Demystifying The Mixing Console
  • Equalization
  • Compression
  • The Ins & outs
  • The Sub Bus
  • The Voicing Concept
  • Reverb
  • Good Habits
  • Psychoacoustics
  • Stage Isolation & Drum Booths
  • System Feedback
  • System Noise & Hum
  • Electronic Repair
  • Speakers
  • Tips & Tricks
  • Noise Gates
  • Mixing 101 & Beyond
  • DIY Projects
  • Digital Audio Basics
  • Stage Lighting
    • Lighting Basics
    • Brightness
    • Color
    • Controls
    • Smoke
  • Books
    • Yamaha Sound Reinforcement Handbook
    • Sound Recording & Production
    • The Art of Record Production
    • Recording & Production of Sound
    • BBC - Microphones
    • Microphones - 3rd Edition
    • How To Build A Small Studio
    • Acoustic Techniques for Home & Studio
  • The Blog
  • References Page